Active Directory Authentication Mode
Web Filtering Proxy is also able to use the built-in Microsoft Windows single-sign-on proxy authentication with the Negotiate authentication scheme (both Kerberos and NTLM) when users are authenticated by your Microsoft Active Directory environment.
The following settings are required to enable this type of authentication.
| Setting | Description |
|---|---|
| Operating System | The application needs to be installed on the Microsoft Windows Server (we test on Windows Server 2016+ and up in our test lab). |
| Server | The server that the application is installed on must be joined to your Active Directory. |
| Browsers | Workstations that your users run browsers on must be joined to your Active Directory. |
| Proxy Settings | Proxy settings in the browser must be pointing to the proxy by FQDN (i.e. in our test lab we specify the winproxy-ad.diladele.lan as the proxy name). |
Note
Note that this single-sign-on proxy authentication is only supported in the domain joined scenario. Currently no other configuration tasks are needed to be done by the administrator, a simple Active Directory join of the server where Web Filtering Proxy runs is enough.
Enable Authentication in Proxy Settings
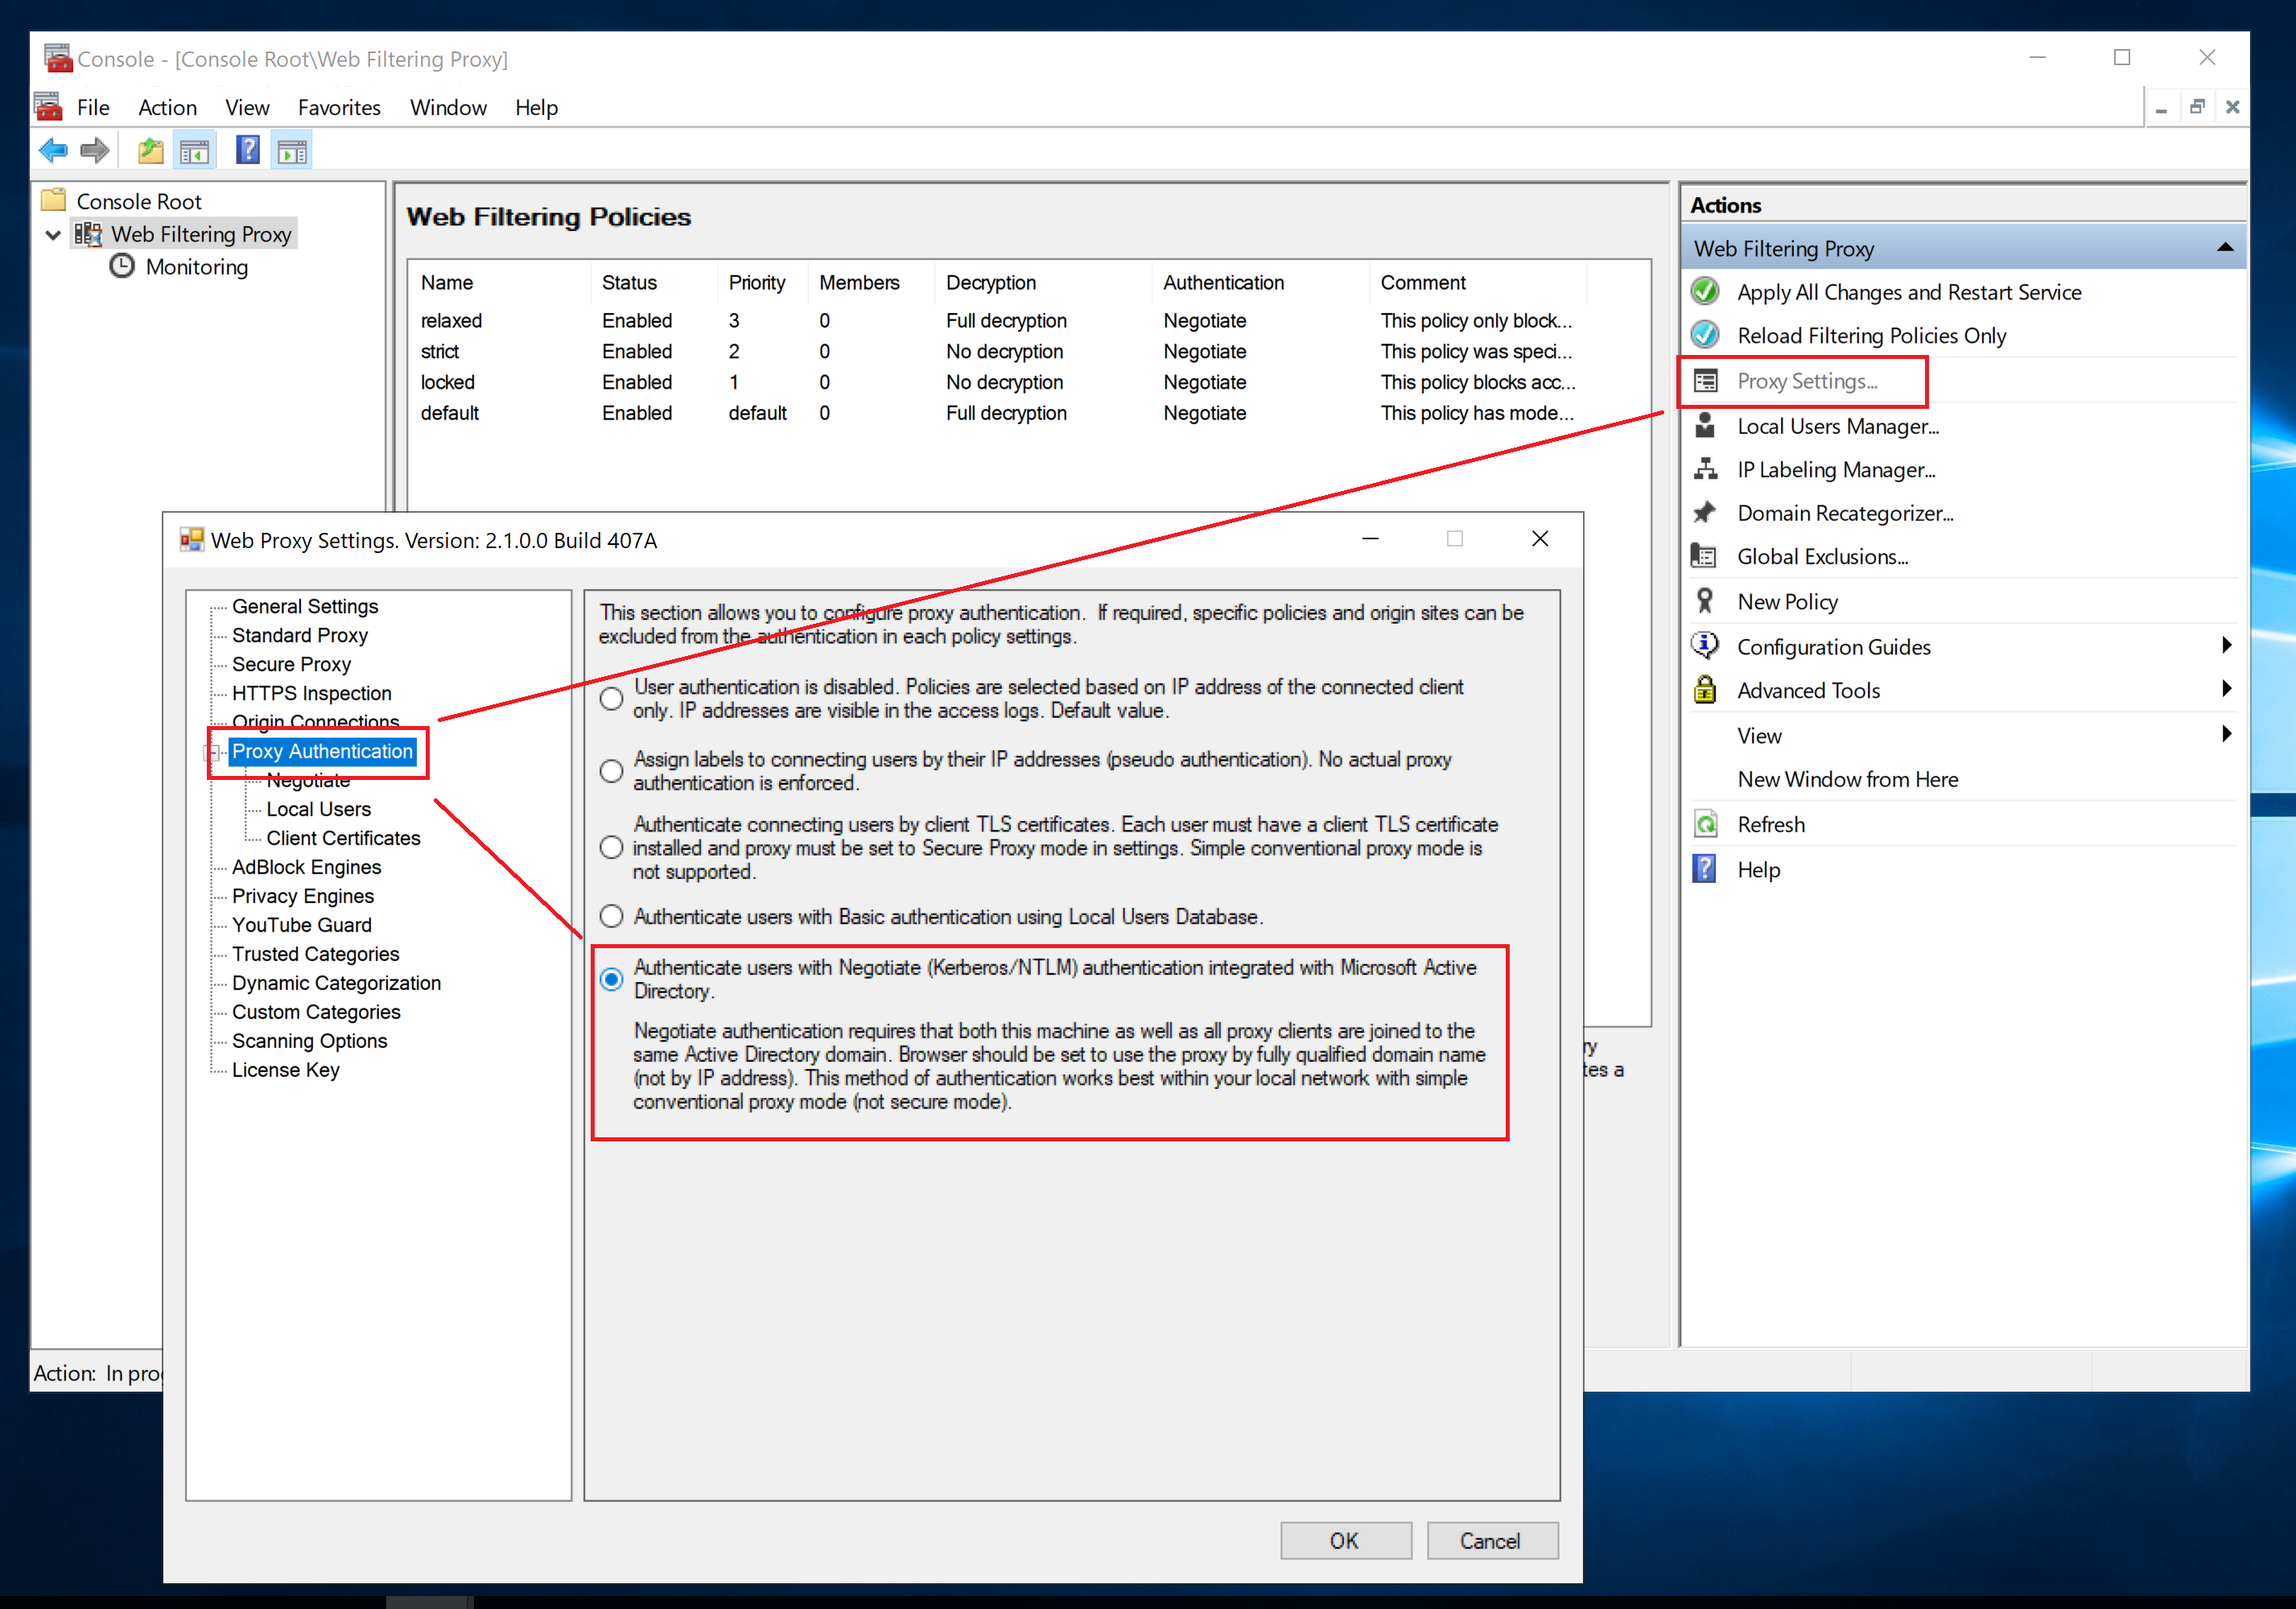
To configure the single-sign-on proxy authentication, you need to actually enable it in proxy settings. This can be done in Admin UI / Proxy Settings. Click the Authentication node and shown on the following screenshot.
Then select the Negotiate node and click the Detect button as shown on the following screenshot. All settings required for the Active Directory proxy authentication to work will be determined automatically. Be sure to check them just in case.
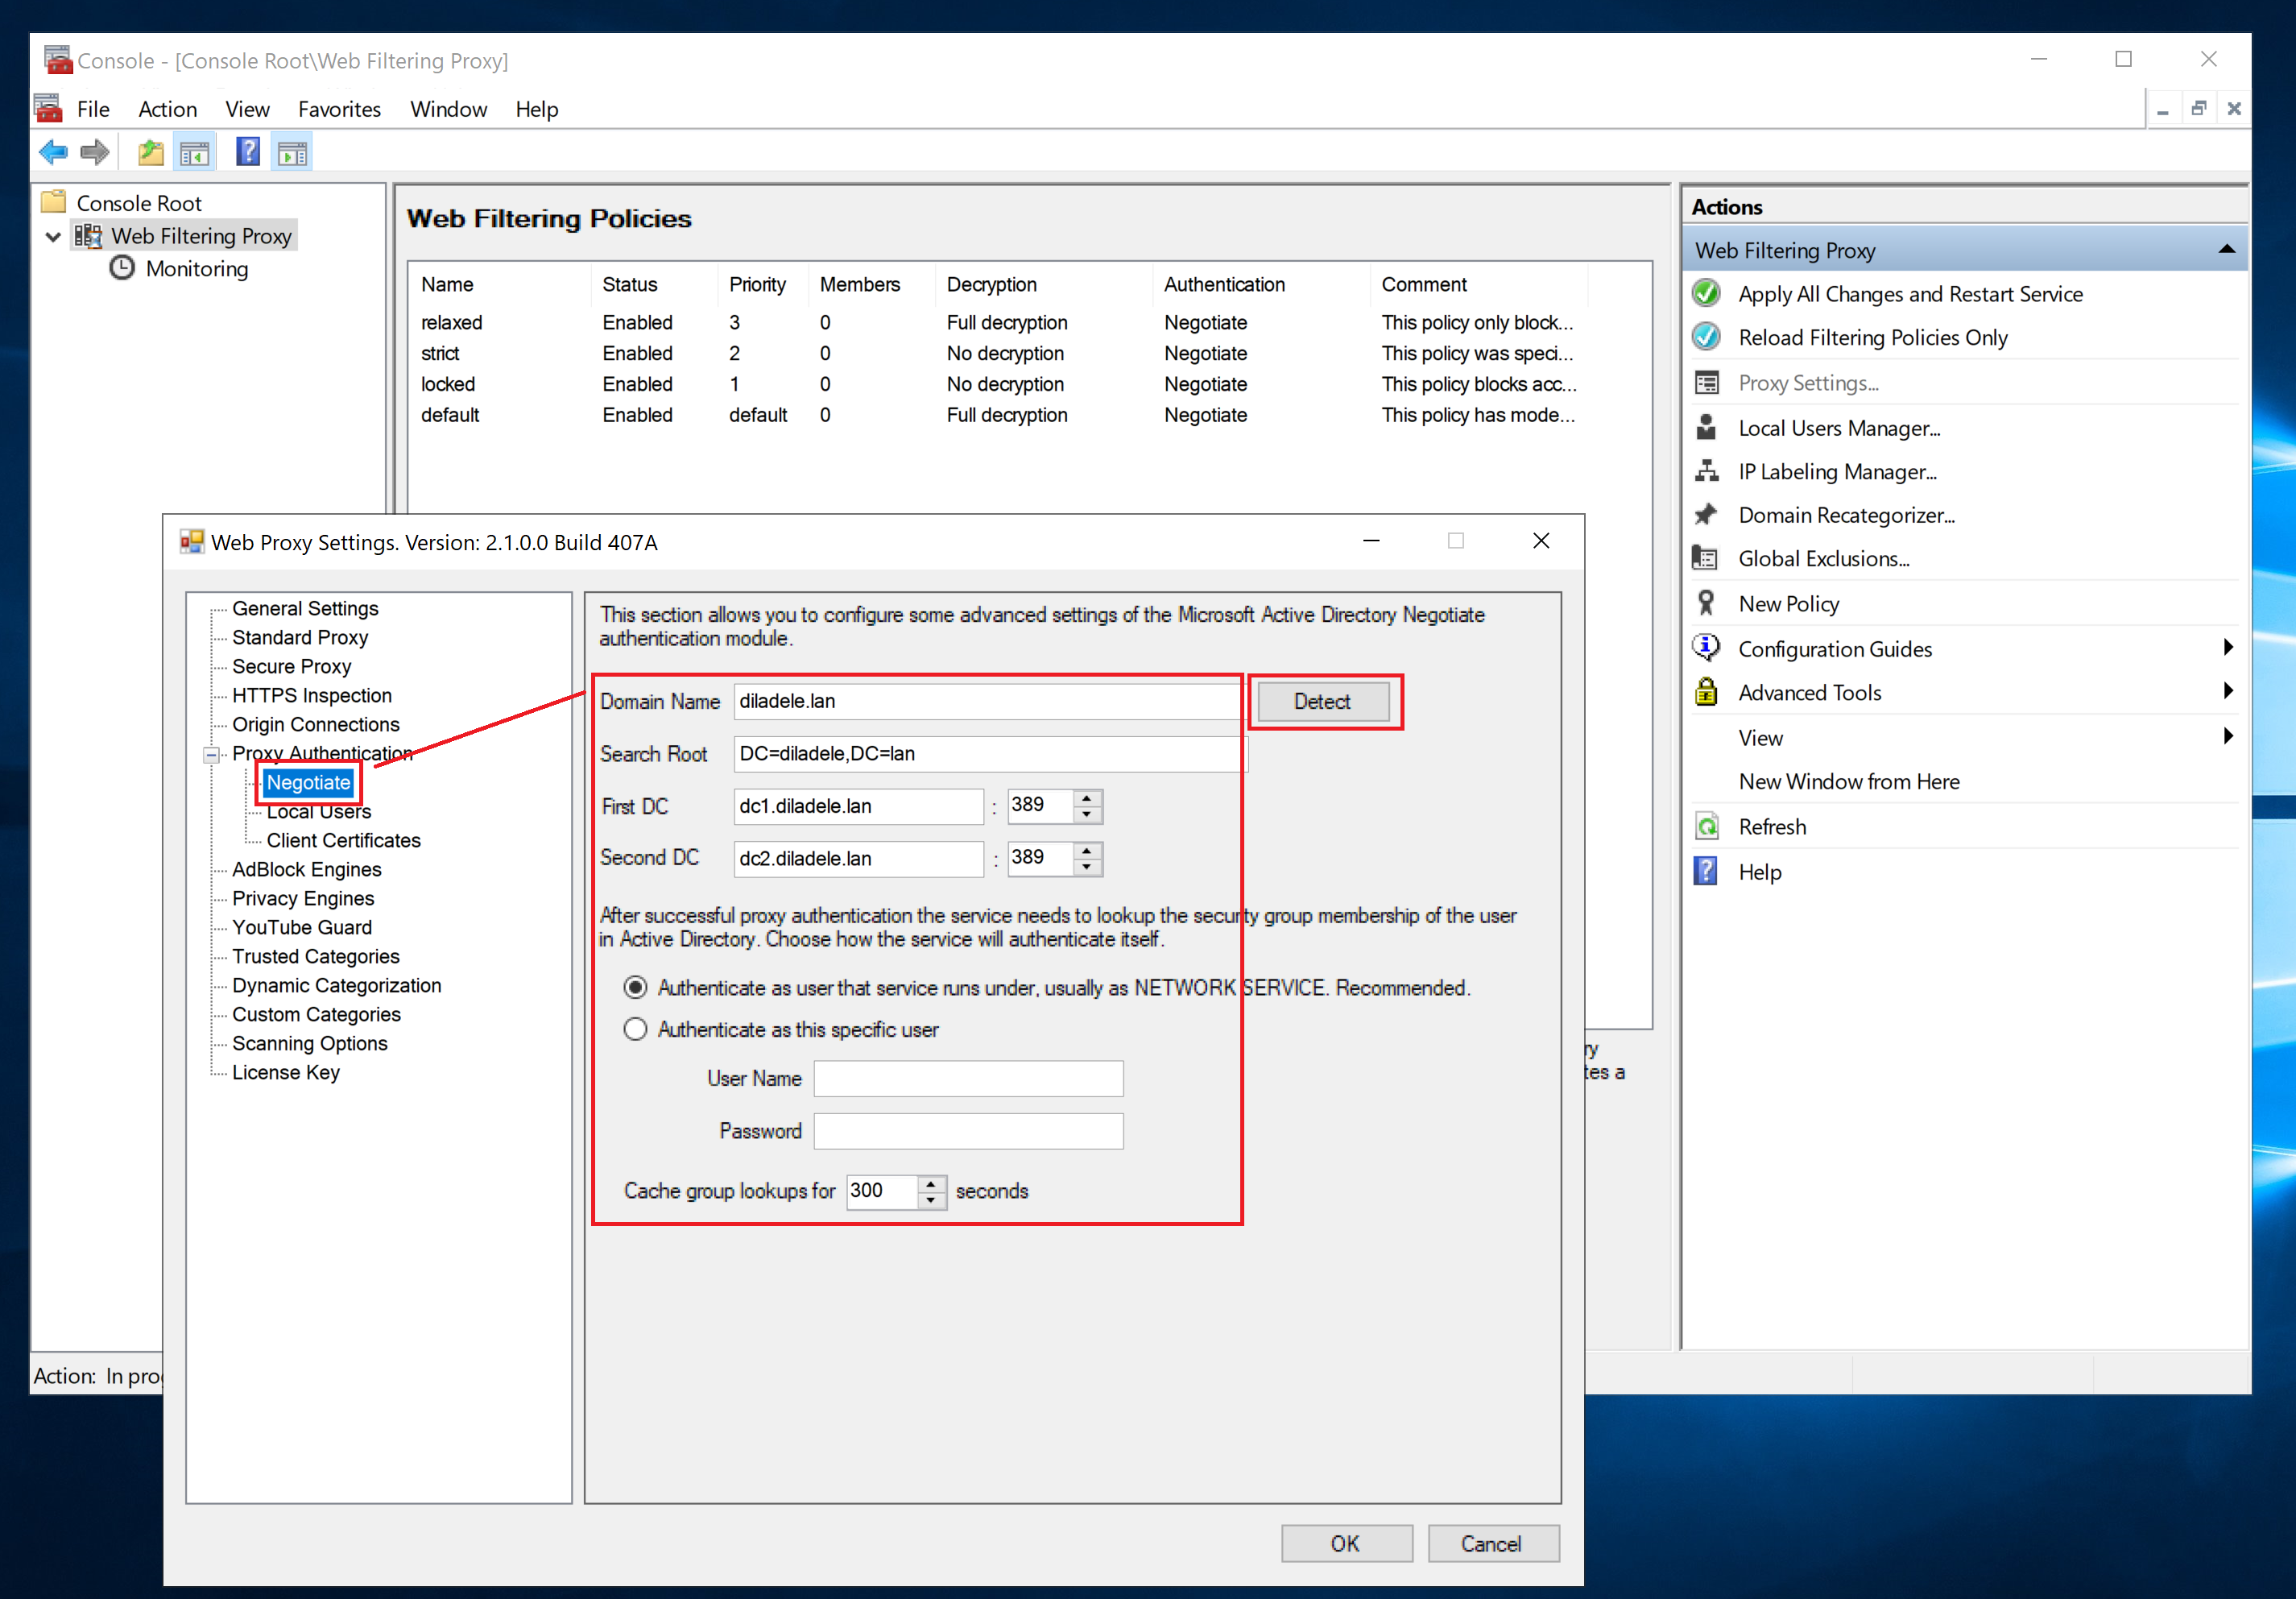
By default, the application uses built-in Windows authentication to authenticate itself to LDAP server for user/group membership lookups. You can use another account if required. This is not recommended though and may be needed only when deploying Web Safety Proxy in NLB cluster.
Do not forget to Restart the Web Filtering Proxy service in order for the changes to be applied.
Presentation in Browser
After single-sign-on proxy authentication is enabled, your browser will just browse normally without showing any pop-ups when accessing the Internet.
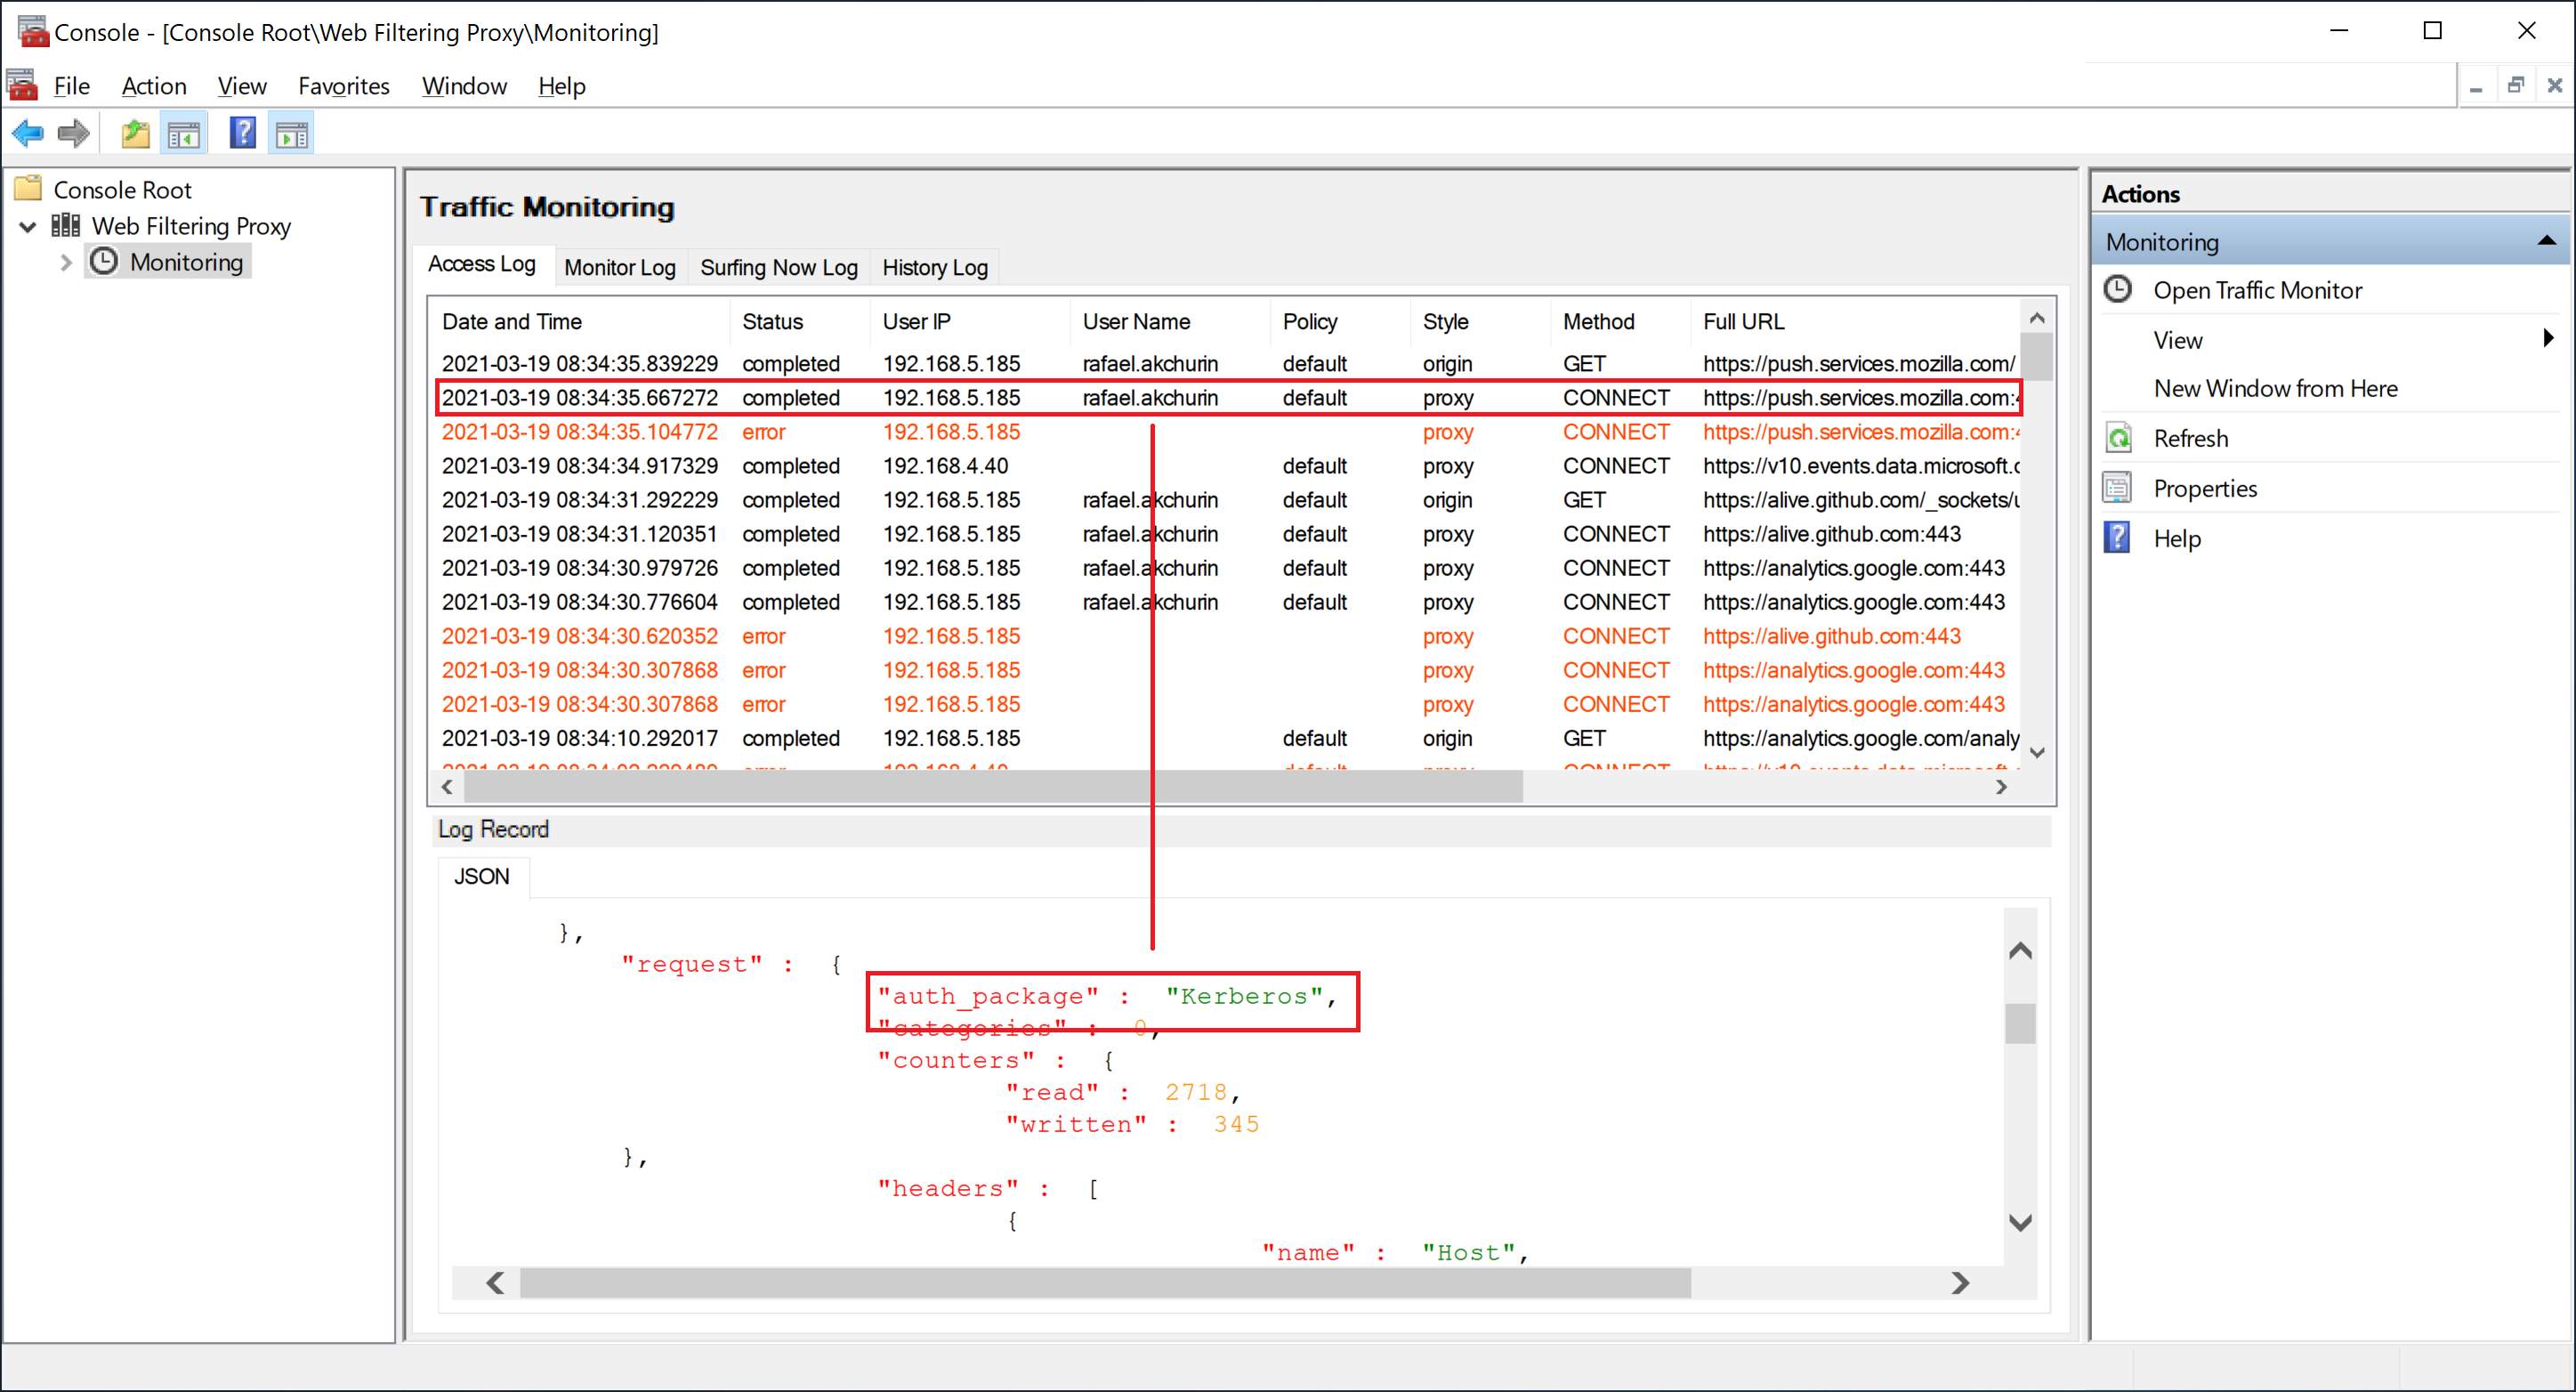
The access log and monitoring table at Admin UI / Monitor will nevertheless show the logged in user name.
How it Works
Here is the sequence of events that happens behind the scenes completely transparently to the user and administrator when Microsoft Active Directory proxy authentication is enabled.
- The user types the URL to visit in the address bar of the browser.
- Browser sends the request to the proxy server.
- Proxy server detects that this request is processed by the policy that requires the Active Directory authentication. Proxy replies with 407 Please Authenticate response indicating the Negotiate authentication scheme to be used.
- Browser requests the Kerberos ticket from the domain controller specifying the FQDN of the proxy to be used (can be verified by the klist command on the browser machine). Browser then re-sends the request to the proxy attaching the Kerberos ticket.
- Proxy verifies the attached ticket and processes the request. The response is sent to the browser and presented to the user.
Important
Note is that the proxy MUST BE set as FQDN in the browser settings (like proxy.example.lan) and the server where the application runs MUST BE JOINED to the Active Directory. If you set the proxy in the browser settings as IP address then only NTLM scheme will be used.