How to Generate Secure Proxy Certificate using Admin UI
Admin UI is able to generate the secure proxy certificate on the fly and sign this certificate using the existing Root CA. This approach is based on the following ideas.
- Most probably you are deploying the Web Filtering Proxy to scan HTTPS traffic.
- To be able to decrypt and inspect HTTPS traffic your browser needs to trust the proxy.
- So, if you trust your proxy for generating web site certificates, it also seems logical to generate the secure proxy certificate too.
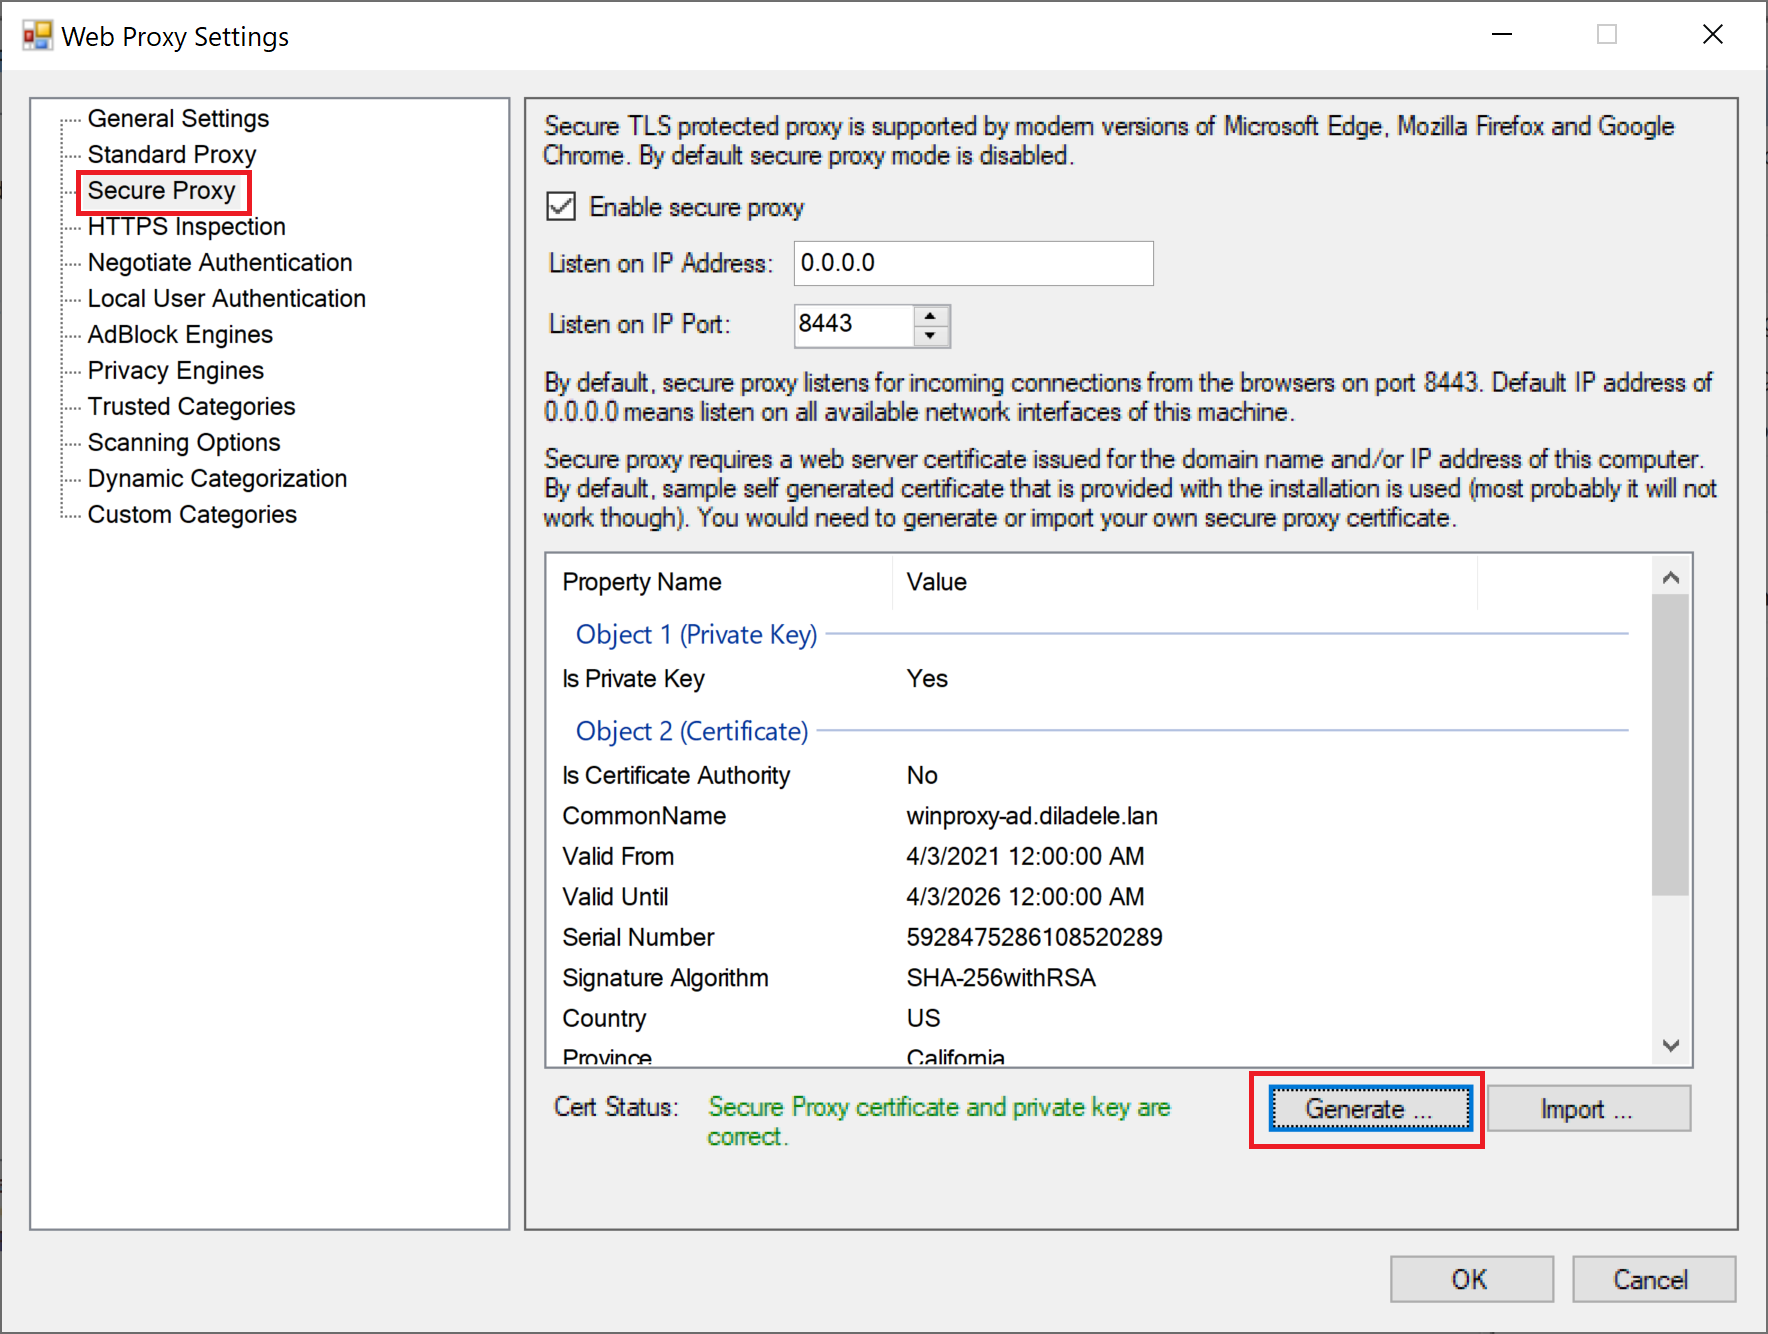
In order to generate the secure proxy certificate using the Admin UI, open the Proxy Settings menu in Admin UI / Web Filtering Proxy section and click on the Proxy Settings node as indicated on the following screenshots.

Select the Secure Proxy setting and click on the Generate button.
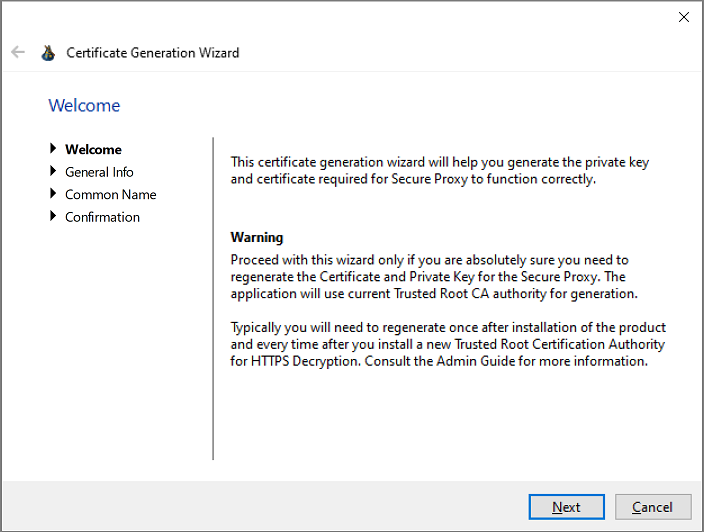
A new wizard will be started that will help you to generate the secure proxy certificate. Be sure to carefully read the explanation text on all wizard pages.
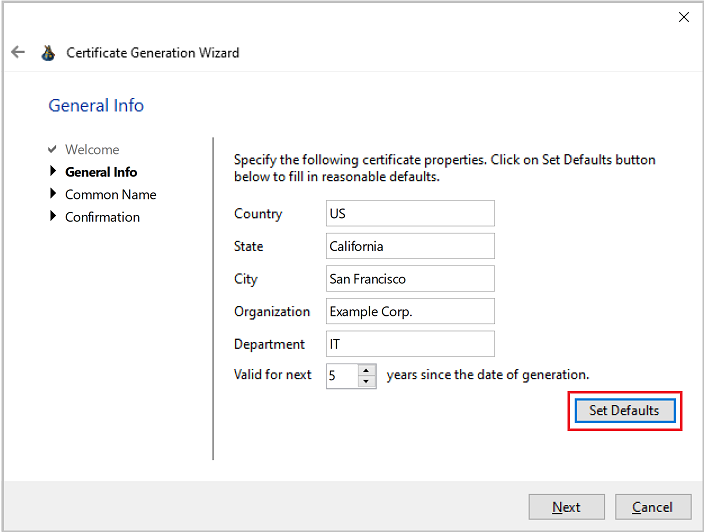
On the next page you can fill in the organizational details to be included into the generated certificate. To fill in the default values click Set Defaults button.
Finally, fill in the Common Name and the Alternative DNS Names certificate attributes. By clicking on the Detect button you can force Admin UI automatically determine the fully qualified domain name of the proxy machine as well as its IP addresses.
It is very important to verify that the Common Name of the imported certificate matches the fully qualified domain name of the machine where Web Filtering Proxy is deployed. Wrong common name will prevent the browser from connecting to secure proxy.

Click Next to generate the secure proxy certificate. Generated certificate will be saved in C:\ProgramData\Diladele\WebProxy\N.N\etc\secure_proxy.pem. A backup copy of the previous certificate will also be saved as C:\ProgramData\Diladele\WebProxy\N.N\etc\secure_proxy.pem.bak file just in case. Might be a good idea to copy it out somewhere.
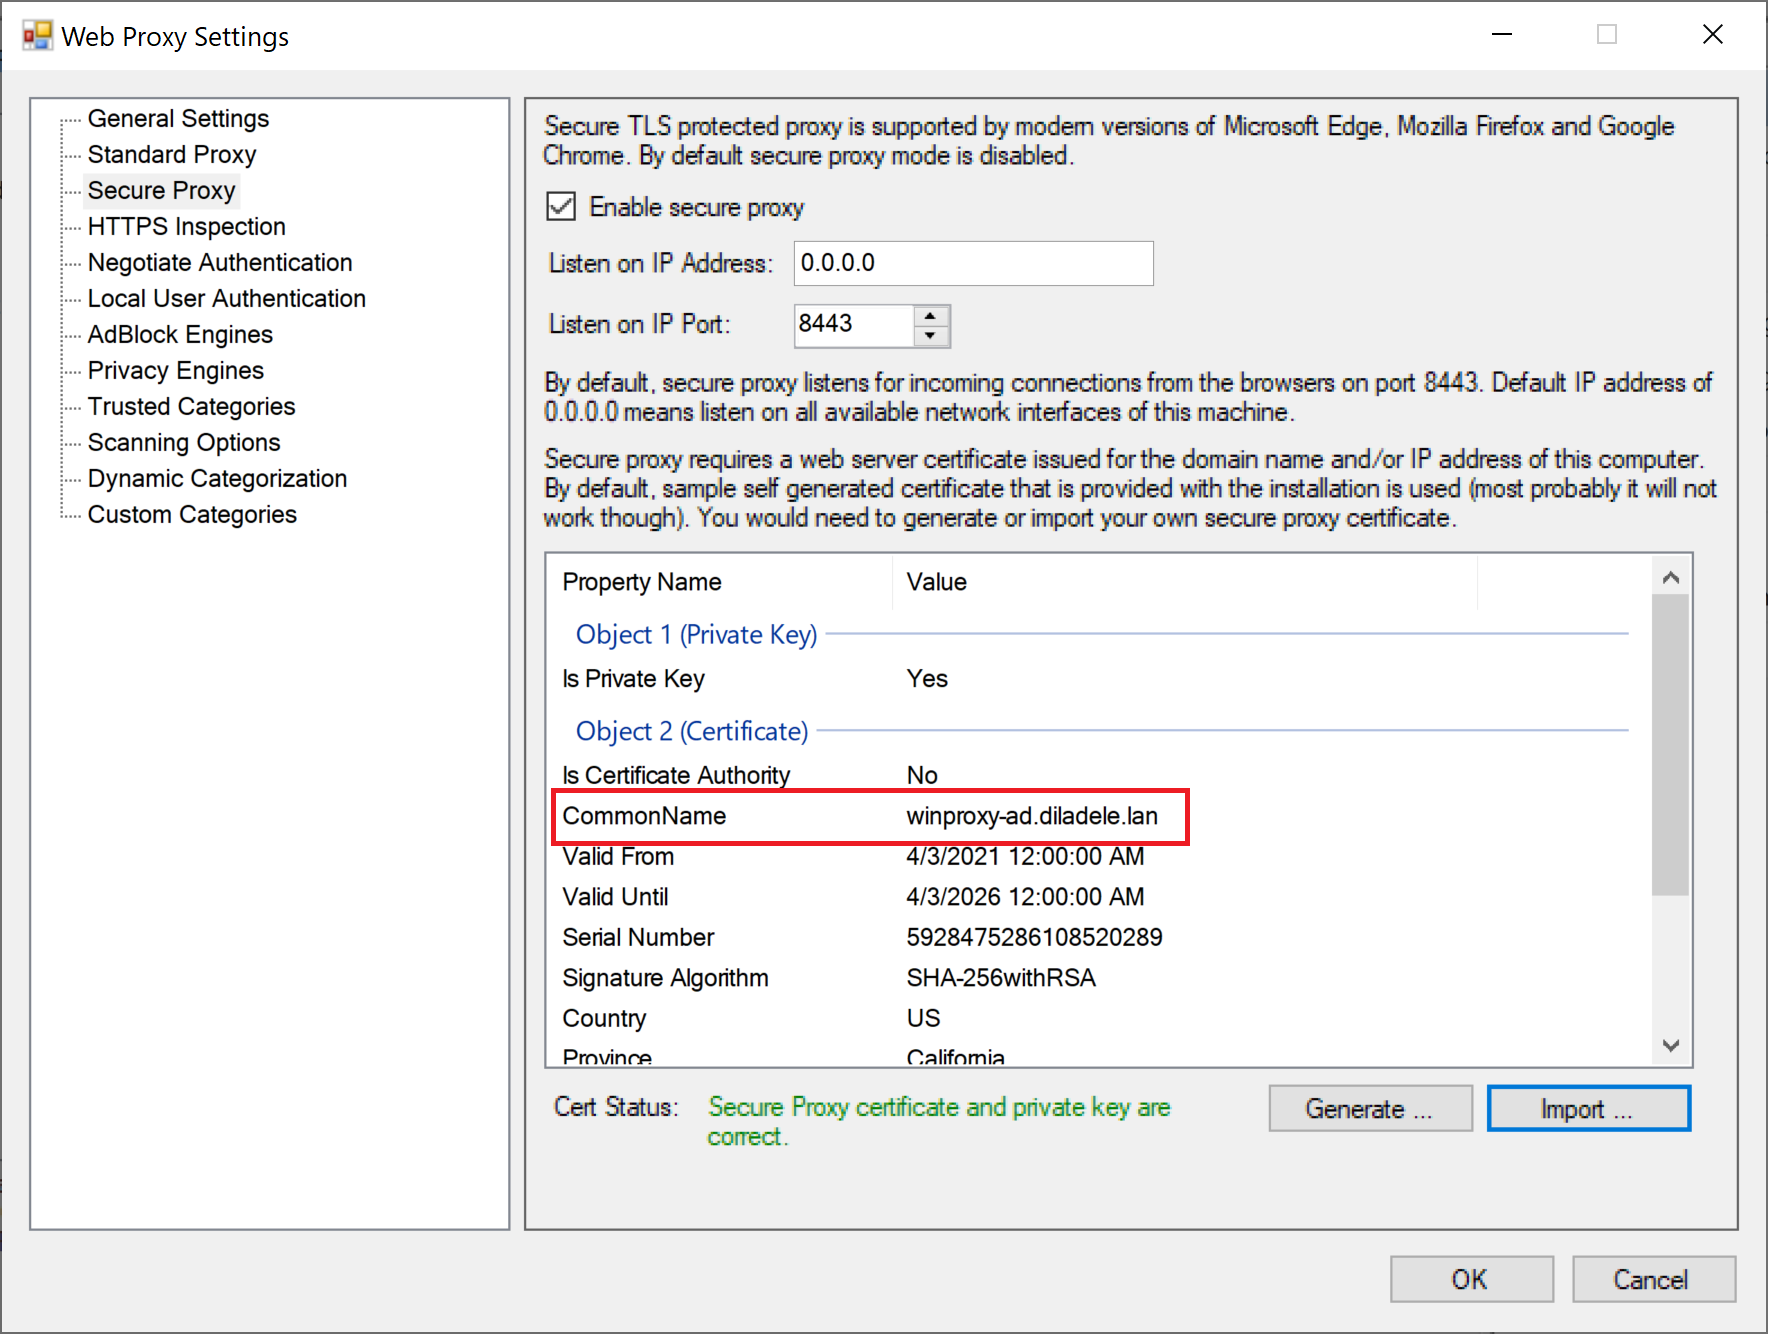
Properties of the generation certificate will be displayed in the Admin UI. Be sure to check the displayed Common Name attribute matches the actual FQDN of your proxy box as shown above.
Do not forget to restart the Web Filtering Proxy service in order for the changes to be applied.