Deployment
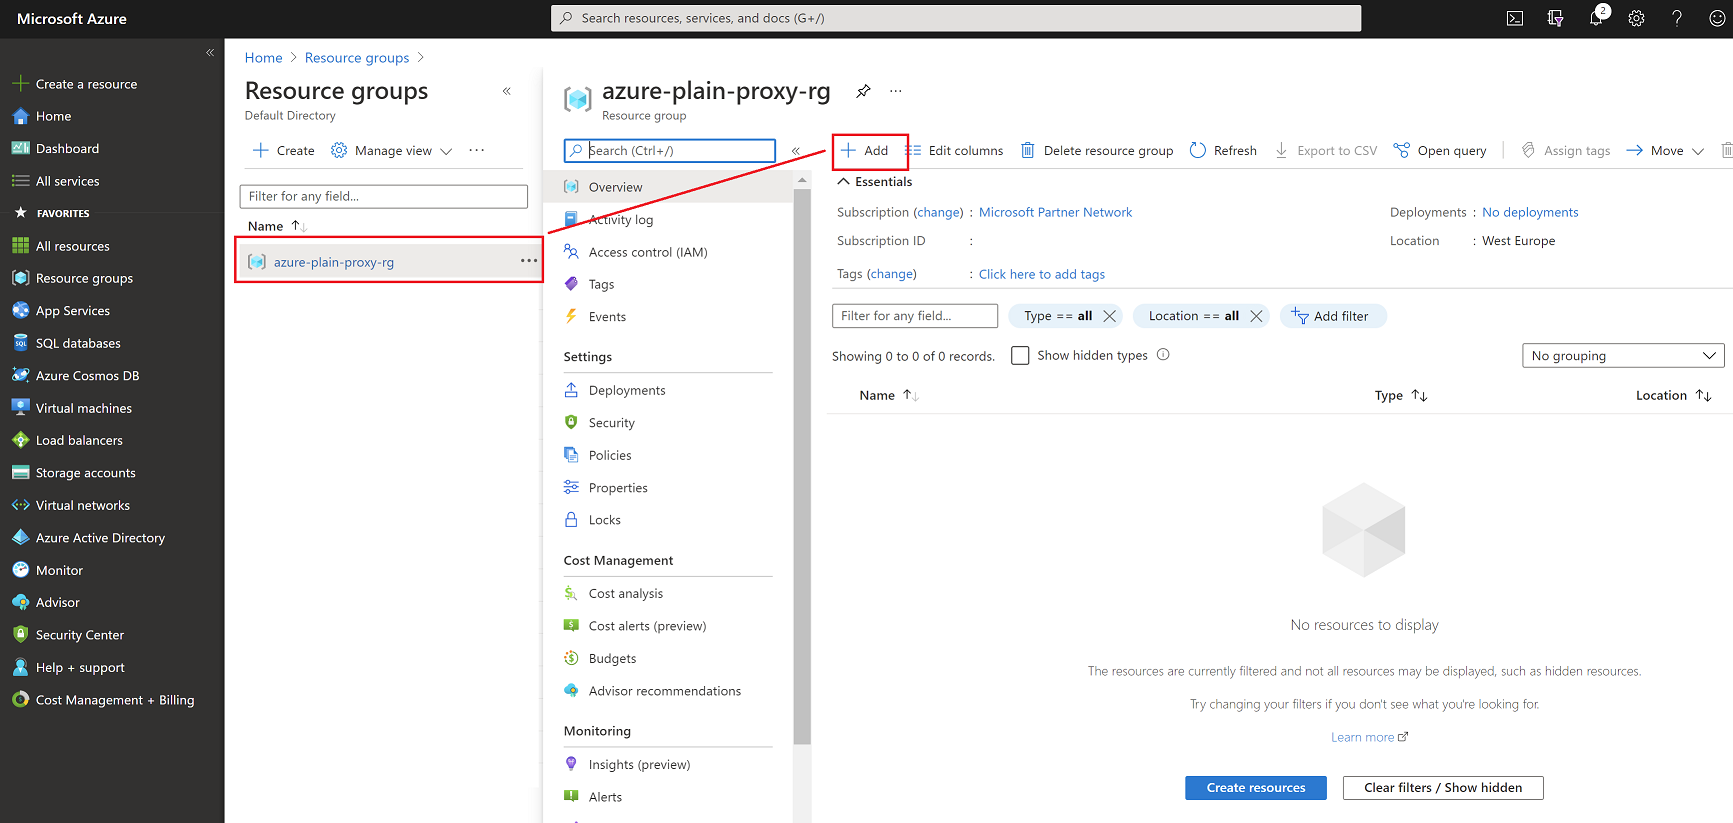
In order to deploy the Web Filtering Proxy as standard plain proxy in the Microsoft Azure, login into your Azure Portal, select the azure-plain-proxy-rg resource group and add a new virtual machine resource there as indicated on the following screenshots.
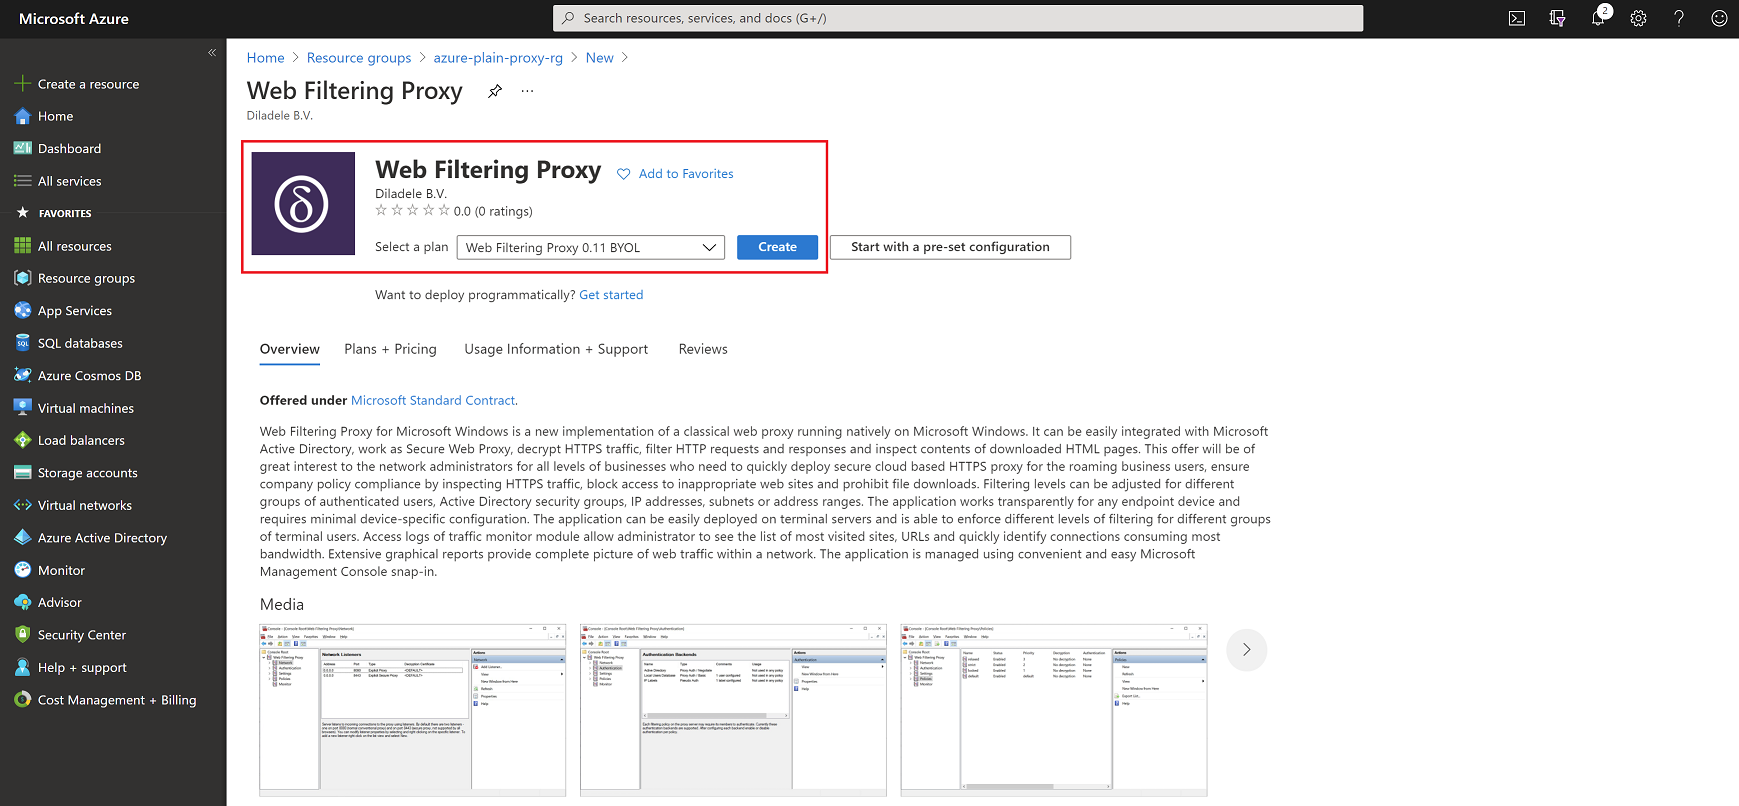
Type Web Filtering Proxy in the search box and click Enter.

Select the latest plan and click Create.
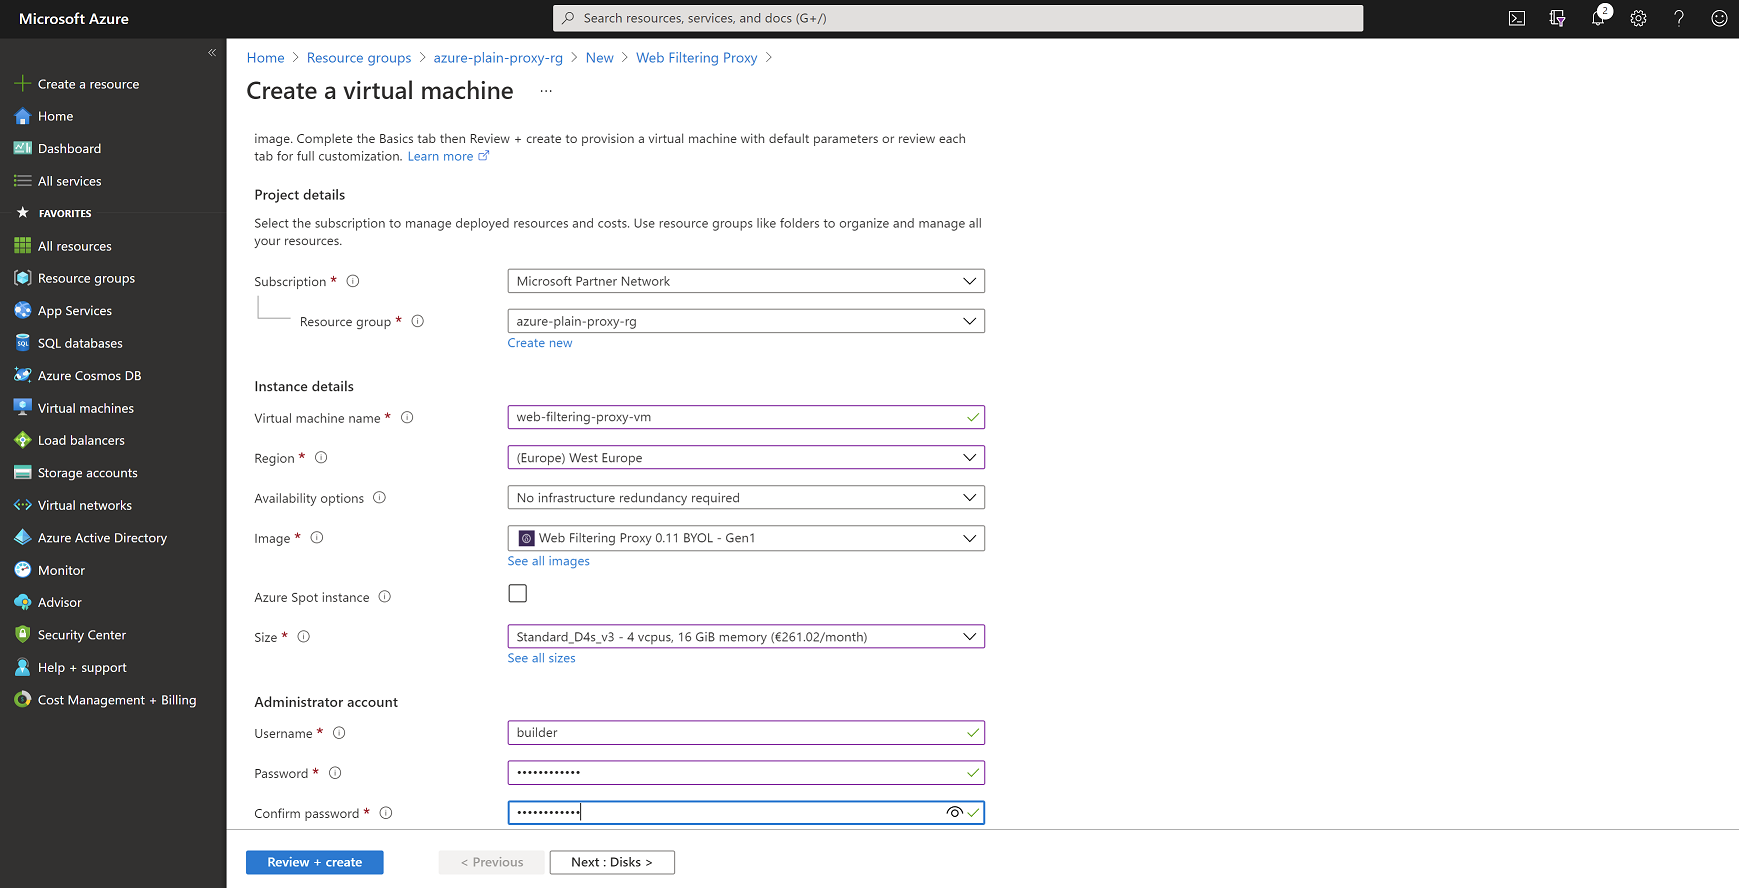
Microsot Azure deployment wizard will ask several questions which are more or less self describing. The following table and screenshots show most important configuration settings. Note here we selected the virtual machine size to be at least 4CPUs and 16Gb of RAM to ensure smooth Windows Server 2019 experience.
| Setting Name | Value |
|---|---|
| Resource group | azure-plain-proxy-rg |
| Virtual machine name | web-filtering-proxy-vm |
| Image | Web Filtering Proxy 0.11 BYOL - Gen1 |
| Size | Standard D4s v3 (4 vcpus, 16 GiB memory) |
| OS disk type | Premium SSD LRS |
| Use managed disks | Yes |
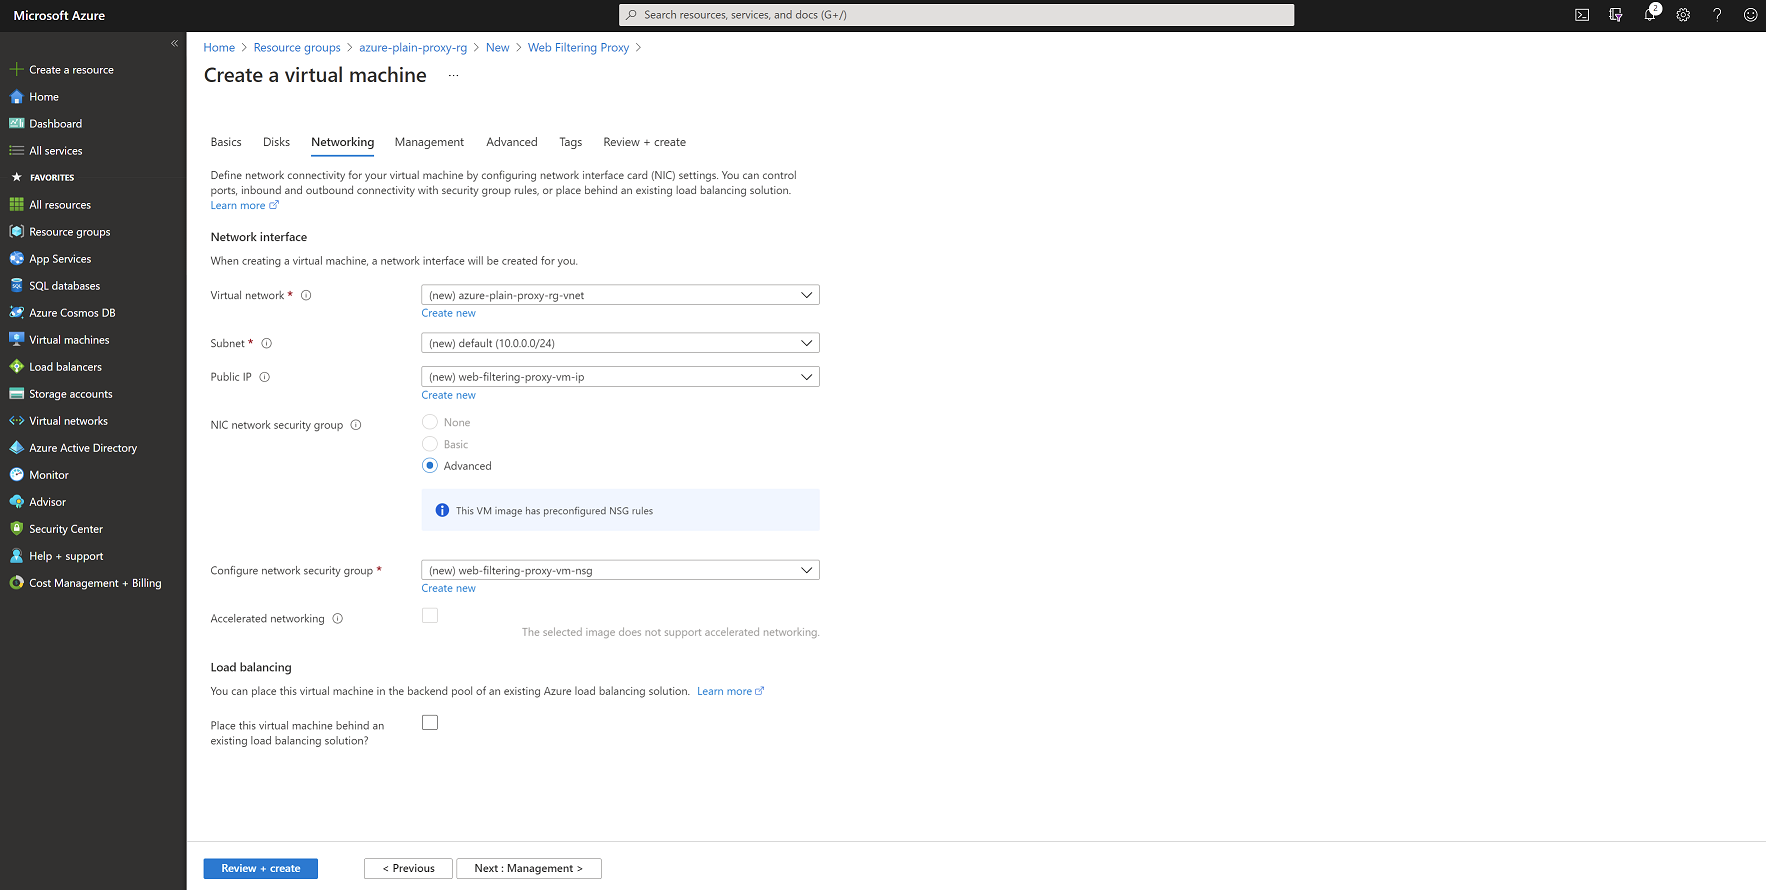
Networking settings are shown in the following table and screenshot. Note the image of Web Filtering Proxy has preconfigured NSG rules that are copied into our new network security group. We will adjust those on the later steps.
| Setting Name | Value |
|---|---|
| Virtual network | (new) azure-plain-proxy-rg-vnet |
| Subnet | (new) default (10.0.0.0/24) |
| Public IP | (new) web-filtering-proxy-vm-ip |
| NIC network security group | (new) web-filtering-proxy-vm-nsg |
| Accelerated networking | Off |
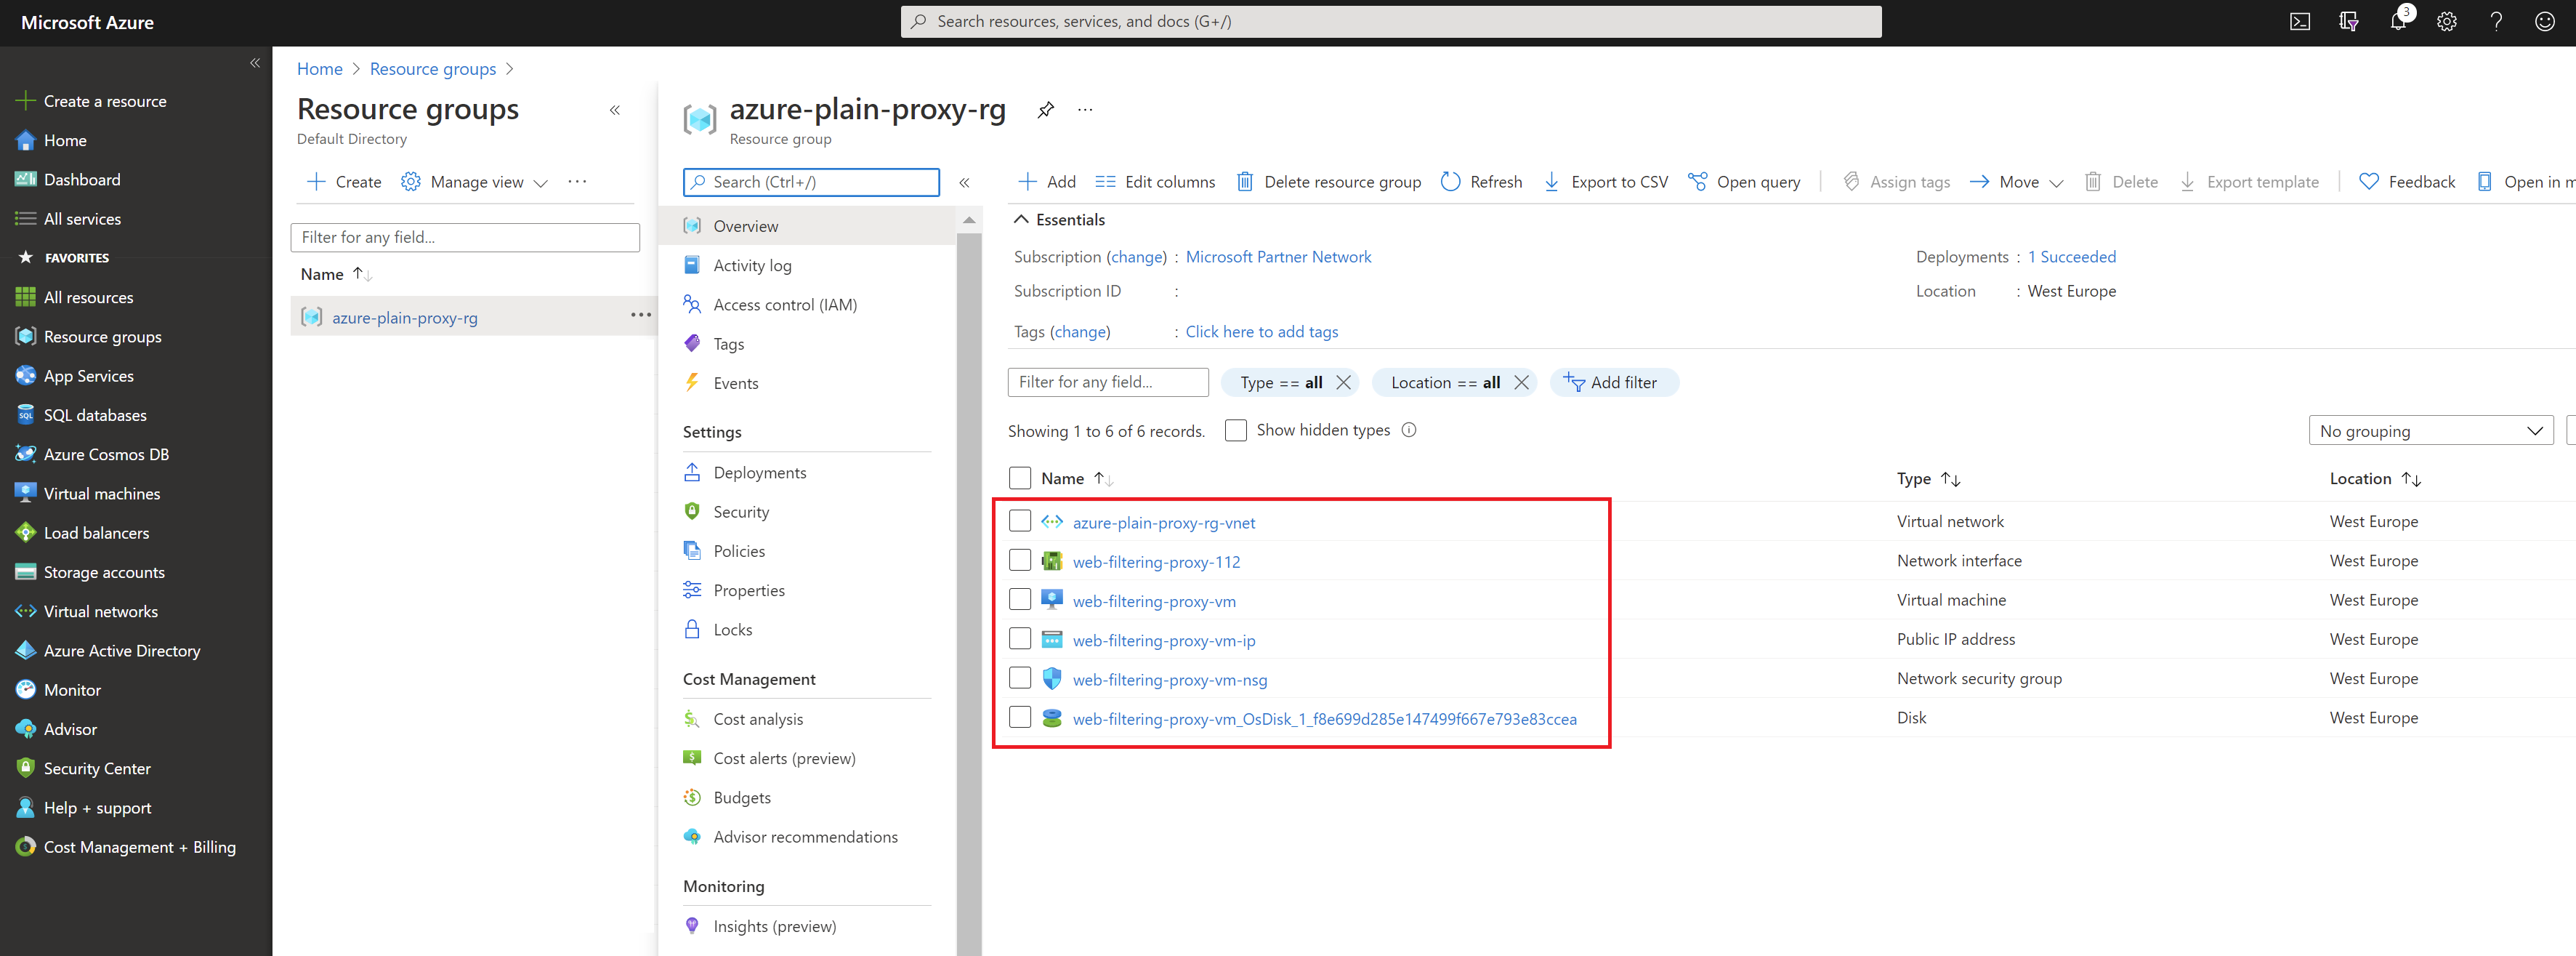
Wait couple of minutes and ensure the resource group now contains our resources.
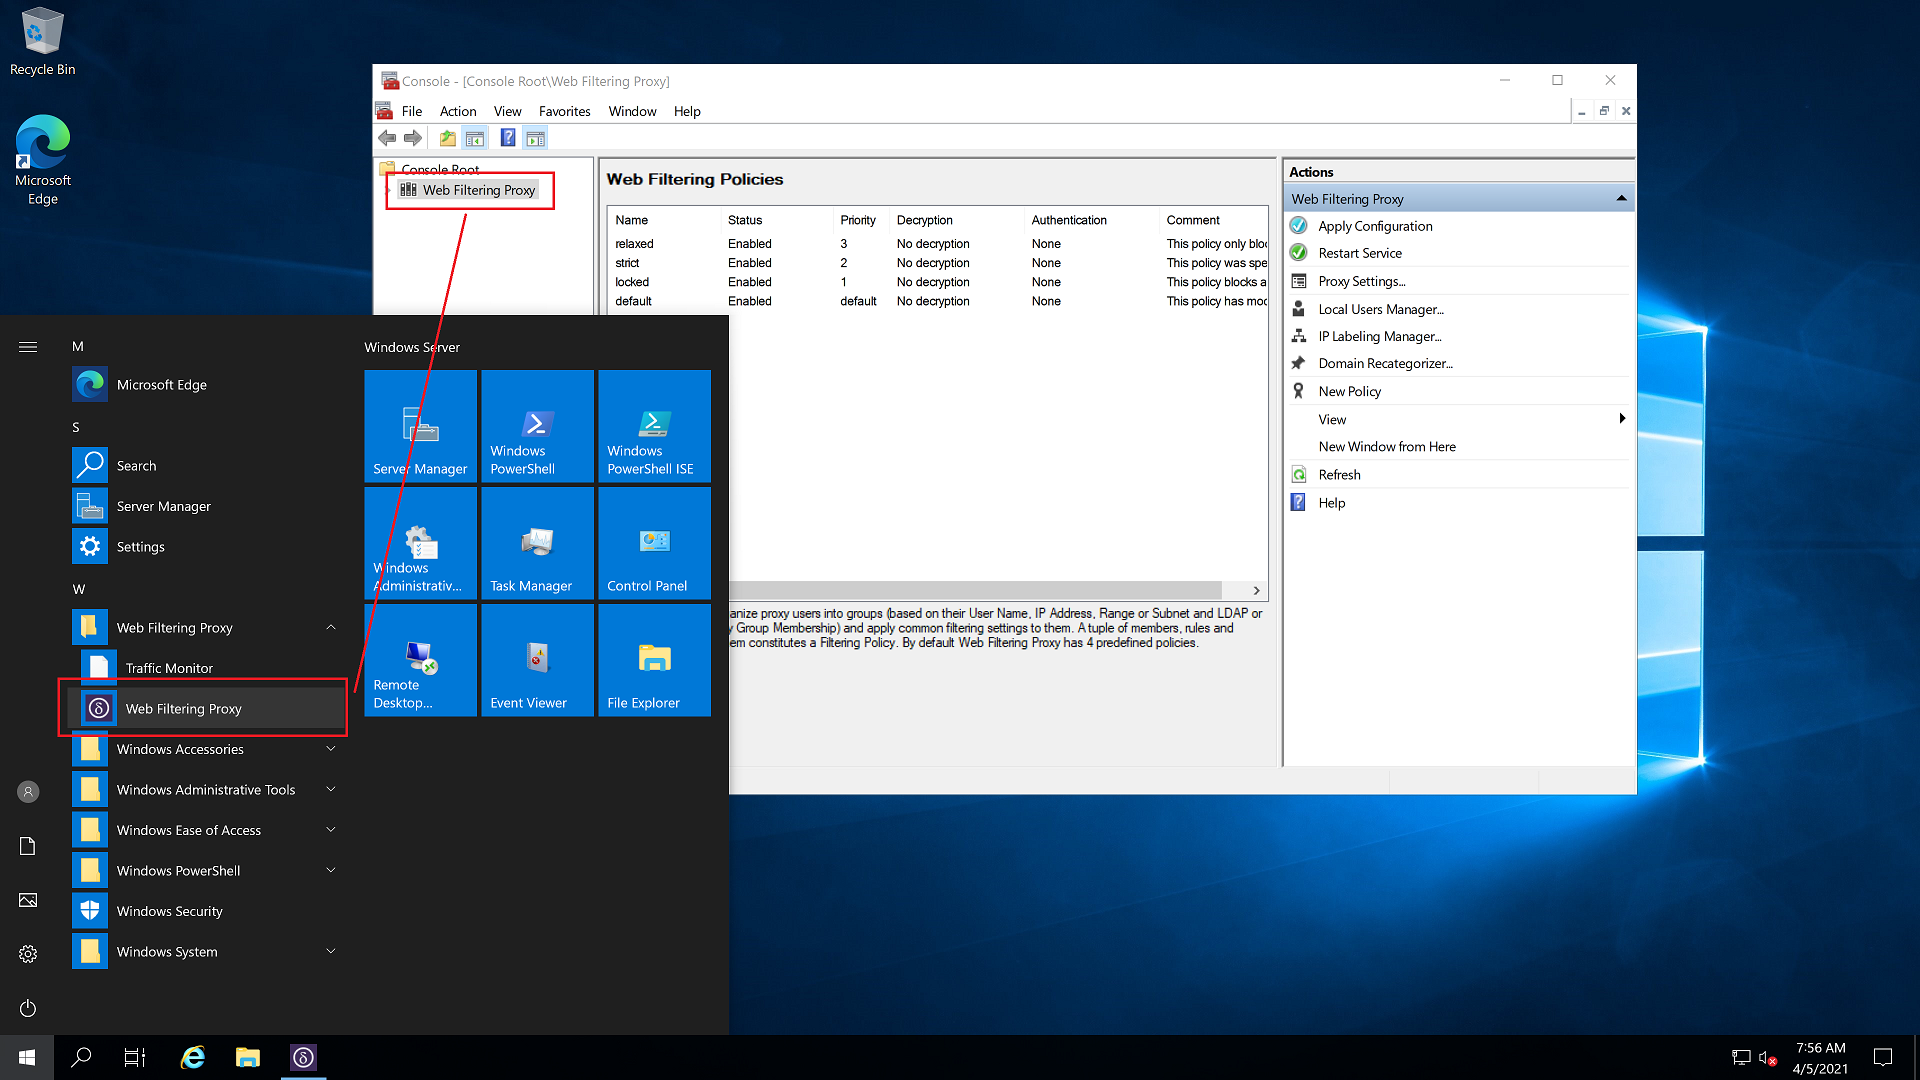
Find out the assigned public IP address of the virtual machine and try logging into it using RDP. After successful login you should be able to find the Web Filtering Proxy icon in Start / Programs menu.