Enable Proxy Authentication
Currently if access to a questionable site is blocked the user's name of the connecting browser remains empty. In order to transparently authenticate users on our clustered proxy we need to perform some additional steps.
Service User
In a clustered proxy scenario browsers connect to the proxy cluster by its fully qualified domain name, proxy.nlb.lan in our case. In order to enable Kerberos authentication and transparent single-sign-on we need to have a separate user in Active Directory which will act as servicePrincipal during Kerberos authentication.
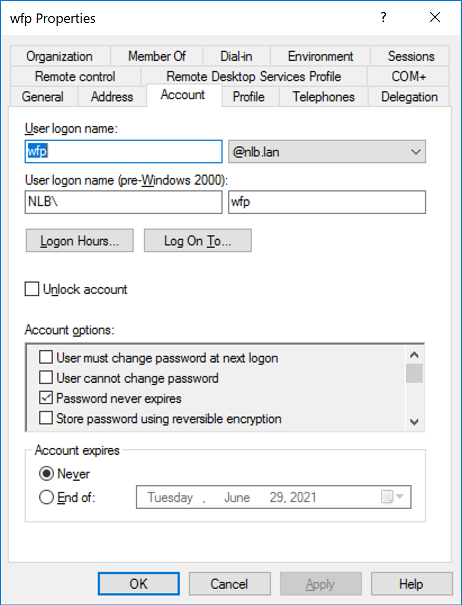
So, on your domain controller, open the Active Directory Users and Computers snap-in and add a wfp user with some arbitrary password. Make sure the password is complex enough and does not expire.
The following screenshot shows the properties of the wfp user.
Service Principal Name
Next step is to create the Service Principal Name (called SPN for short later) and map it to the wfp user we created earlier.
Verify you do not already have such SPN in your Active Directory. If such SPN already exists, Kerberos authentication will always fail. Run the following command on your domain controller. The output shall indicate that no such SPN is found.
C:\Users\Administrator>setspn -Q HTTP/proxy.nlb.lan
Checking domain DC=nlb,DC=lan

No such SPN found.
Now run the following setspn command on the domain controller to assign service principal name of our cluster to the wfp user we have just created. Note the HTTP part here is case-sensitive.
C:\Users\Administrator>setspn -S HTTP/proxy.nlb.lan NLB\wfp
Checking domain DC=nlb,DC=lan

Registering ServicePrincipalNames for CN=wfp,CN=Users,DC=nlb,DC=lan
        HTTP/proxy.nlb.lan
Updated object
Use ADSI Edit to verify the SPN was set correctly.

Service Account
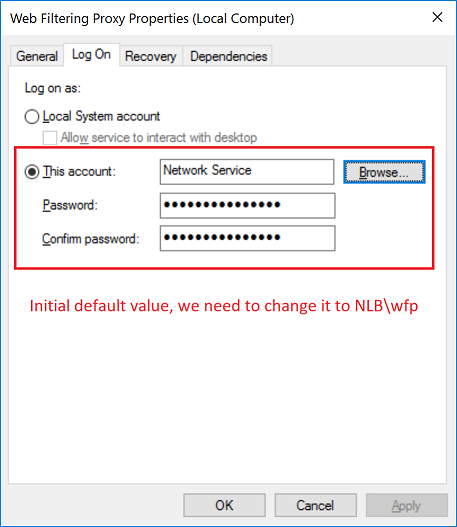
Now we need to configure the instances of Web Filtering Proxy to run using NLB\wfp account and not using the NETWORK_SERVICE account as it does by default. To do that, on each node of the cluster, open the Services snap-in and change the webproxyd service configuration as shown on the following screenshots.
Initially Web Filtering Proxy runs under the NETWORK_SERVICE account.
Click the Browse button and select the NLB\wfp user account.

Provide the password for that user. Note if you have let the password expire you would need to re-do this step after expiration. This is the main reason why we created wfp user with password never expires attribute earlier.
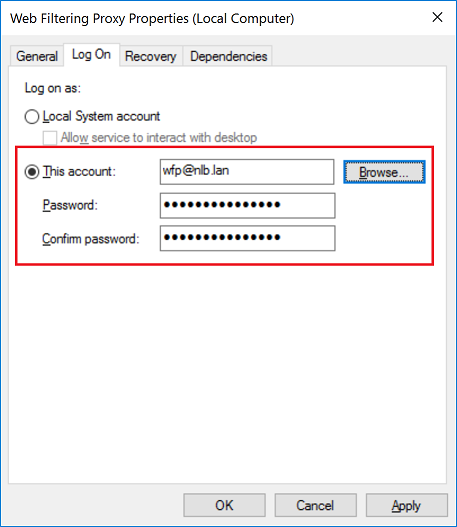
Acknowledge the warning.
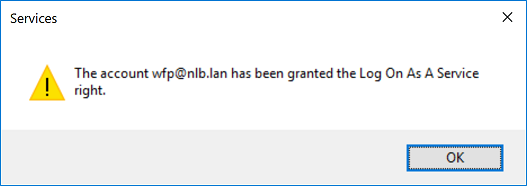
Restart the Web Filtering Proxy service and make sure it runs as wfp user now.

Service Permissions
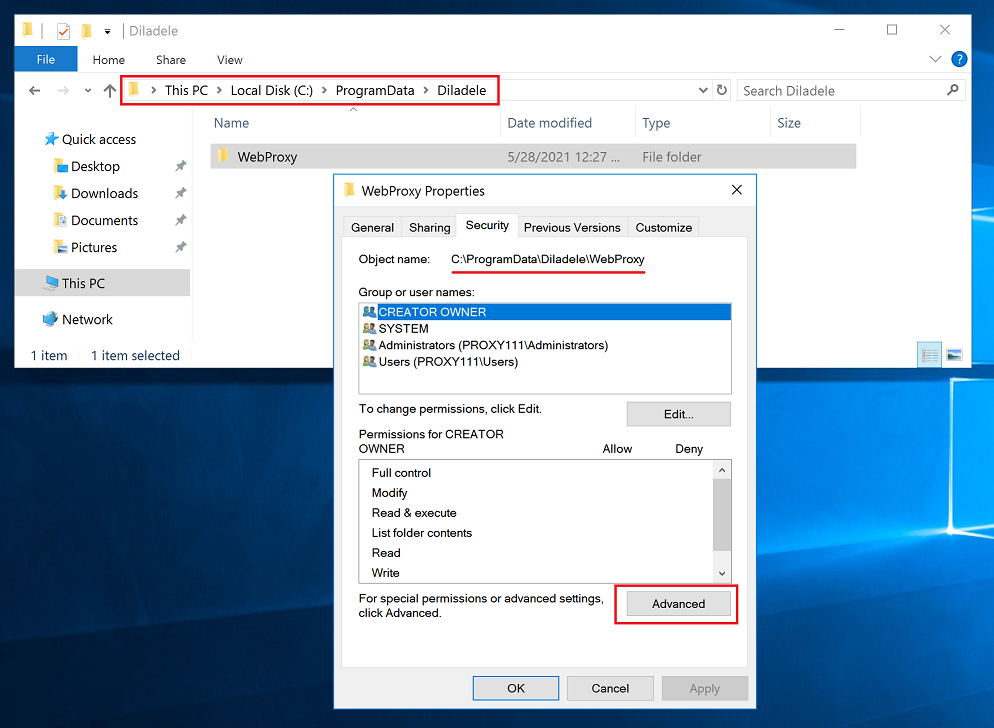
For the service to be able to write to application directories we also need to add some more permissions to the wfp user. So navigate to C:\ProgramData\Diladele\WebProxy folder and right click Properties, select Security tab and click Advanced button.
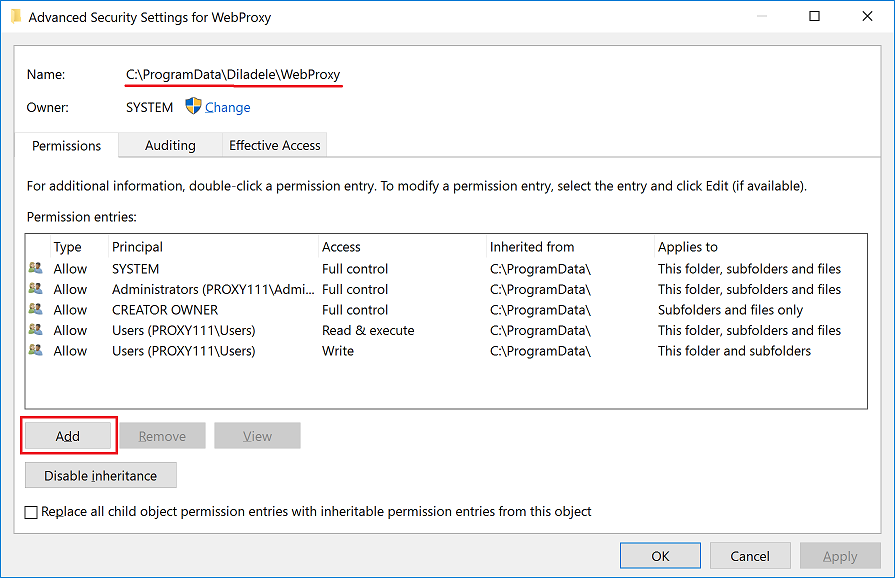
In the Advanced Security Settings dialog click the Add button.
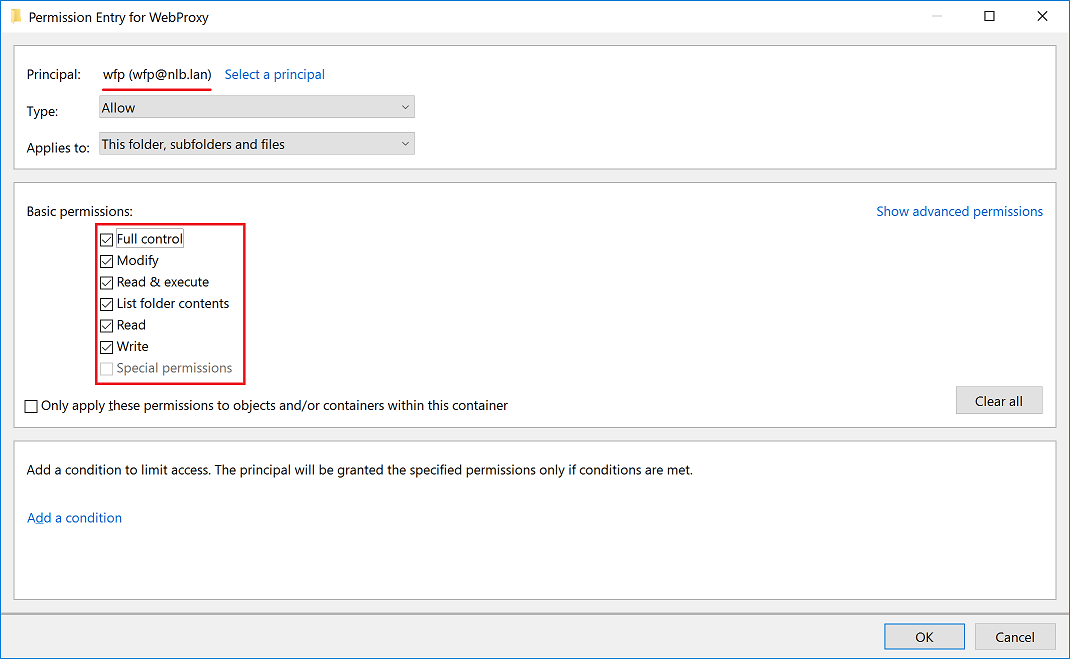
Select the wfp user and give him the Full Control and Write permissions. Make sure all other permissions are at there default values (i.e. checked).
Now restart the Web Filtering Proxy service and make sure it can write to for example error.log located at C:\ProgramData\Diladele\WebProxy\var\log\error.log.
Activate Authentication
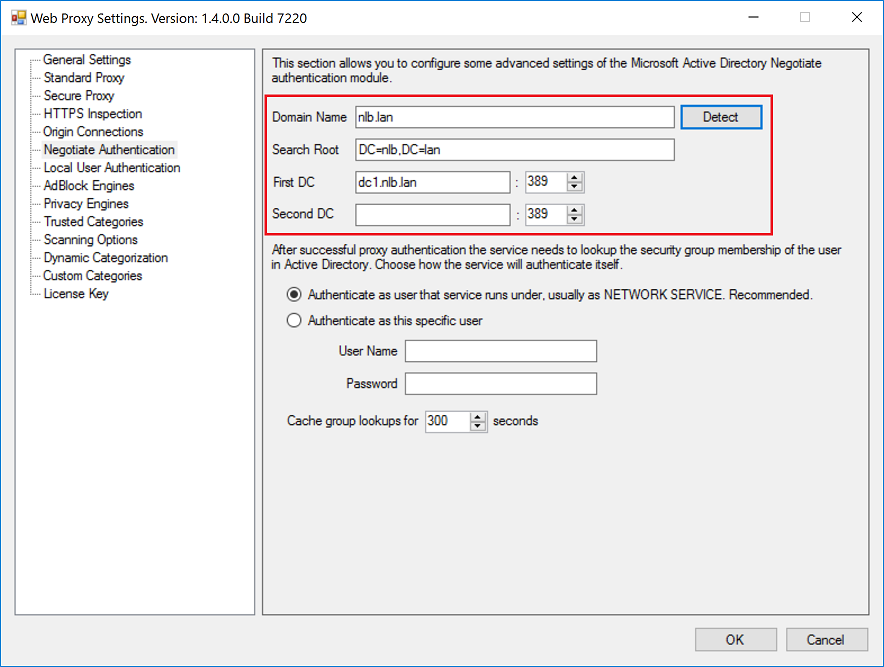
Final step is to activate the proxy authentication. This is done in the same way as when deploying normal non clustered proxy. Just open the Proxy Settings dialog, select the Negotiate item and click Detect button.
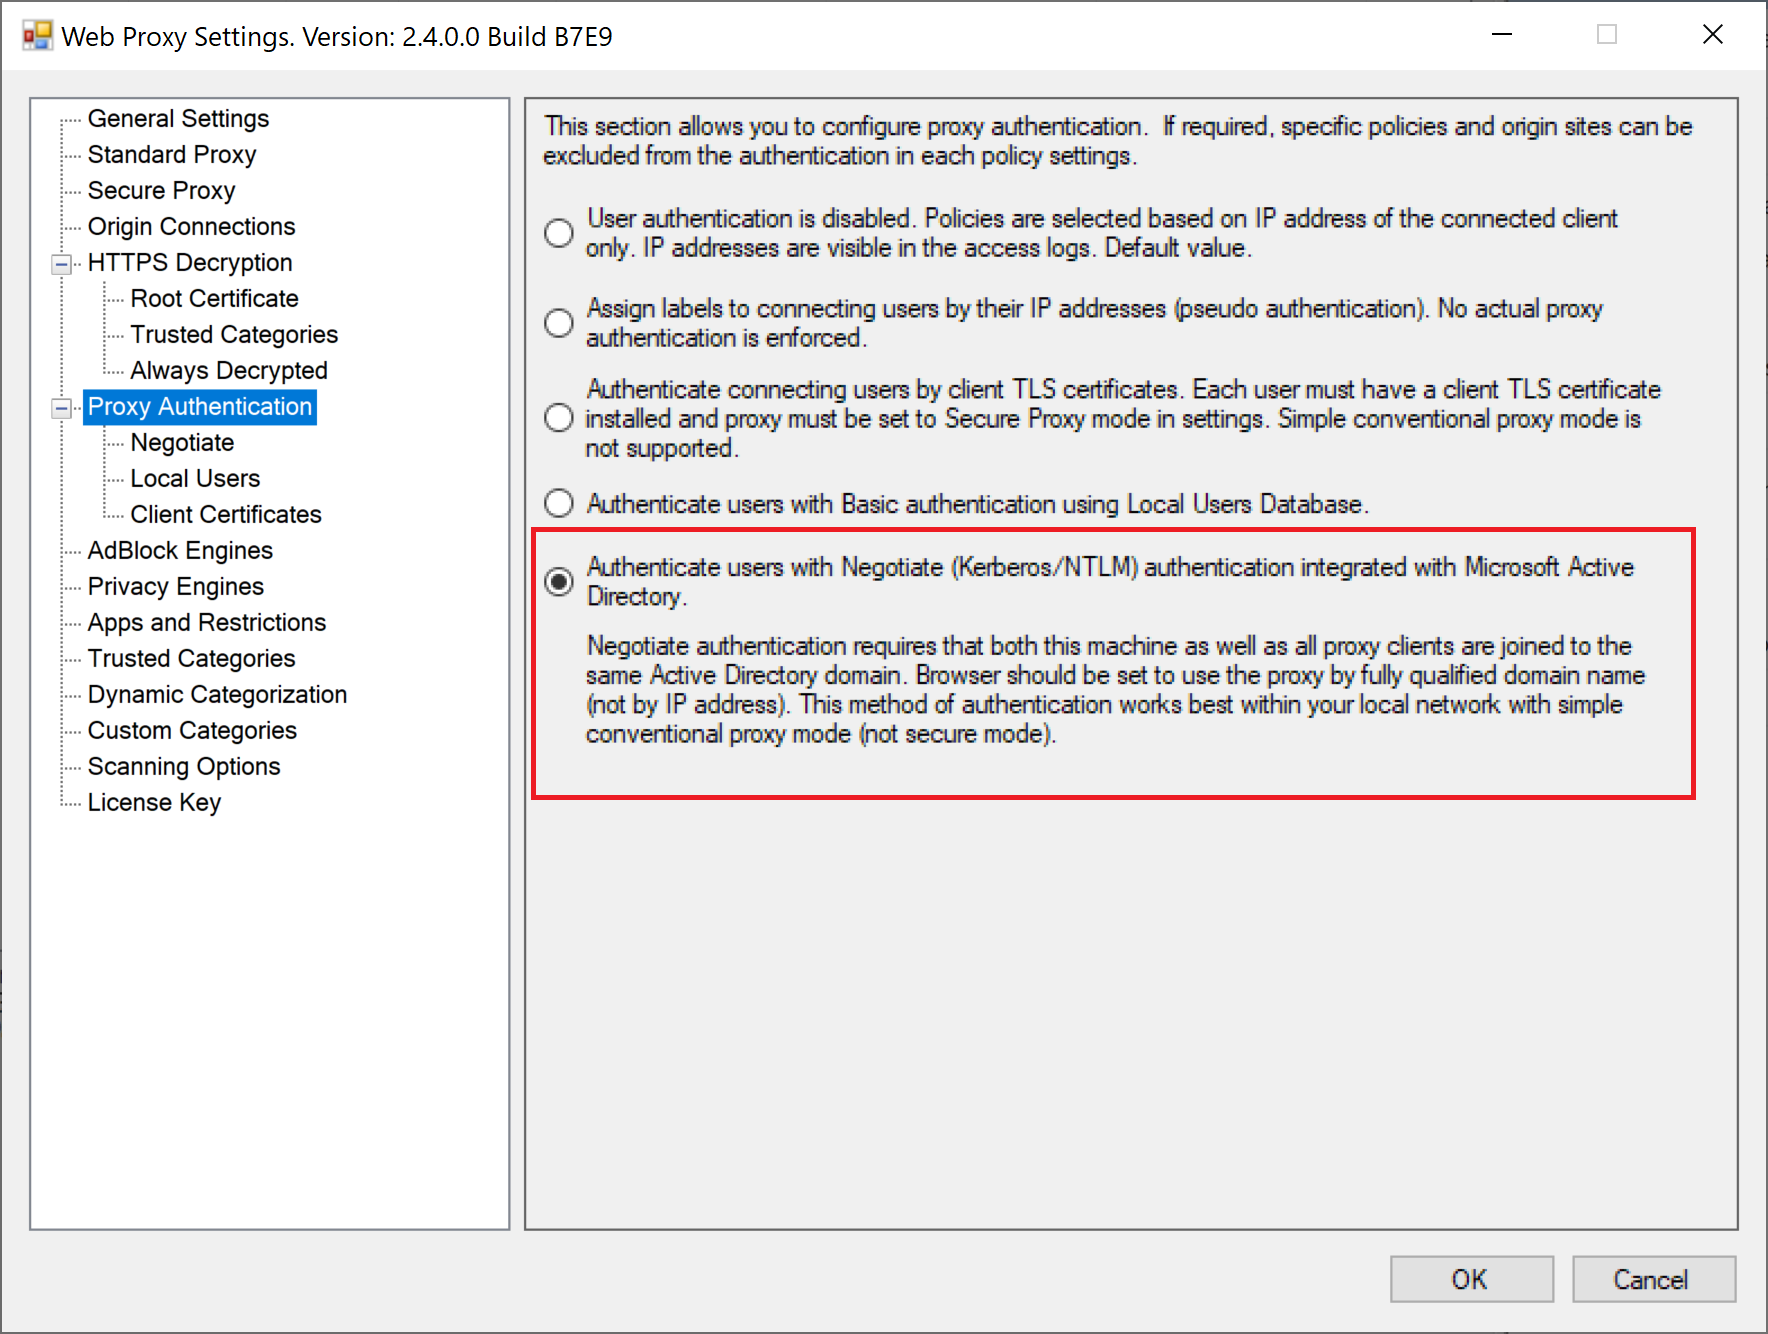
Then click on the Authentication node and select the Negotiate option. Do not forget to click Apply Configuration and Restart Service afterwards.
Verify Authentication
To verify the authentication works as expected, from the browser machine navigate to some questionable site. The blocked page shall indicate the name of the logged-on user. Browser shall not show any authentication pop up windows. Single-sign-on should be working transparently.
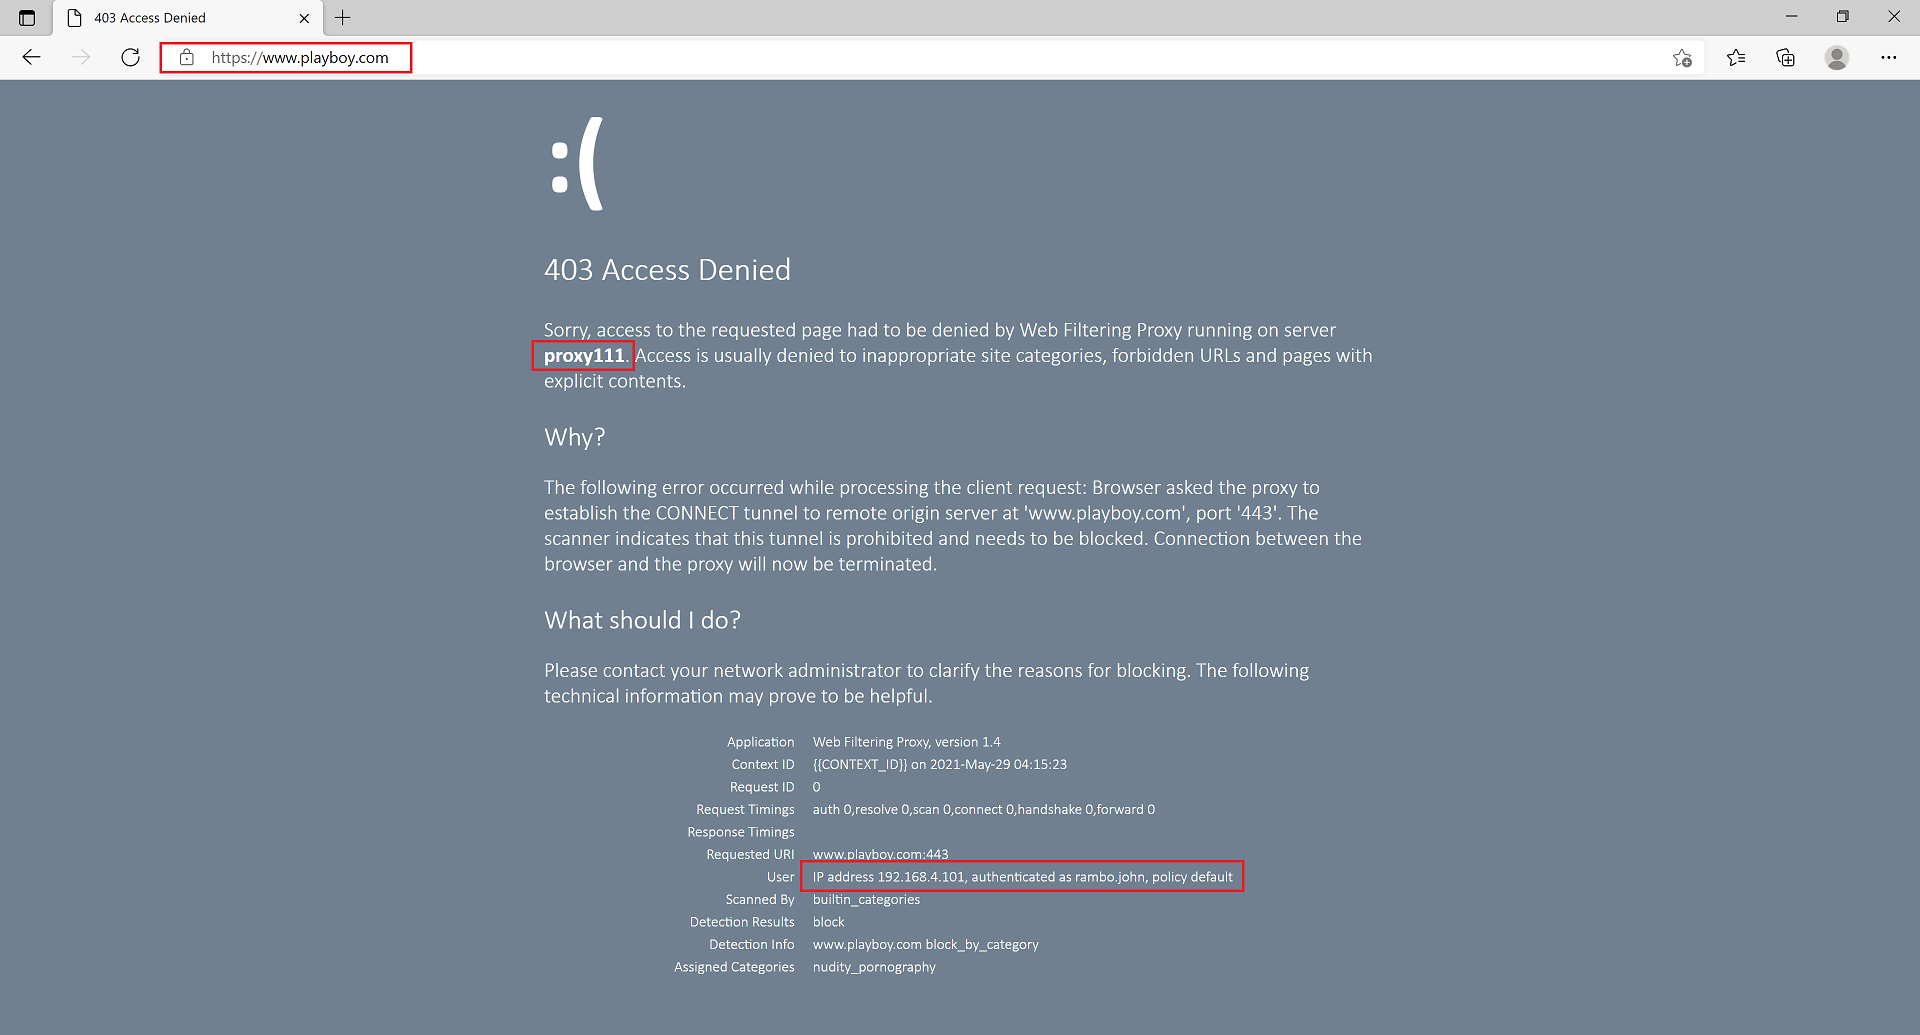
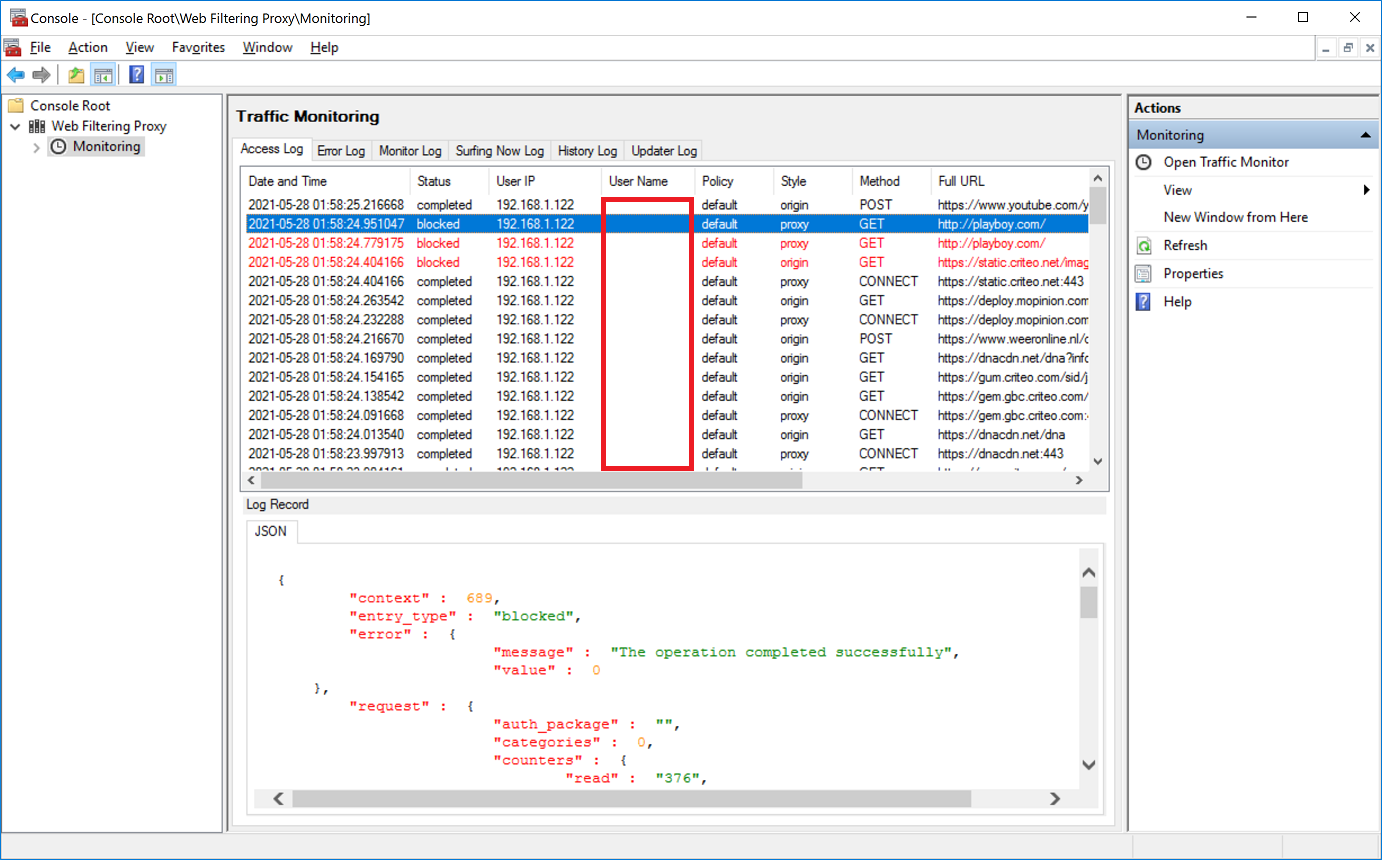
The traffic monitoring view in the Admin UI shall be showing the actual browsing user name on both cluster nodes.

Troubleshooting
In case of any problems with Kerberos authentication it might be a good idea to follow troubleshooting steps indicated on Microsoft docs site.