Secure Proxy Certificate
Connections from the browser to our secure proxy will be protected by the Secure Proxy Certificate. There are several methods to generate this certificate. The easiest method to generate the certificate is using Admin UI as described in the following article.
Generate Using Root CA and OpenSSL
Another way to generate the secure proxy certificate requires the use of Root CA authority we used for HTTPS decryption and OpenSSL toolkit.
The idea here is that as we are going to enable HTTPS decryption on our proxy anyway and when doing that, we will have to generate our own Root CA self signed certification authority. We will then re-use this authority to also generate a secure proxy certificate. As our browsers need to trust our Root CA for HTTPS decryption, they will also automatically trust our secure proxy certificate.
So download the myca.pem file from C:\ProgramData\Diladele\WebProxy\N.N\etc folder and use it in the following OpenSSL commands. See this Microsoft Azure document for more information.
$ openssl req \
    -newkey rsa:2048 \
    -nodes \
    -keyout secure_proxy.key \
    -subj "/C=NL/ST=Noord-Holland/L=Amsterdam/O=Example B.V./OU=IT/CN=secure-web-filtering-proxy.westeurope.cloudapp.azure.com" \
    -out secure_proxy.csr

$ openssl x509 \
    -req \
    -extfile <(printf "subjectAltName=DNS:secure-web-filtering-proxy.westeurope.cloudapp.azure.com") \
    -days 732 \
    -in secure_proxy.csr -CA myca.pem -CAkey myca.pem -CAcreateserial \
    -out secure_proxy.crt

$ cat secure_proxy.key secure_proxy.crt > secure_proxy.pem
The subj parameter is filled as indicated in the following table. Note how we set the Common Name parameter and subjectAltName extension to the fully qualified name of our secure proxy.
| Question | Sample Answer |
|---|---|
| Country Name | NL |
| State or Province Name | Noord-Holland |
| Locality Name | Amsterdam |
| Organization Name | Example B.V. |
| Organizational Unit Name | IT |
| Common Name | secure-web-filtering-proxy.westeurope.cloudapp.azure.com |
The last command concatenated the private key and certificate for the proxy together as this is how the Admin UI requires it to be.
To dump the contents of the certificate use
openssl x509 -in secure_proxy.crt -text -nooutcommand.
Import Secure Proxy Pem into Admin UI
We now need to import the secure_proxy.pem file into Admin UI. So open the Proxy Settings, select Secure Proxy node and click the Import button as shown on the following screenshot.
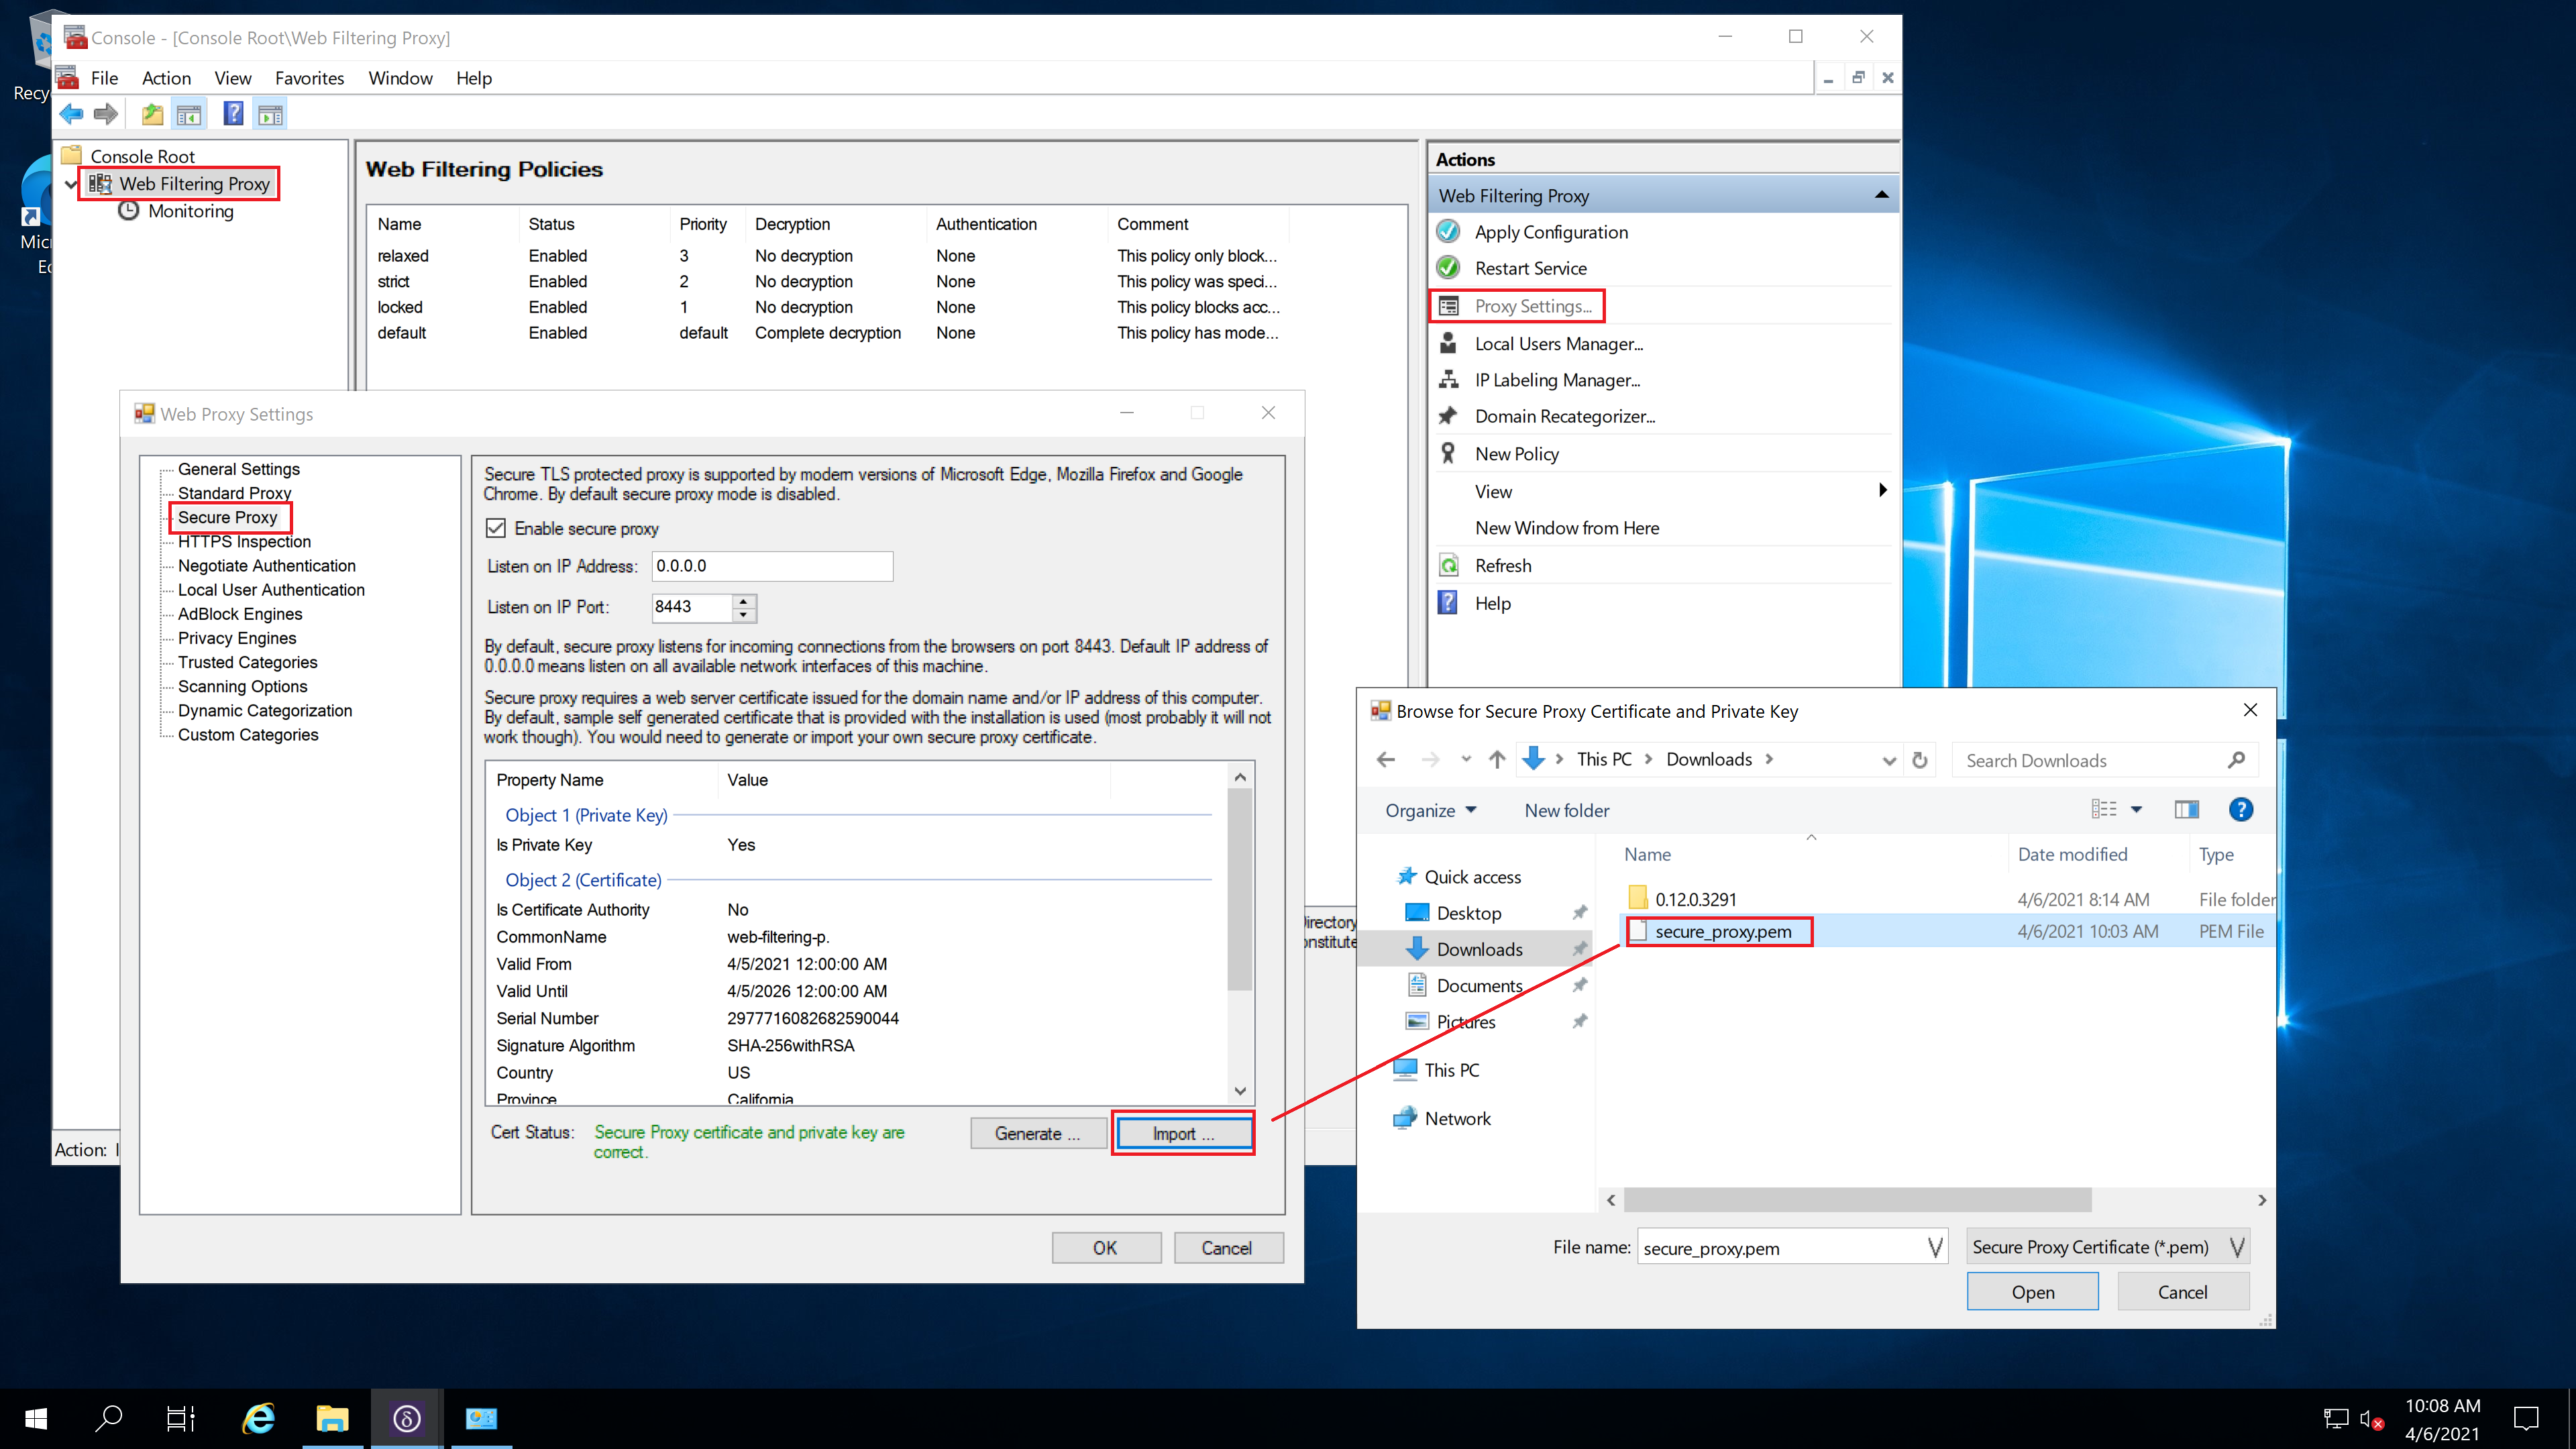
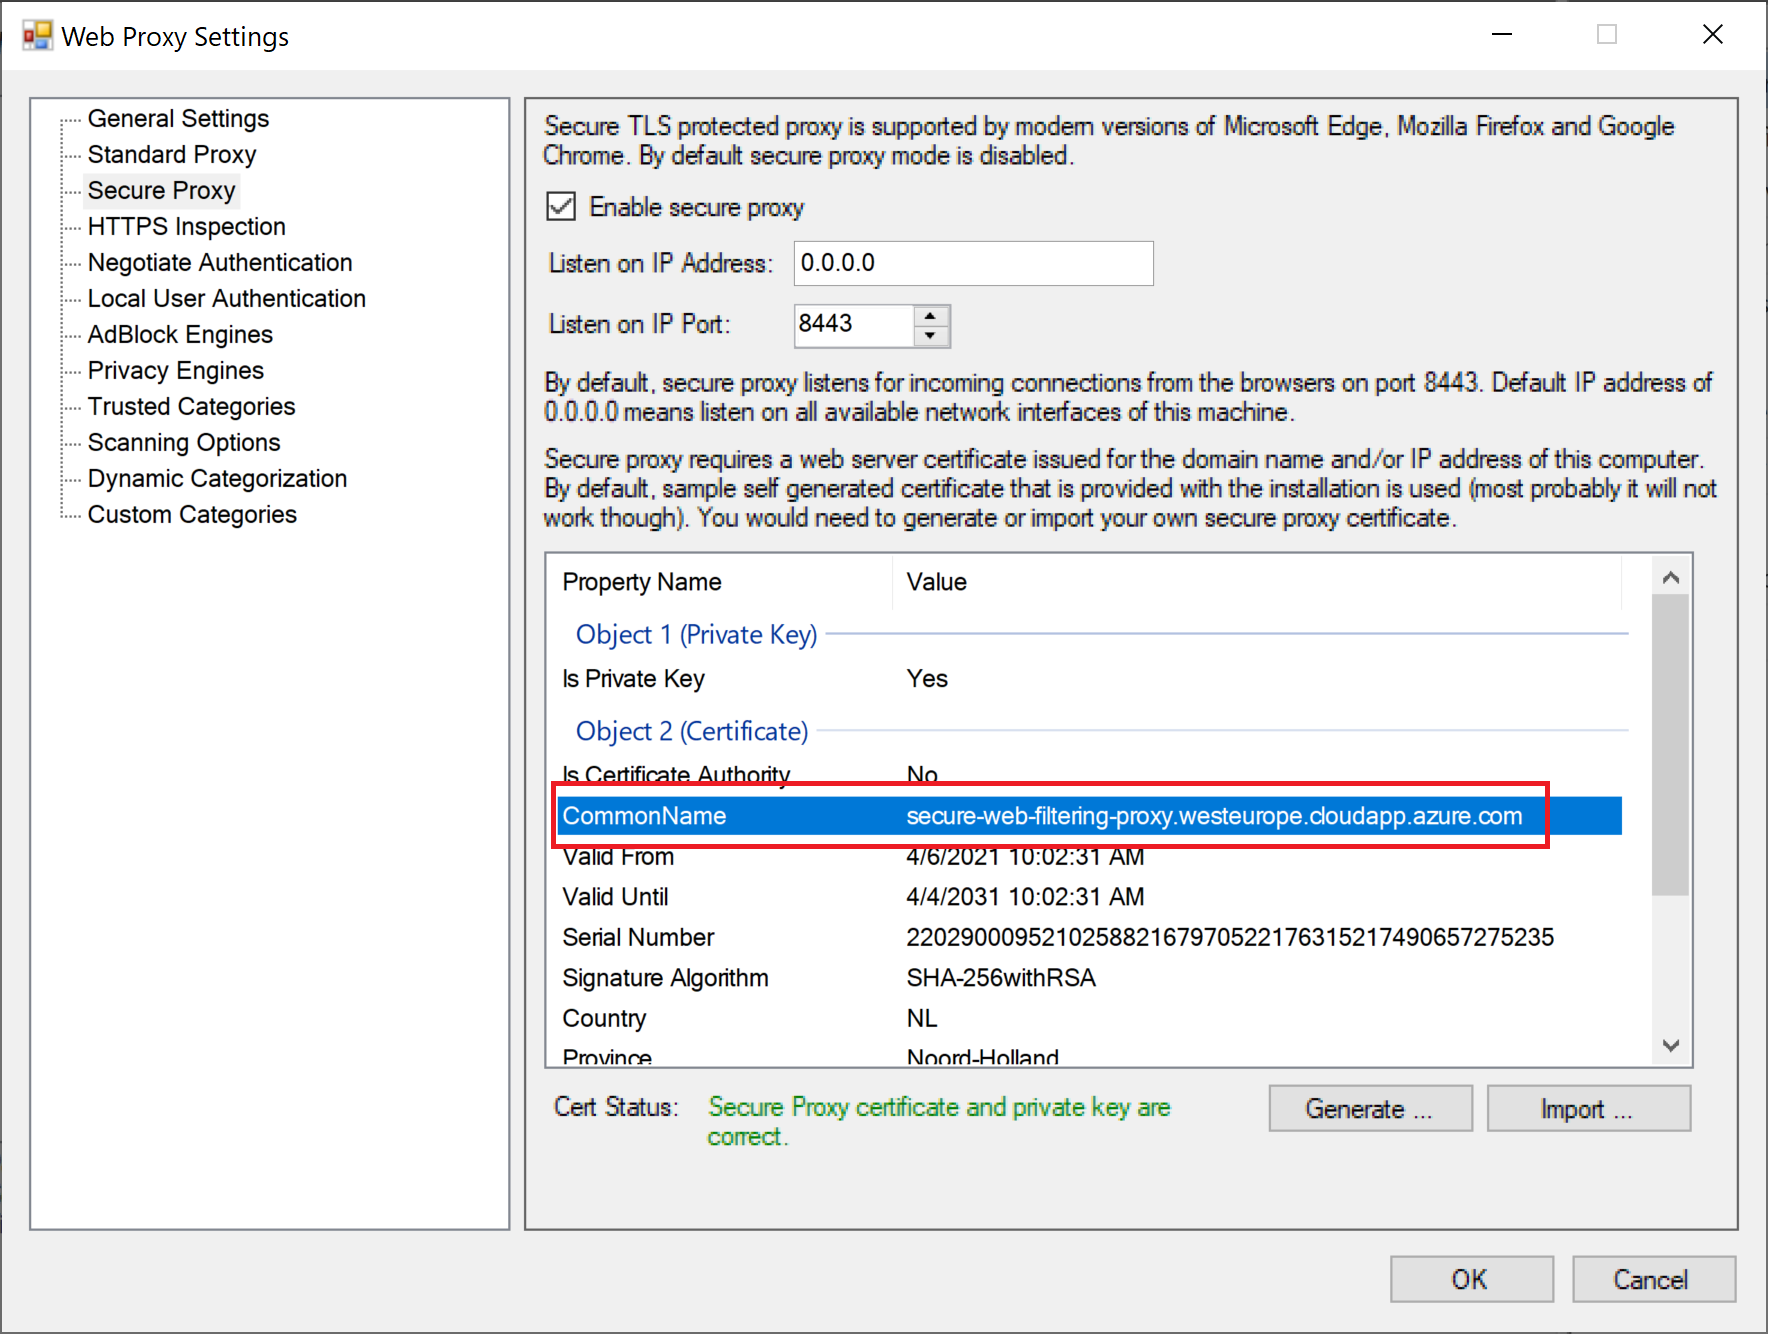
Click Open and verify the Common Name shown on the secure proxy certificates properties is indeed secure-web-filtering-proxy.westeurope.cloudapp.azure.com.
Configure Browser for Secure Proxy
We will use Mozilla Firefox as our test browser, so navigate to Options / Connections / Proxy tab. Select the Automatic Proxy Configuration Script option and type the following line into it as-is. Microsoft Edge and Google Chrome can be configured easily using this article as a reference.
data:,function FindProxyForURL(u, h){return "HTTPS secure-web-filtering-proxy.westeurope.cloudapp.azure.com:8443";}
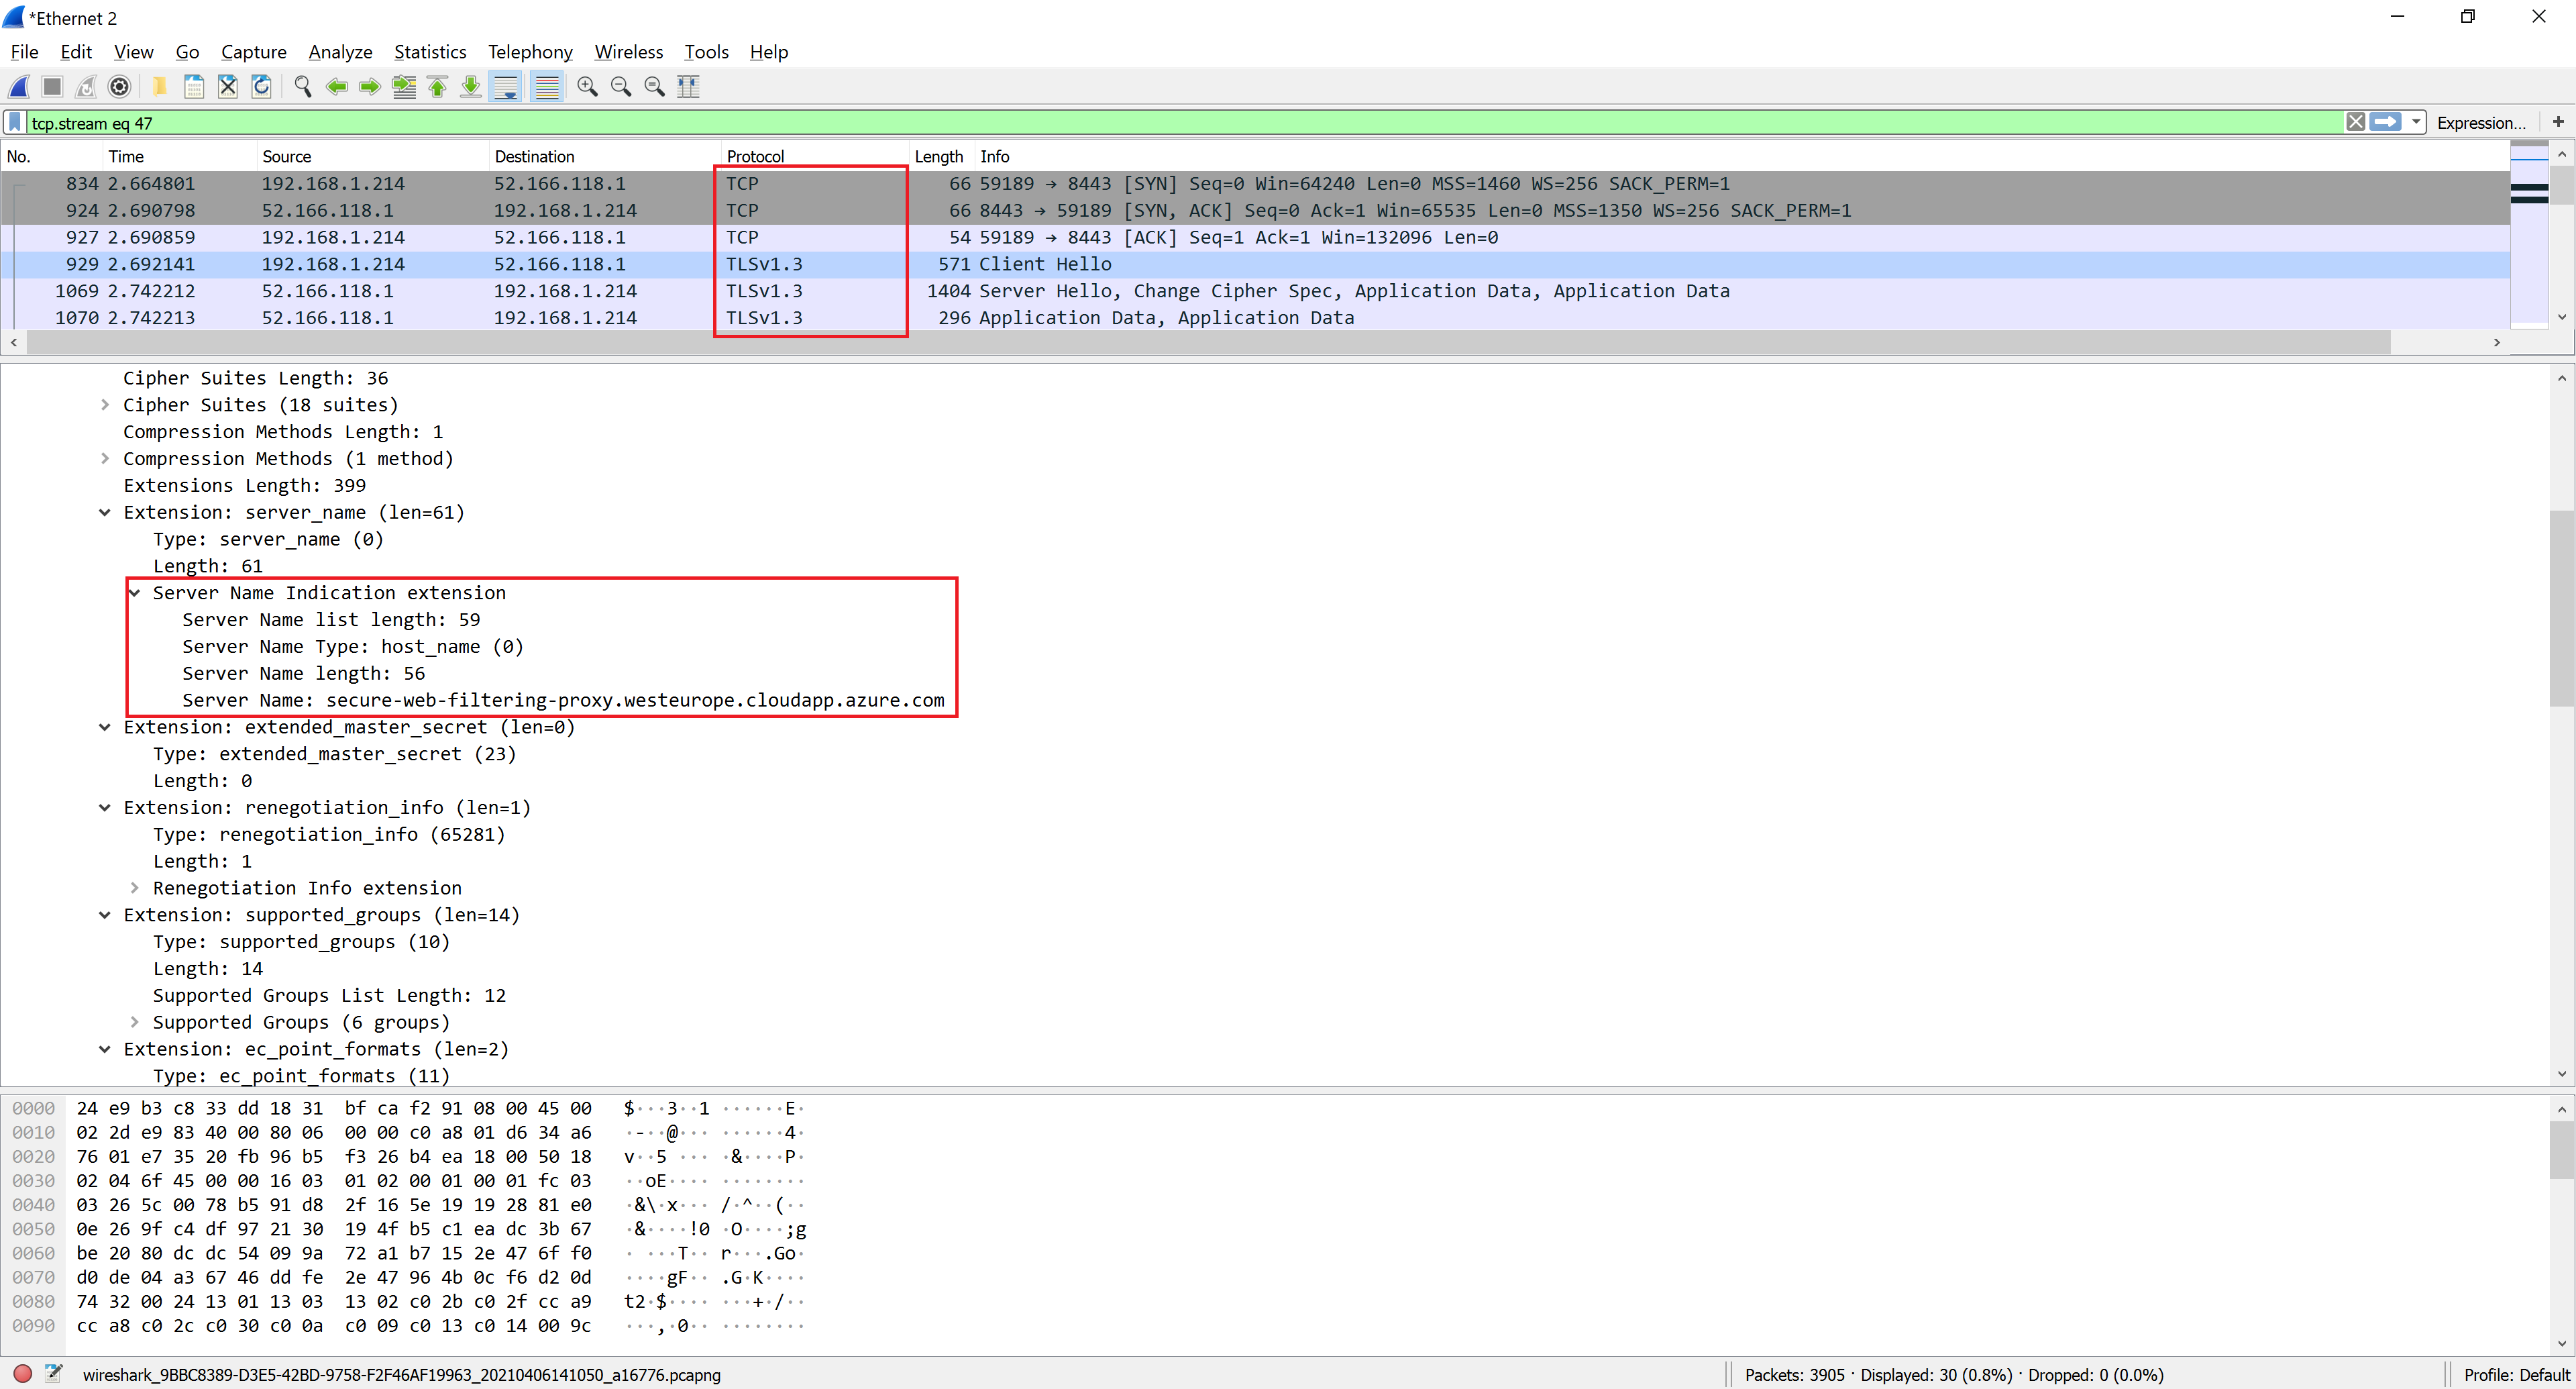
Validate Secure Connections
The final step is to navigate to some web site and make sure the connection is done using TLS at port 8443. The following screenshot of wireshark output confirm our expectations - the traffic between the browser and the proxy is indeed secure and takes place over port 8443.