Client TLS Certificates Proxy Authentication
Web Filtering Proxy is able to authenticate connecting clients by client TLS certificates. In this case each client gets a certificate installed and proxy is configured to require clients to present their certificates upon connection. CommonName or E-Mail attribute of the client certificate is then used as authenticated user name.
Read the following step-by-step tutorial with simple description of each required deployment step and a checklist here How to Configure the Secure Proxy with Client TLS Certificates Authentication on Microsoft Azure
Enable Authentication in Proxy Settings
To enable this mode of authentication, open Admin UI / Proxy Settings / Authentication and set the radio button to Authenticate connecting users by client TLS certificate.
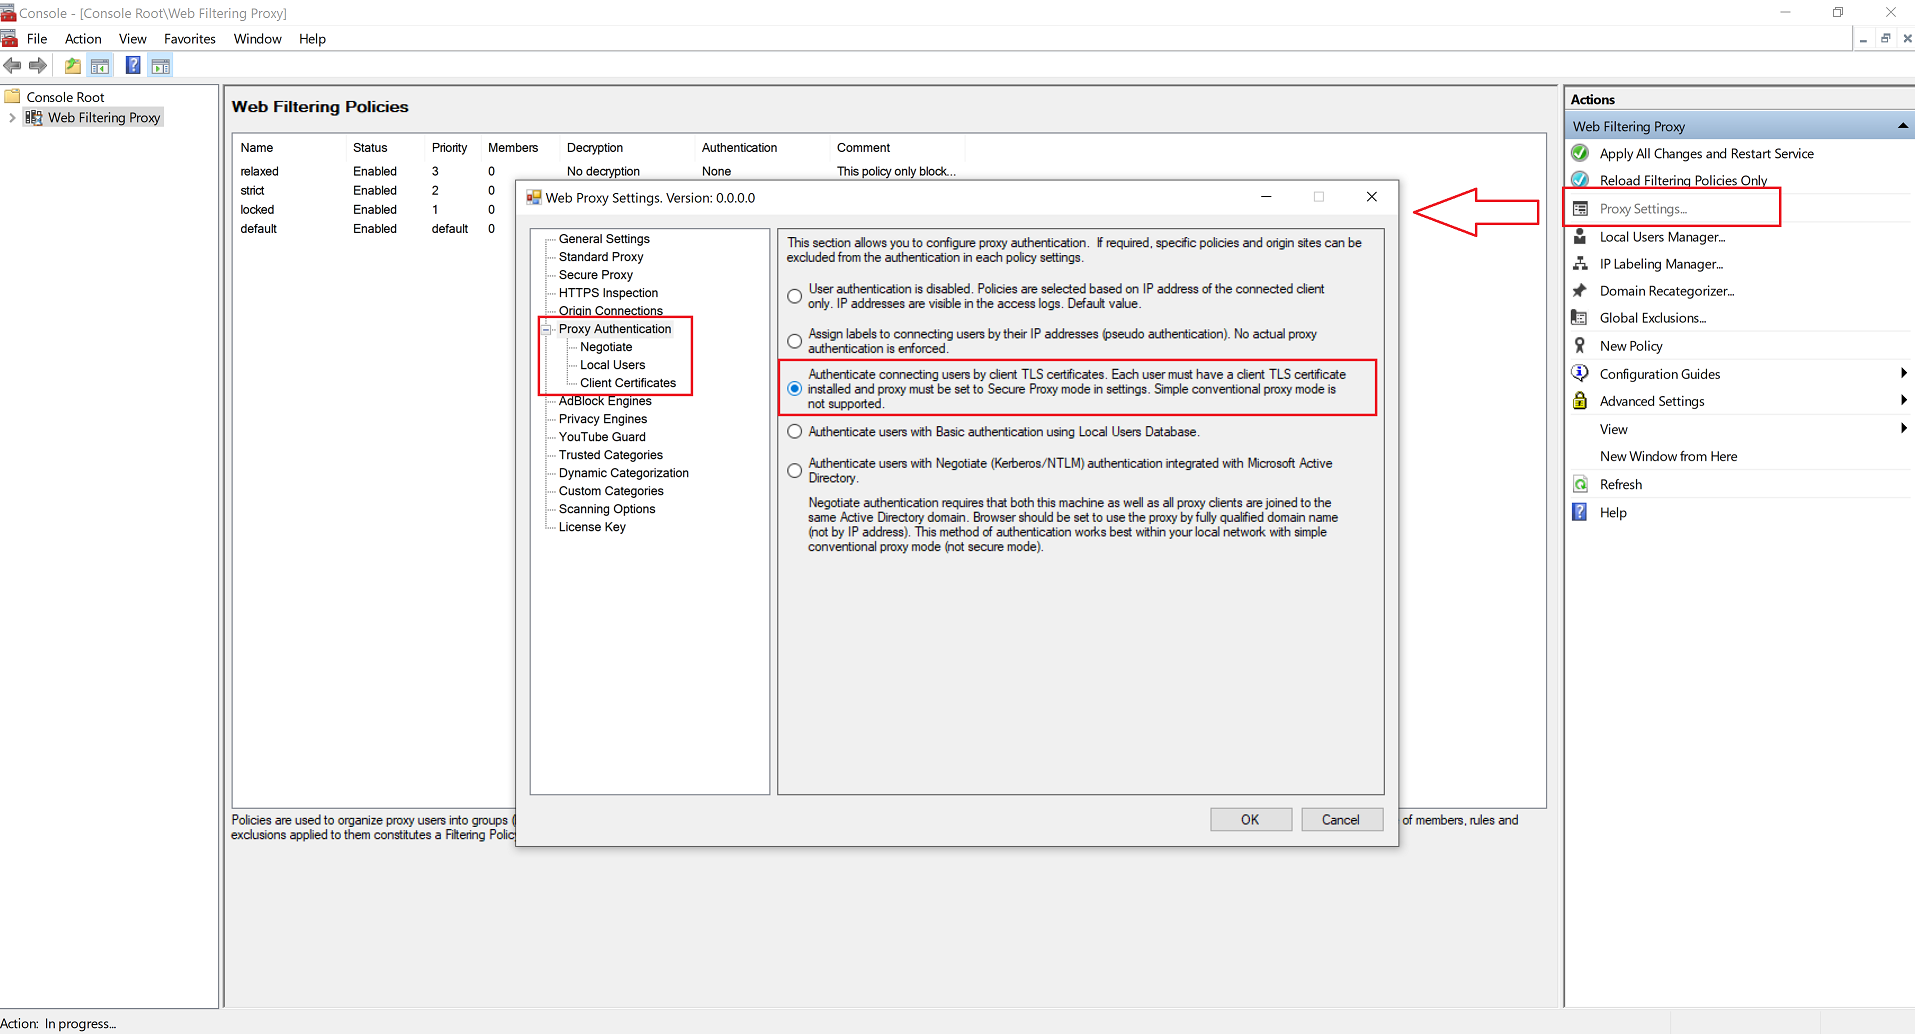
Secure Proxy Mode Required
Proxy authentication by client certificates is only possible when proxy is set to Secure Mode. This is because in Secure Mode clients connect to the proxy by using TLS/SSL and proxy then has the ability to request a client certificate. If your proxy is not set to Secure Mode the following warning will be shown in the Admin UI.

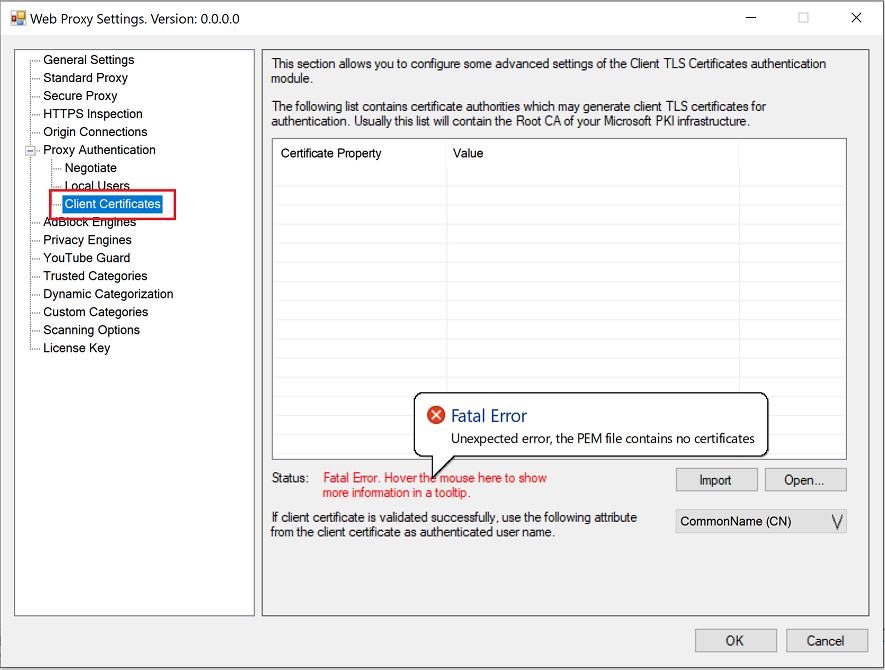
Certification Authority to Verify Client Certificates
After installation the application contains no certification authorities that could verify certificates of the connecting clients. This means that client certificate authentication will not work out of the box. You would need to configure the list of authorities in Admin UI / Proxy Settings / Proxy Authentication / Client Certificates node.
To configure this list, save the certificates of the trusted authorities into a PEM file (just cat multiple certificates together) and click the import button. For example, we can re-use the Root CA of the decryption certificate as trusted authority by importing it into the Admin UI.
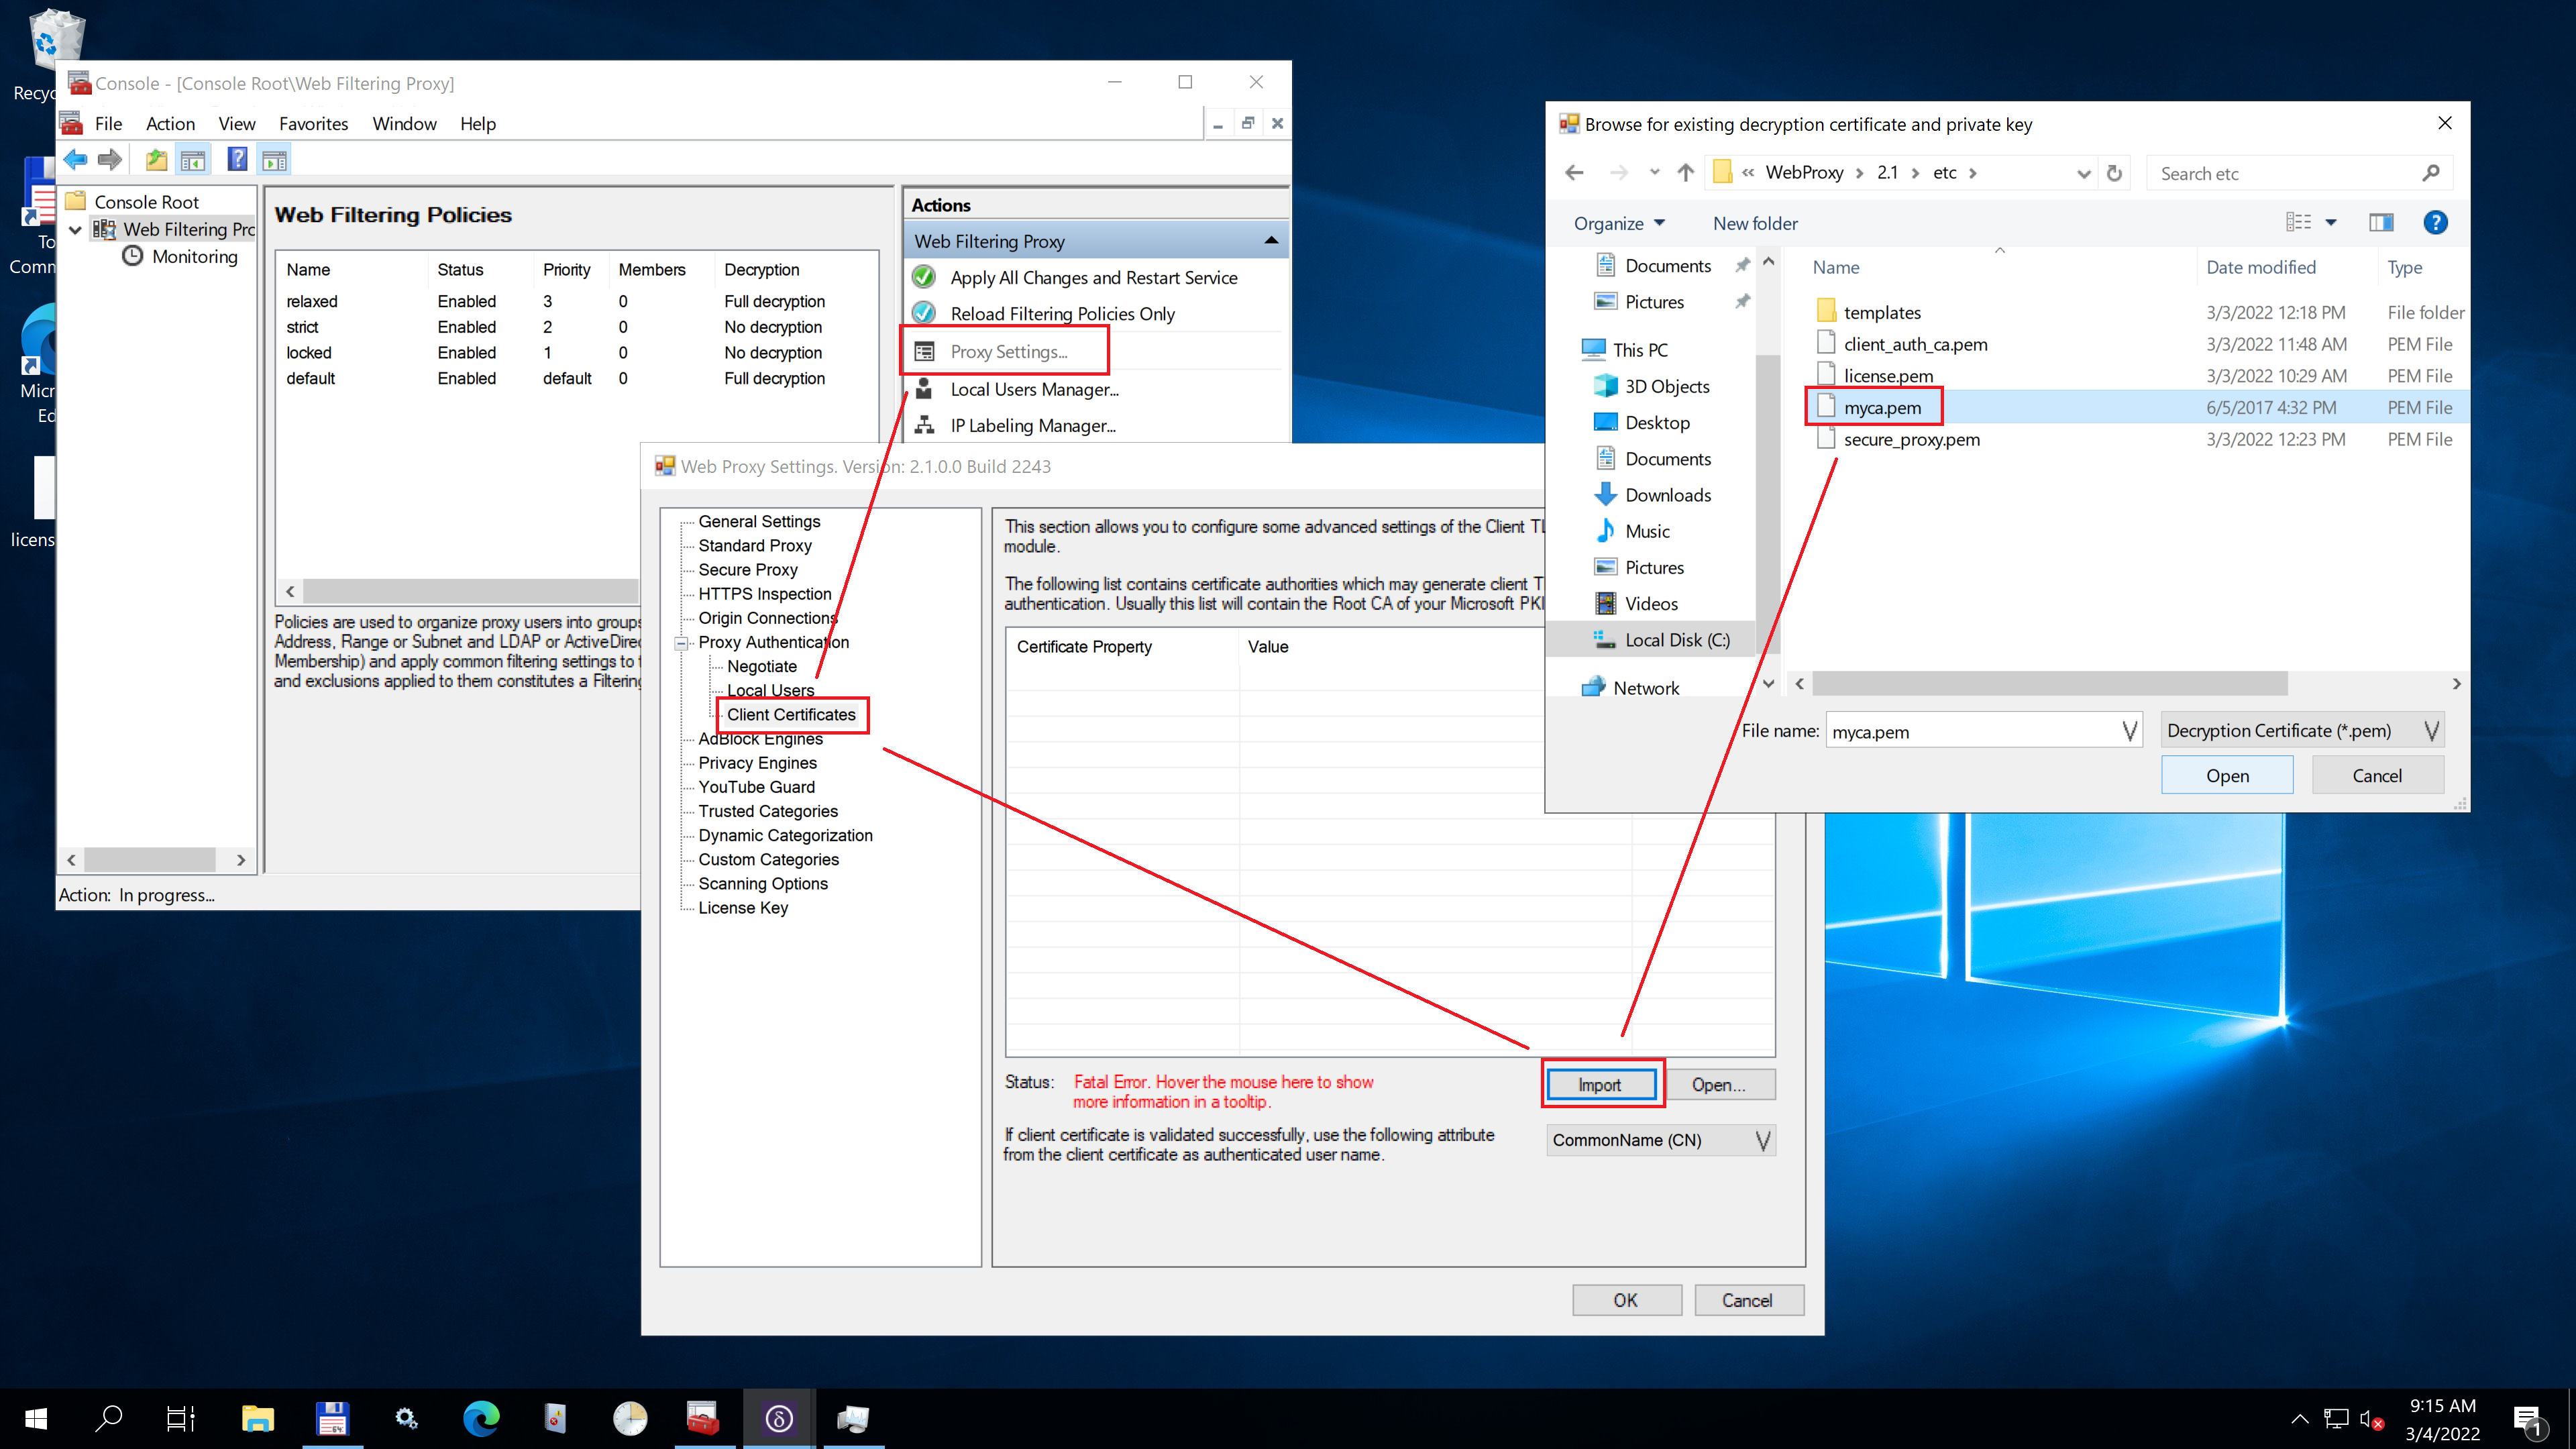
The contents of the imported PEM file will be stored in C:\ProgramData\Diladele\WebProxy\N.N\client_auth_ca.pem file.
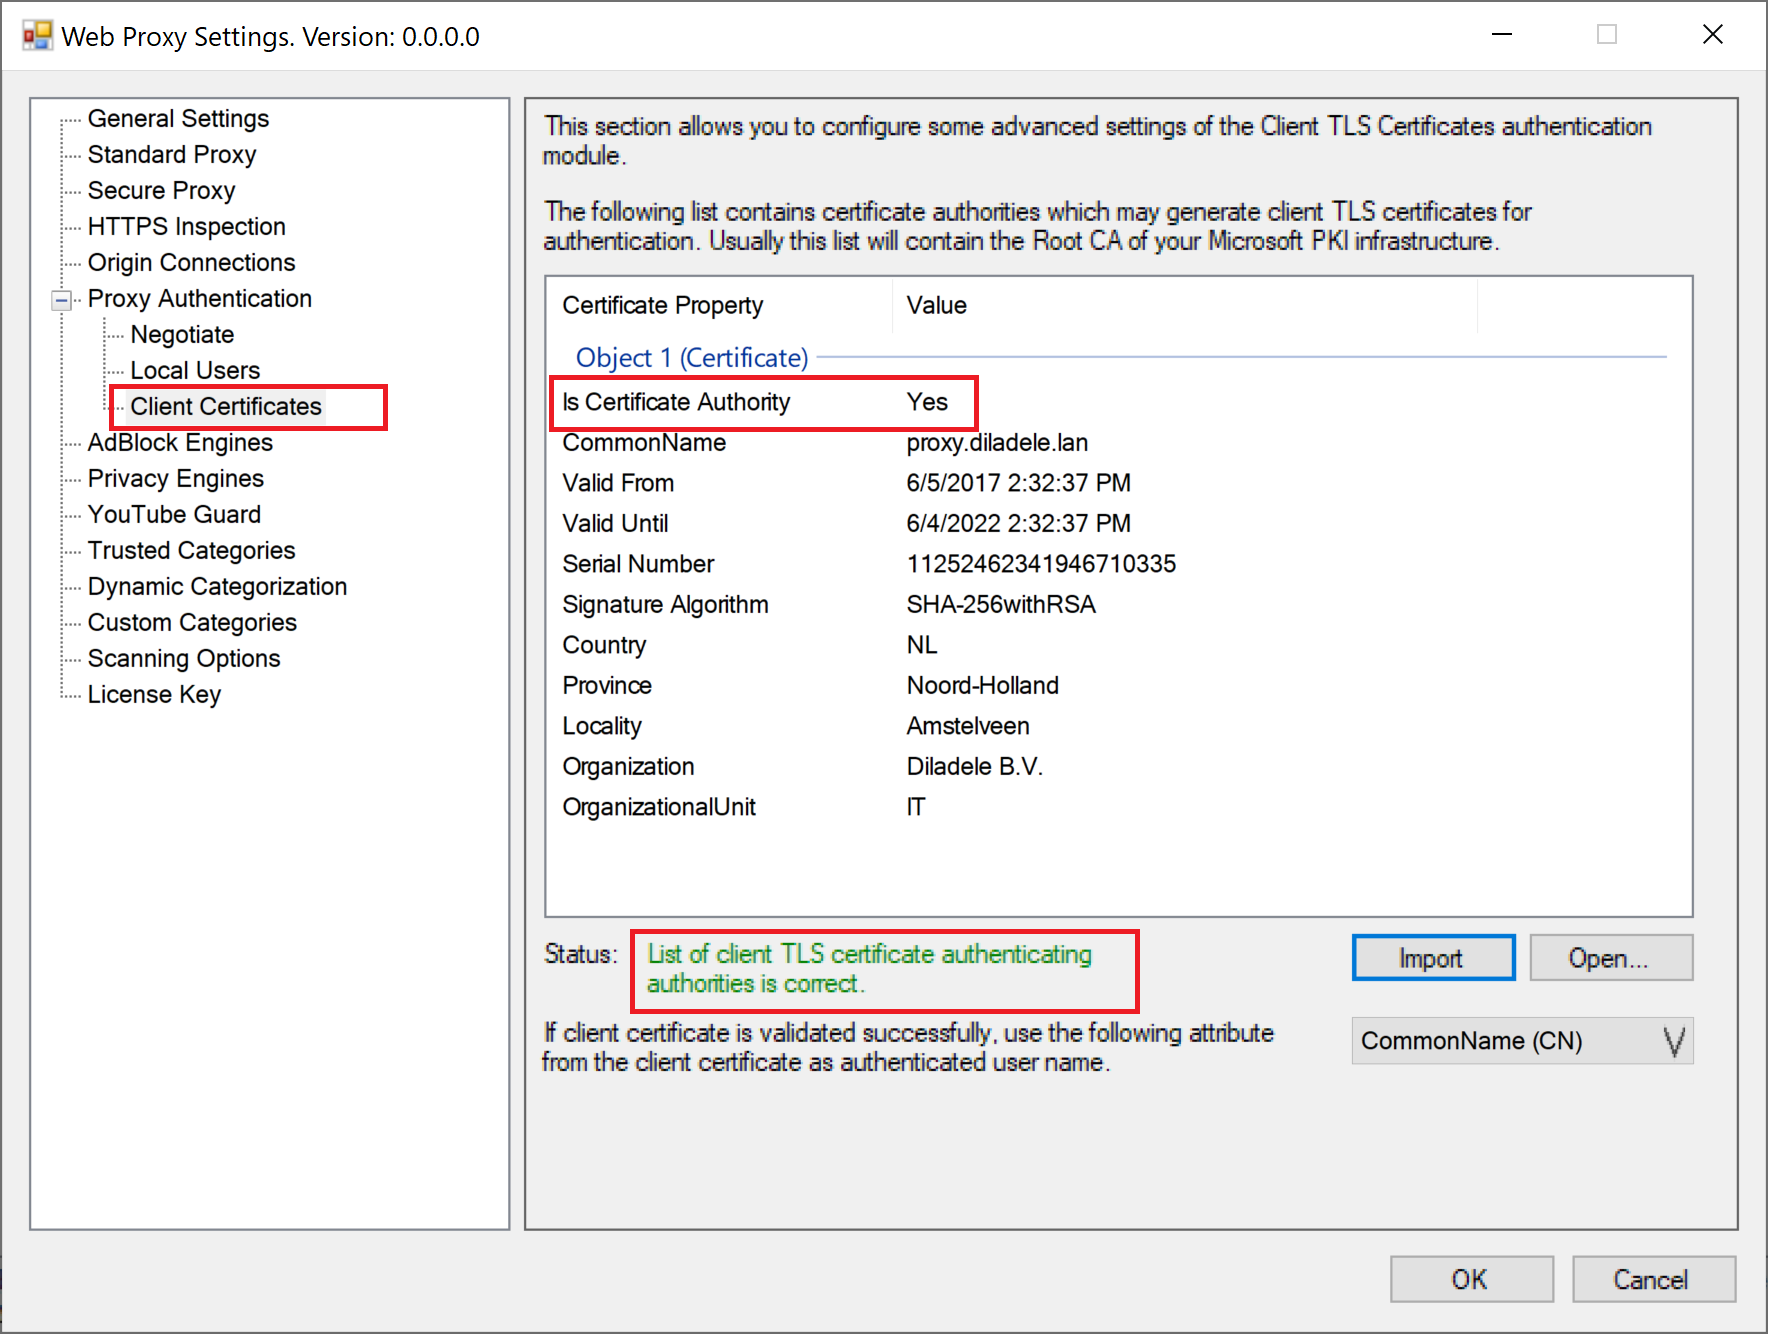
After import the list of authorities for validation client certificate will look like on the following screenshot. Be sure to check the PEM file indeed has at least one authority.
Generate and Install Certificates on Each Client
The next step is to generate and install the certificate for each client. How this is done is up to you. In this tutorial we show how to re-use the existing Root CA decryption authority for this. In real life the client certificate will most probably be generated by your Microsoft PKI infrastructure / Microsoft Intune or other certificate management solution.
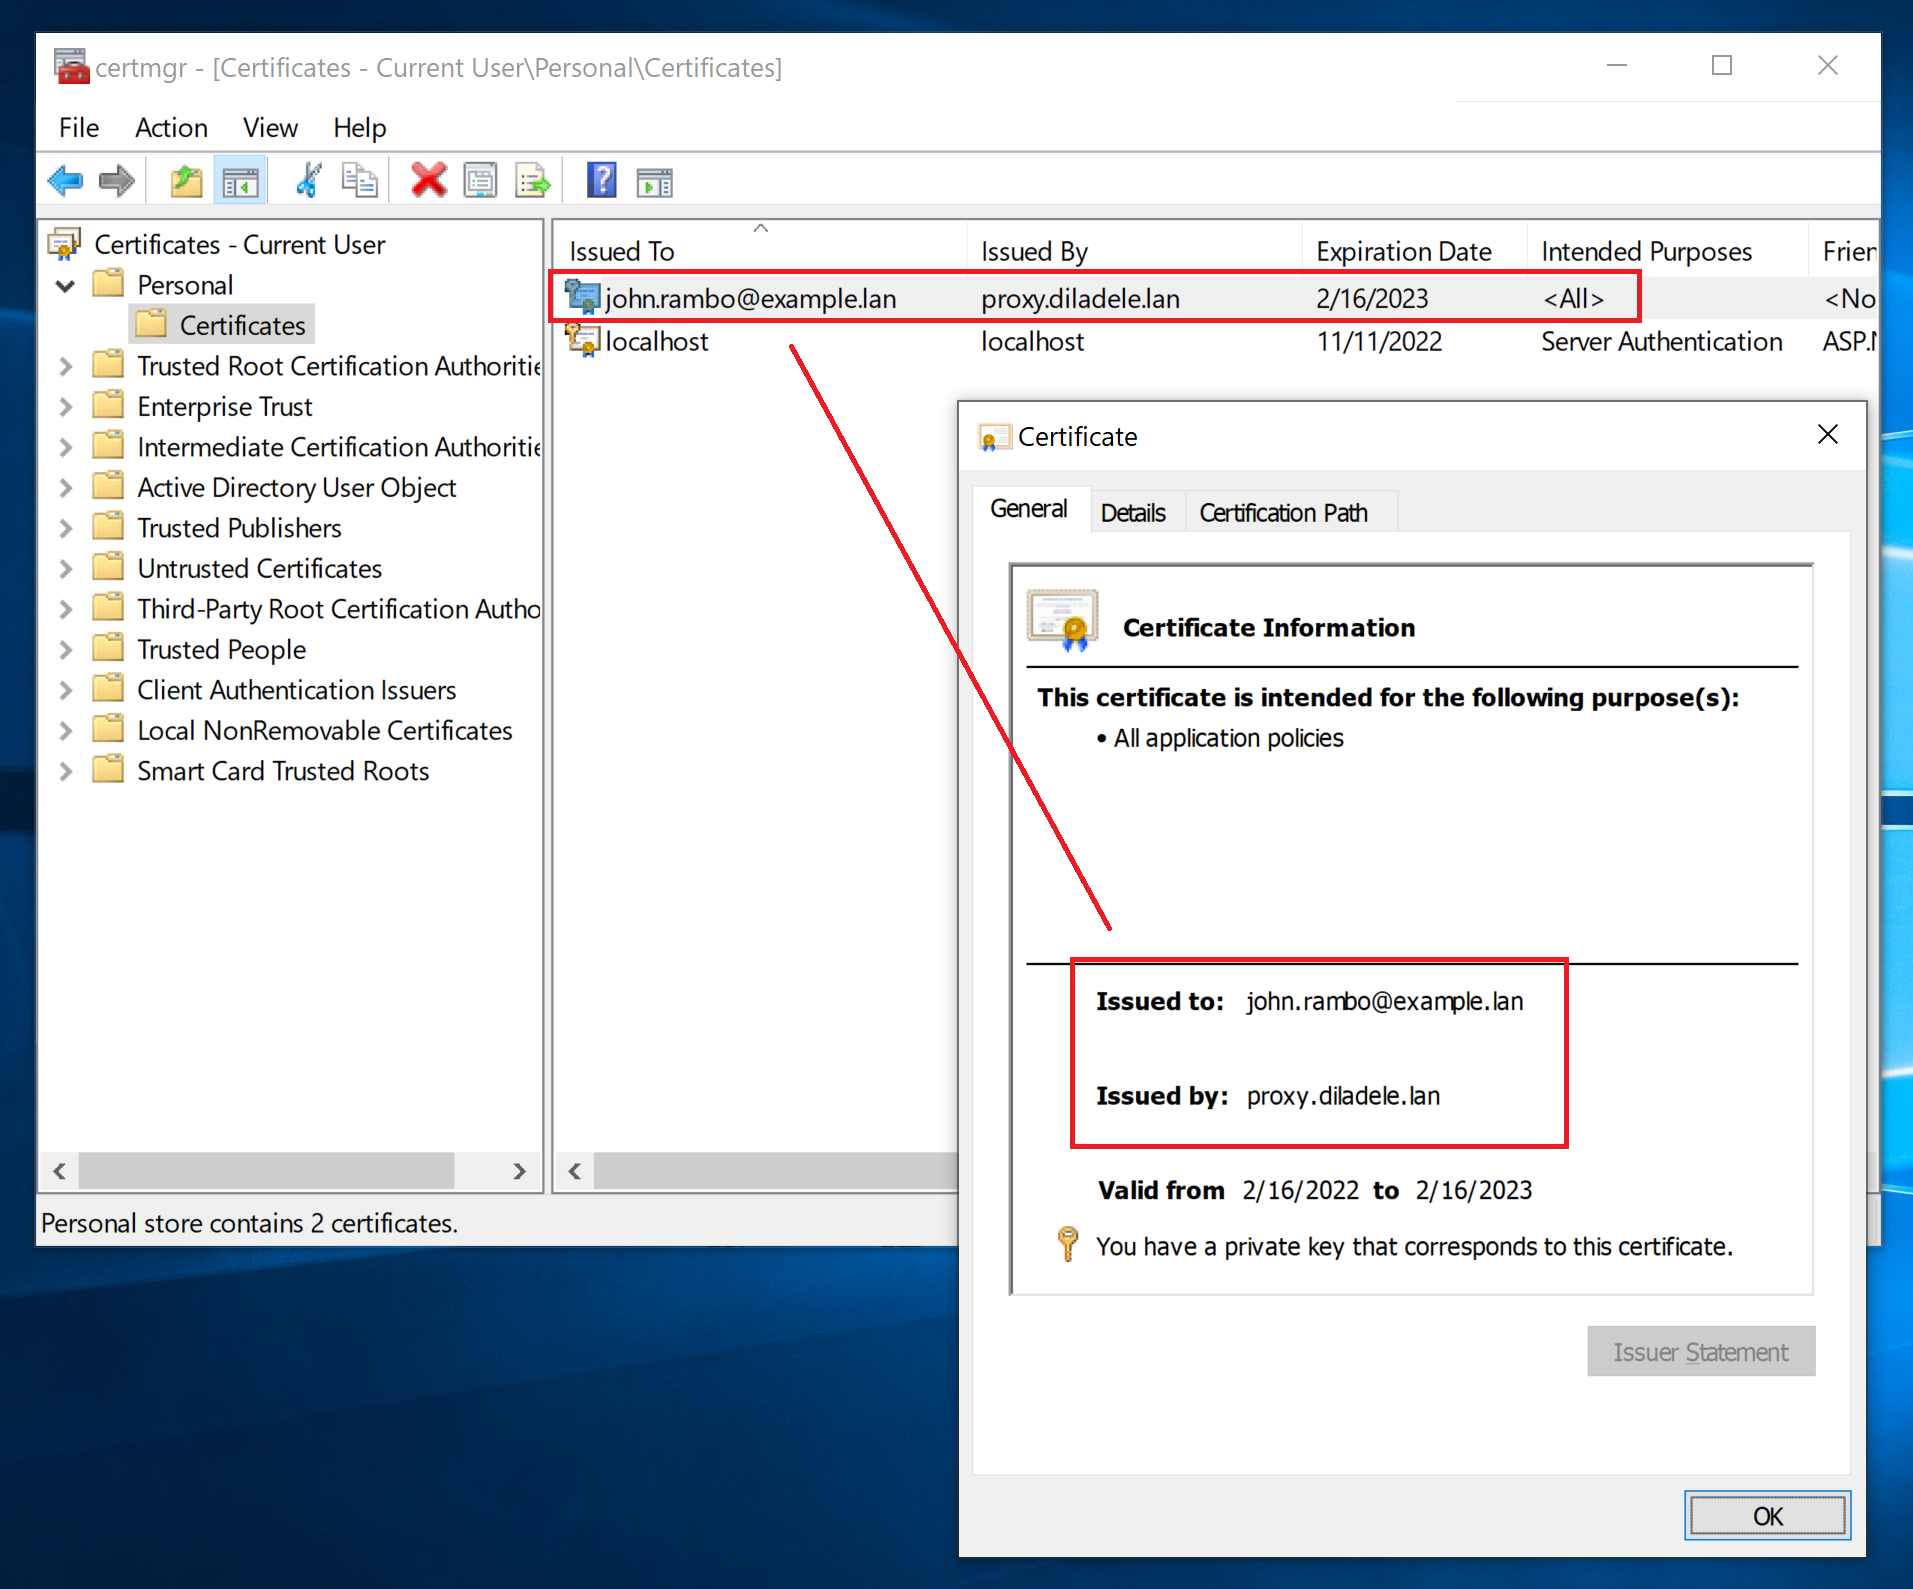
The client certificate needs to be installed into the Current User certificate store as shown on the following screenshot. Note installation instructions on Mozilla Firefox may be different than usual installation valid for Microsoft Edge/Chrome.
Presentation in Browser
When proxy requires the client to present his certificate - upon first connection to the proxy the browser will usually show the certificate selection dialog. Just click on the corresponding client certificate and proxy should use the properties of the certificate as authenticated user name.
Do not forget to Restart the Web Filtering Proxy service in order for the changes to be applied.