Install Root CA Certificate
After you have generated or imported the Root CA certificate and private key it is time to install it into Trusted Root Certification authority storage. There are several ways to do that.
Please note that here we assume that the browsers in your LAN are managed - thus you as administrator are legally allowed to inspect the HTTPS traffic. This is important because inspecting HTTPS traffic may require performing some legal steps in some countries so be sure you understand what you are doing before continuing.
Manual Installation
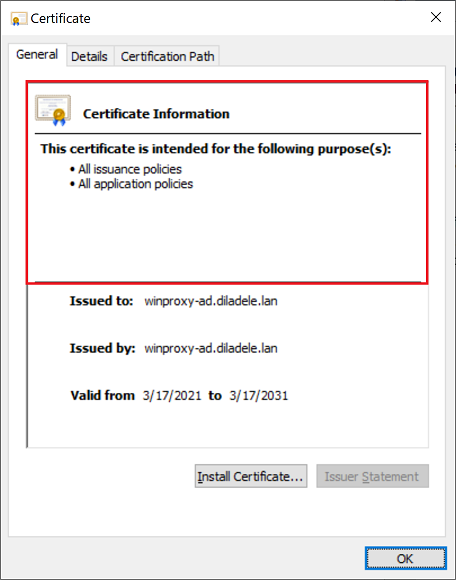
To manually install the newly generated Root CA certificate as trusted into certificate storage on Microsoft Windows, copy the C:\ProgramData\Diladele\WebProxy\N.N\etc\myca.der file into the machine where you need to install the Root CA, double click on it and follow the steps indicated on the following screenshots.

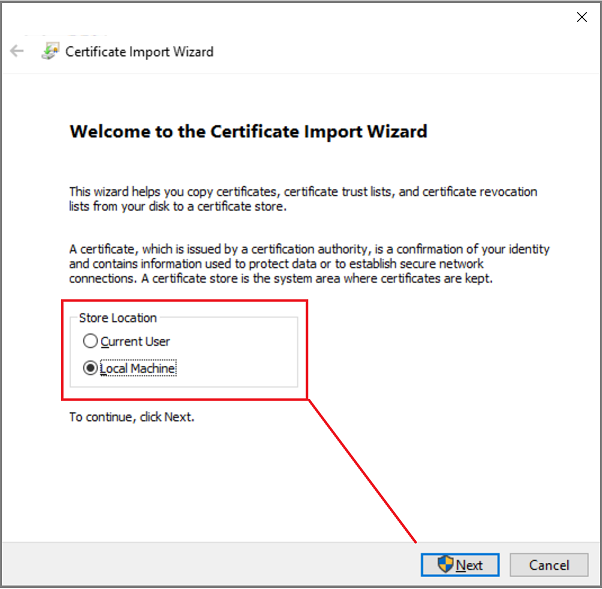
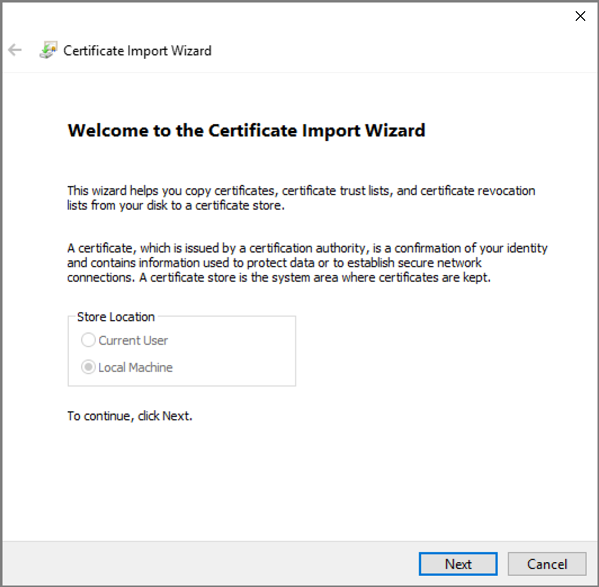
Note the certificate is not yet trusted and click on the Install Certificate button. A standard Certificate Import Wizard of Microsoft Windows will be started. Select the Local Machine storage and click Next.
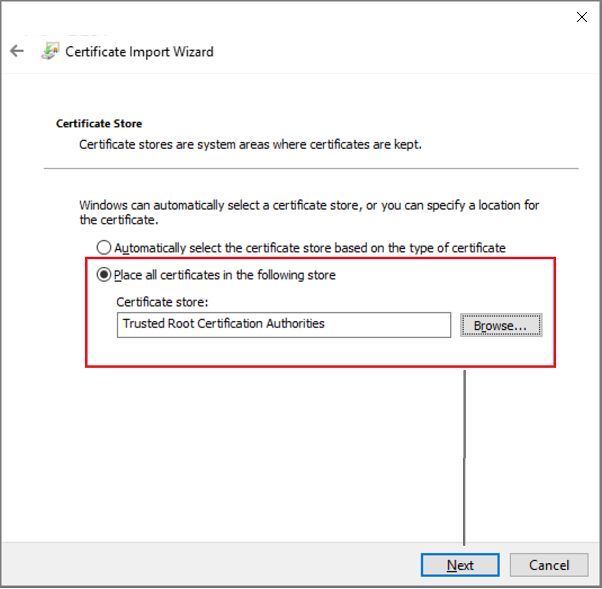
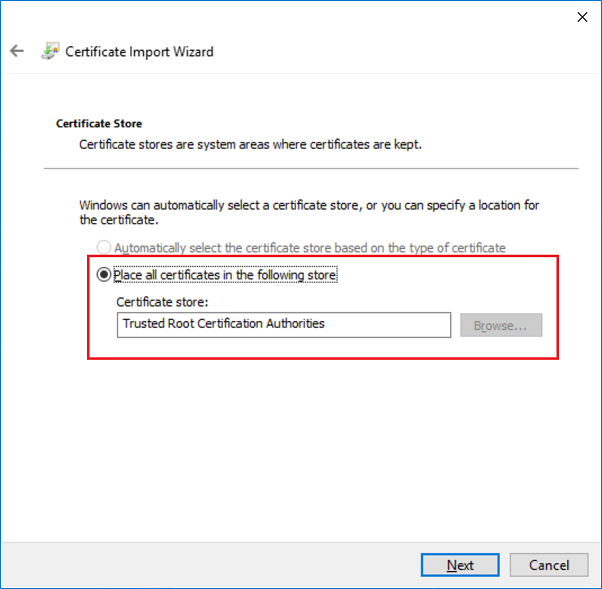
Place the certificate to be installed into Trusted Root Certification Authority store and click Next and then Finish.
There should be a message of the successful import and again clicking on the myca.der shall reflect its trusted status.
More information on the installation of the certificate and how to install it into Mozilla Firefox or other operating systems can be found in the Web Safety Admin Guide.
Automatic Installation using Group Policy
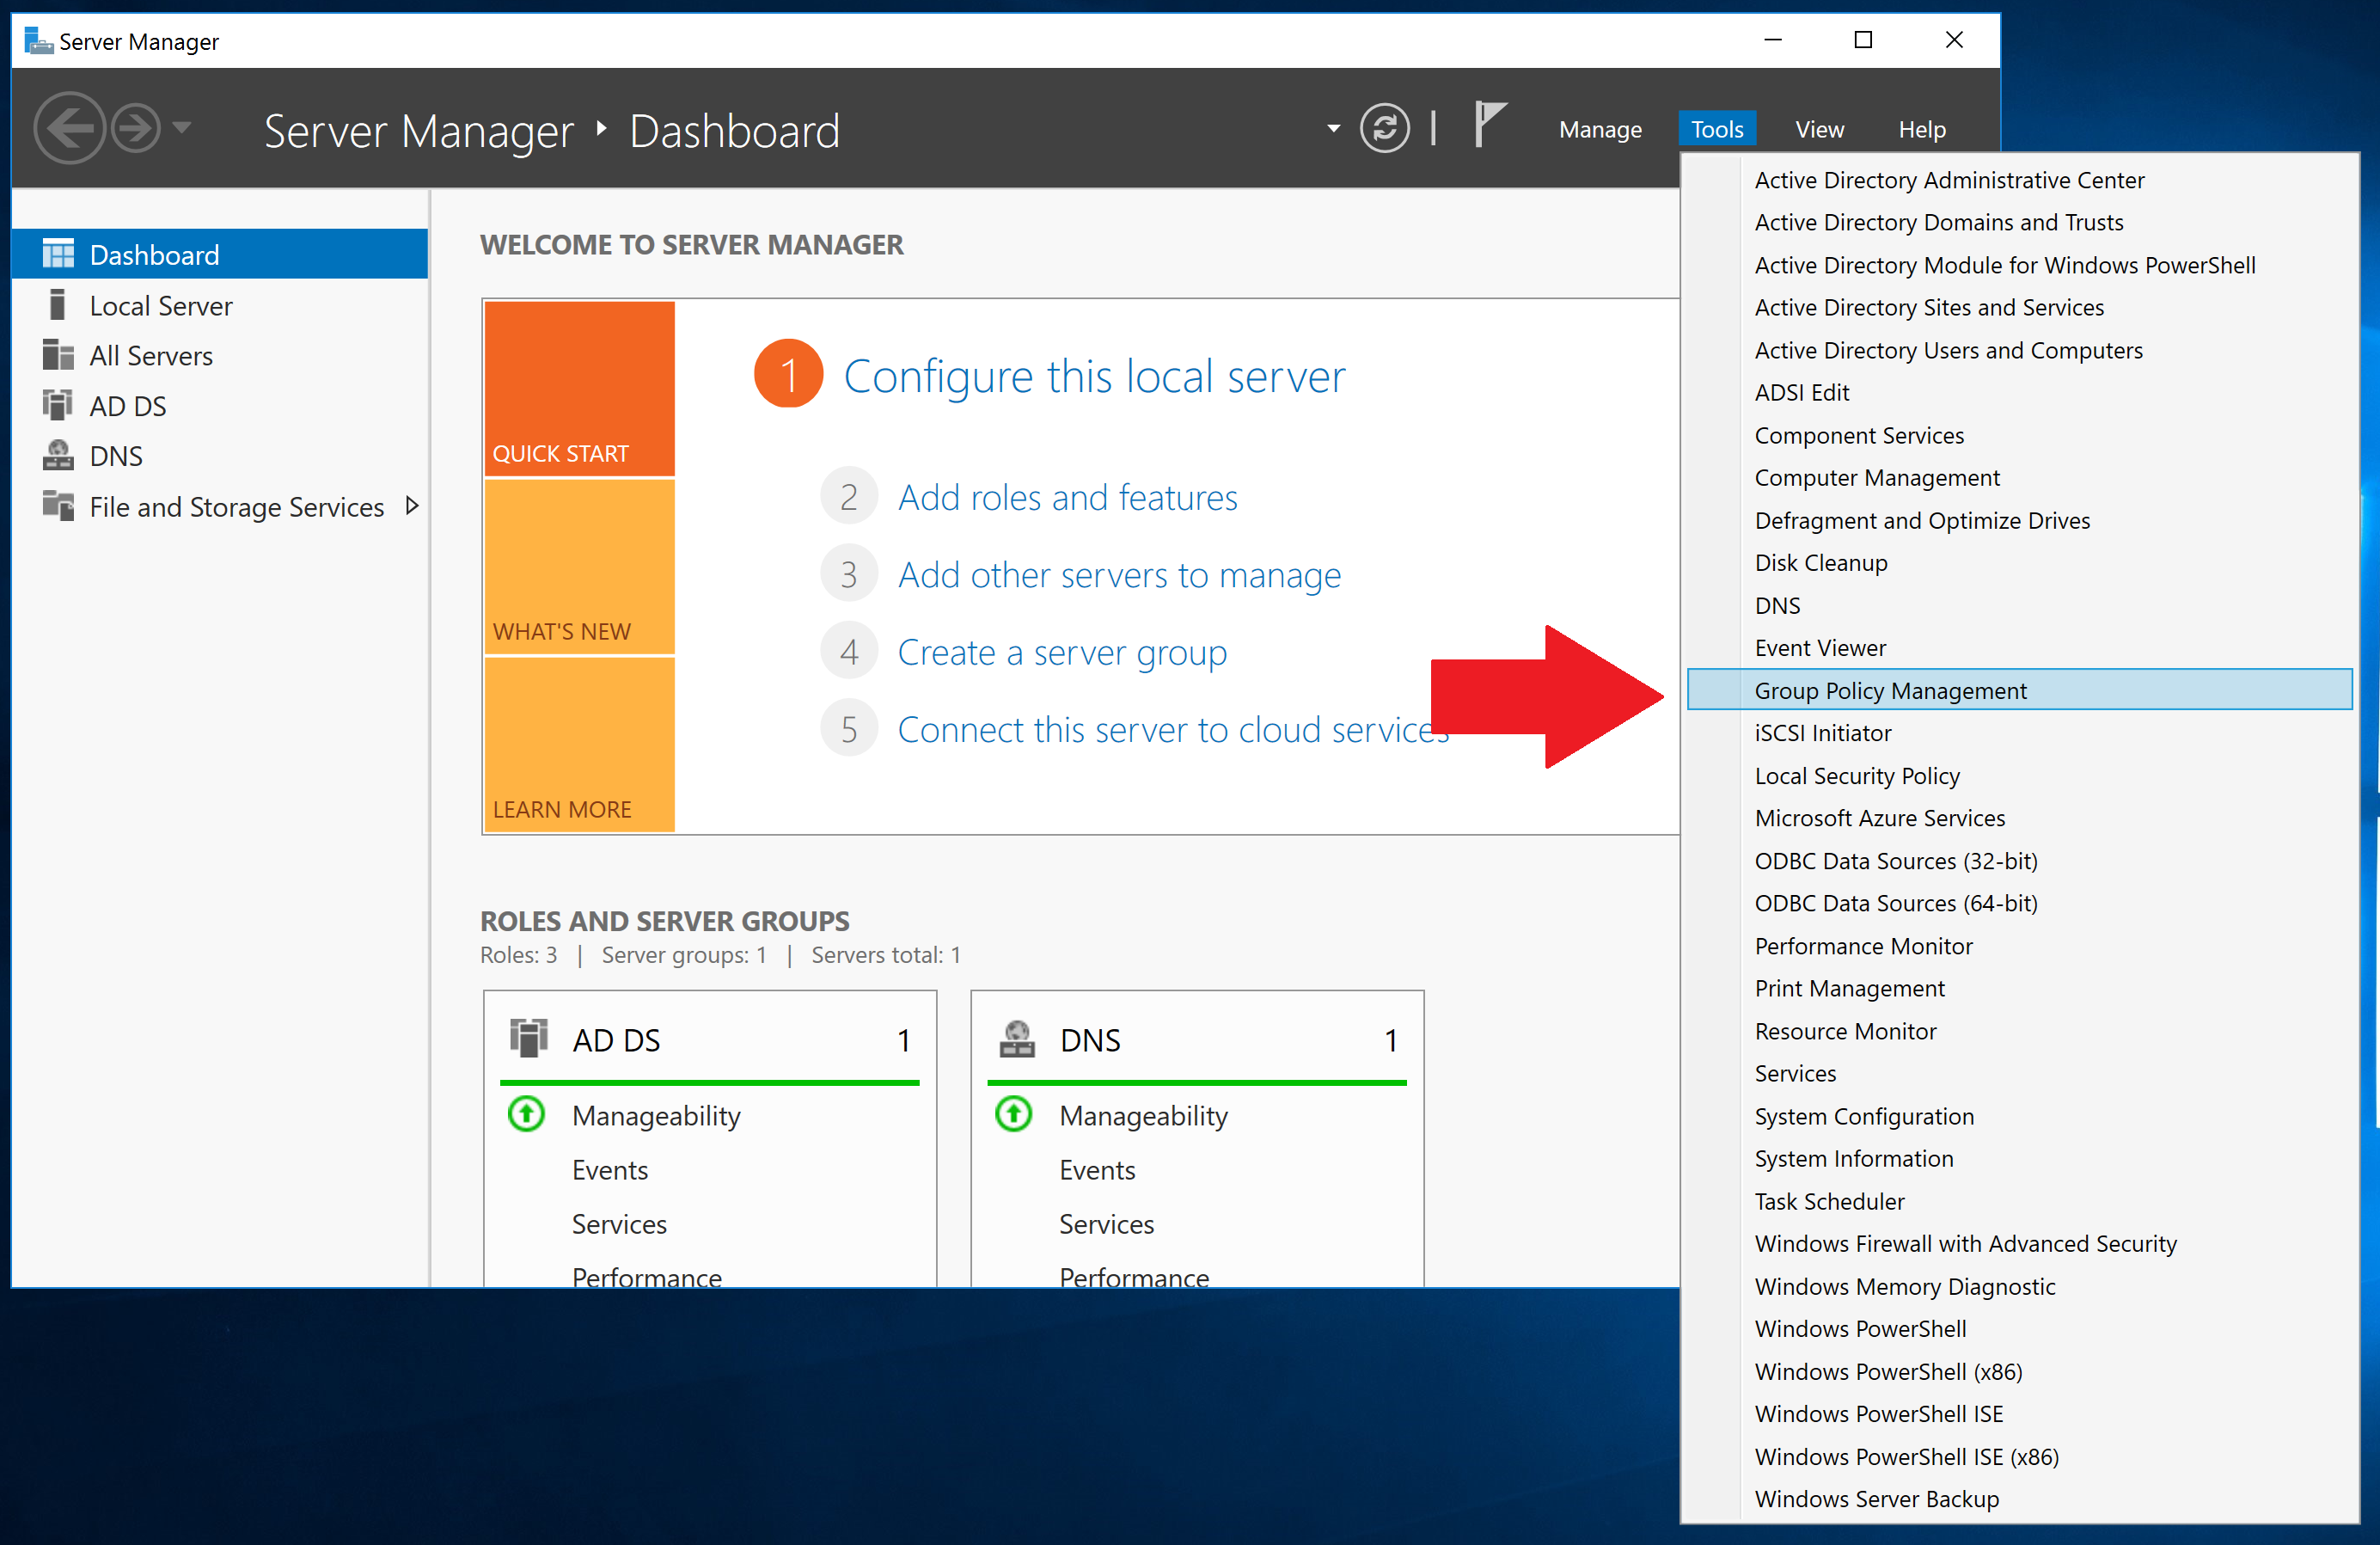
To automatically install the newly generated Root CA certificate as trusted into certificate storage of Microsoft Windows using Group Policy, copy the C:\ProgramData\Diladele\WebProxy\N.N\etc\myca.der file into your Domain Controller and start the Group Policy Management addin.
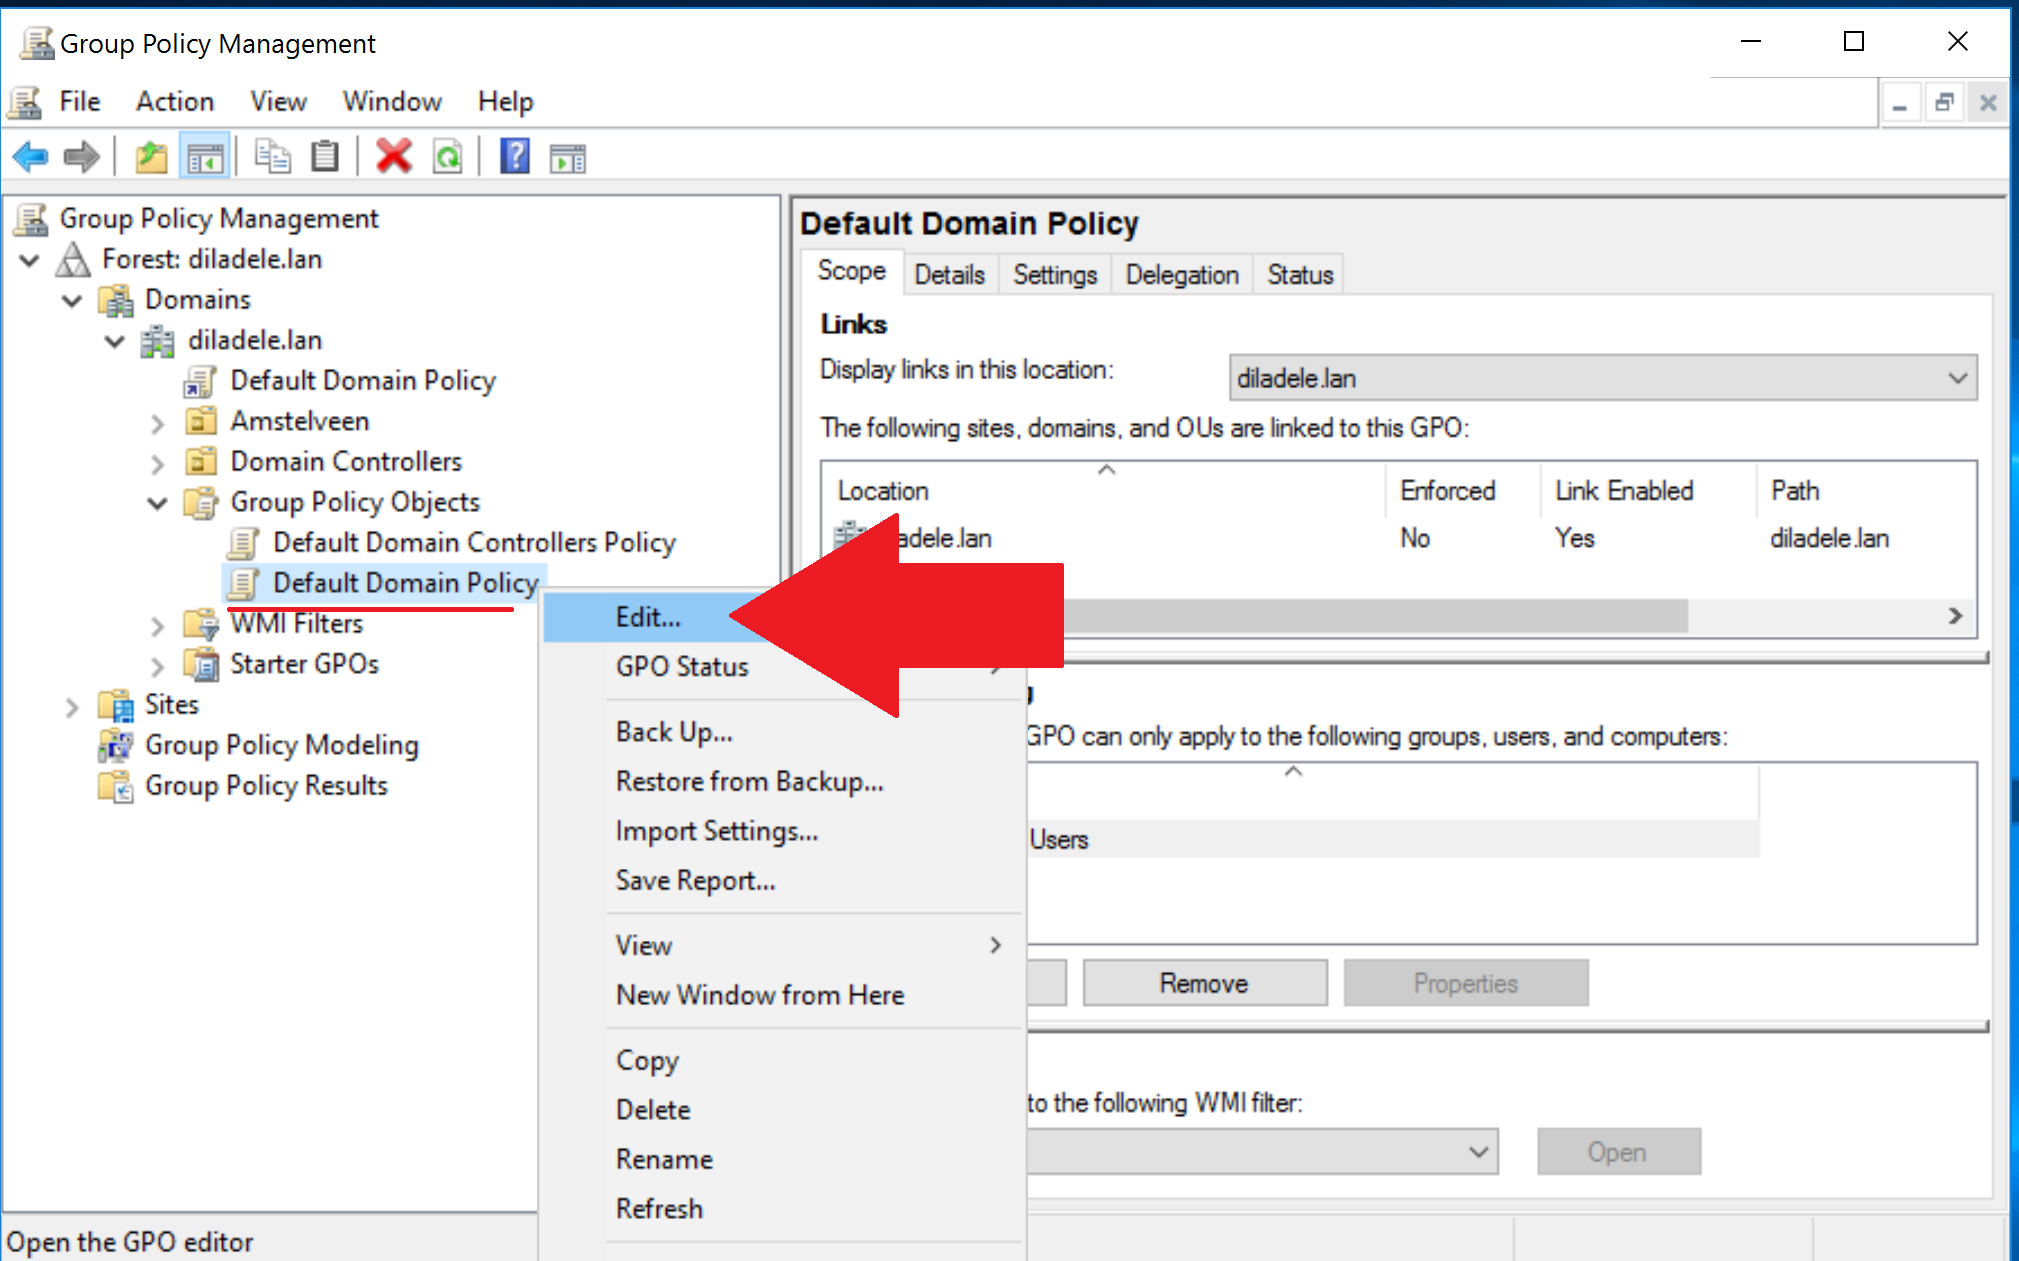
In Group Policy Management, expand Forest / Domains / Your domain / Group Policy Objects / Default Domain Policy. Right click on it and choose Edit as shown on the following screenshot.
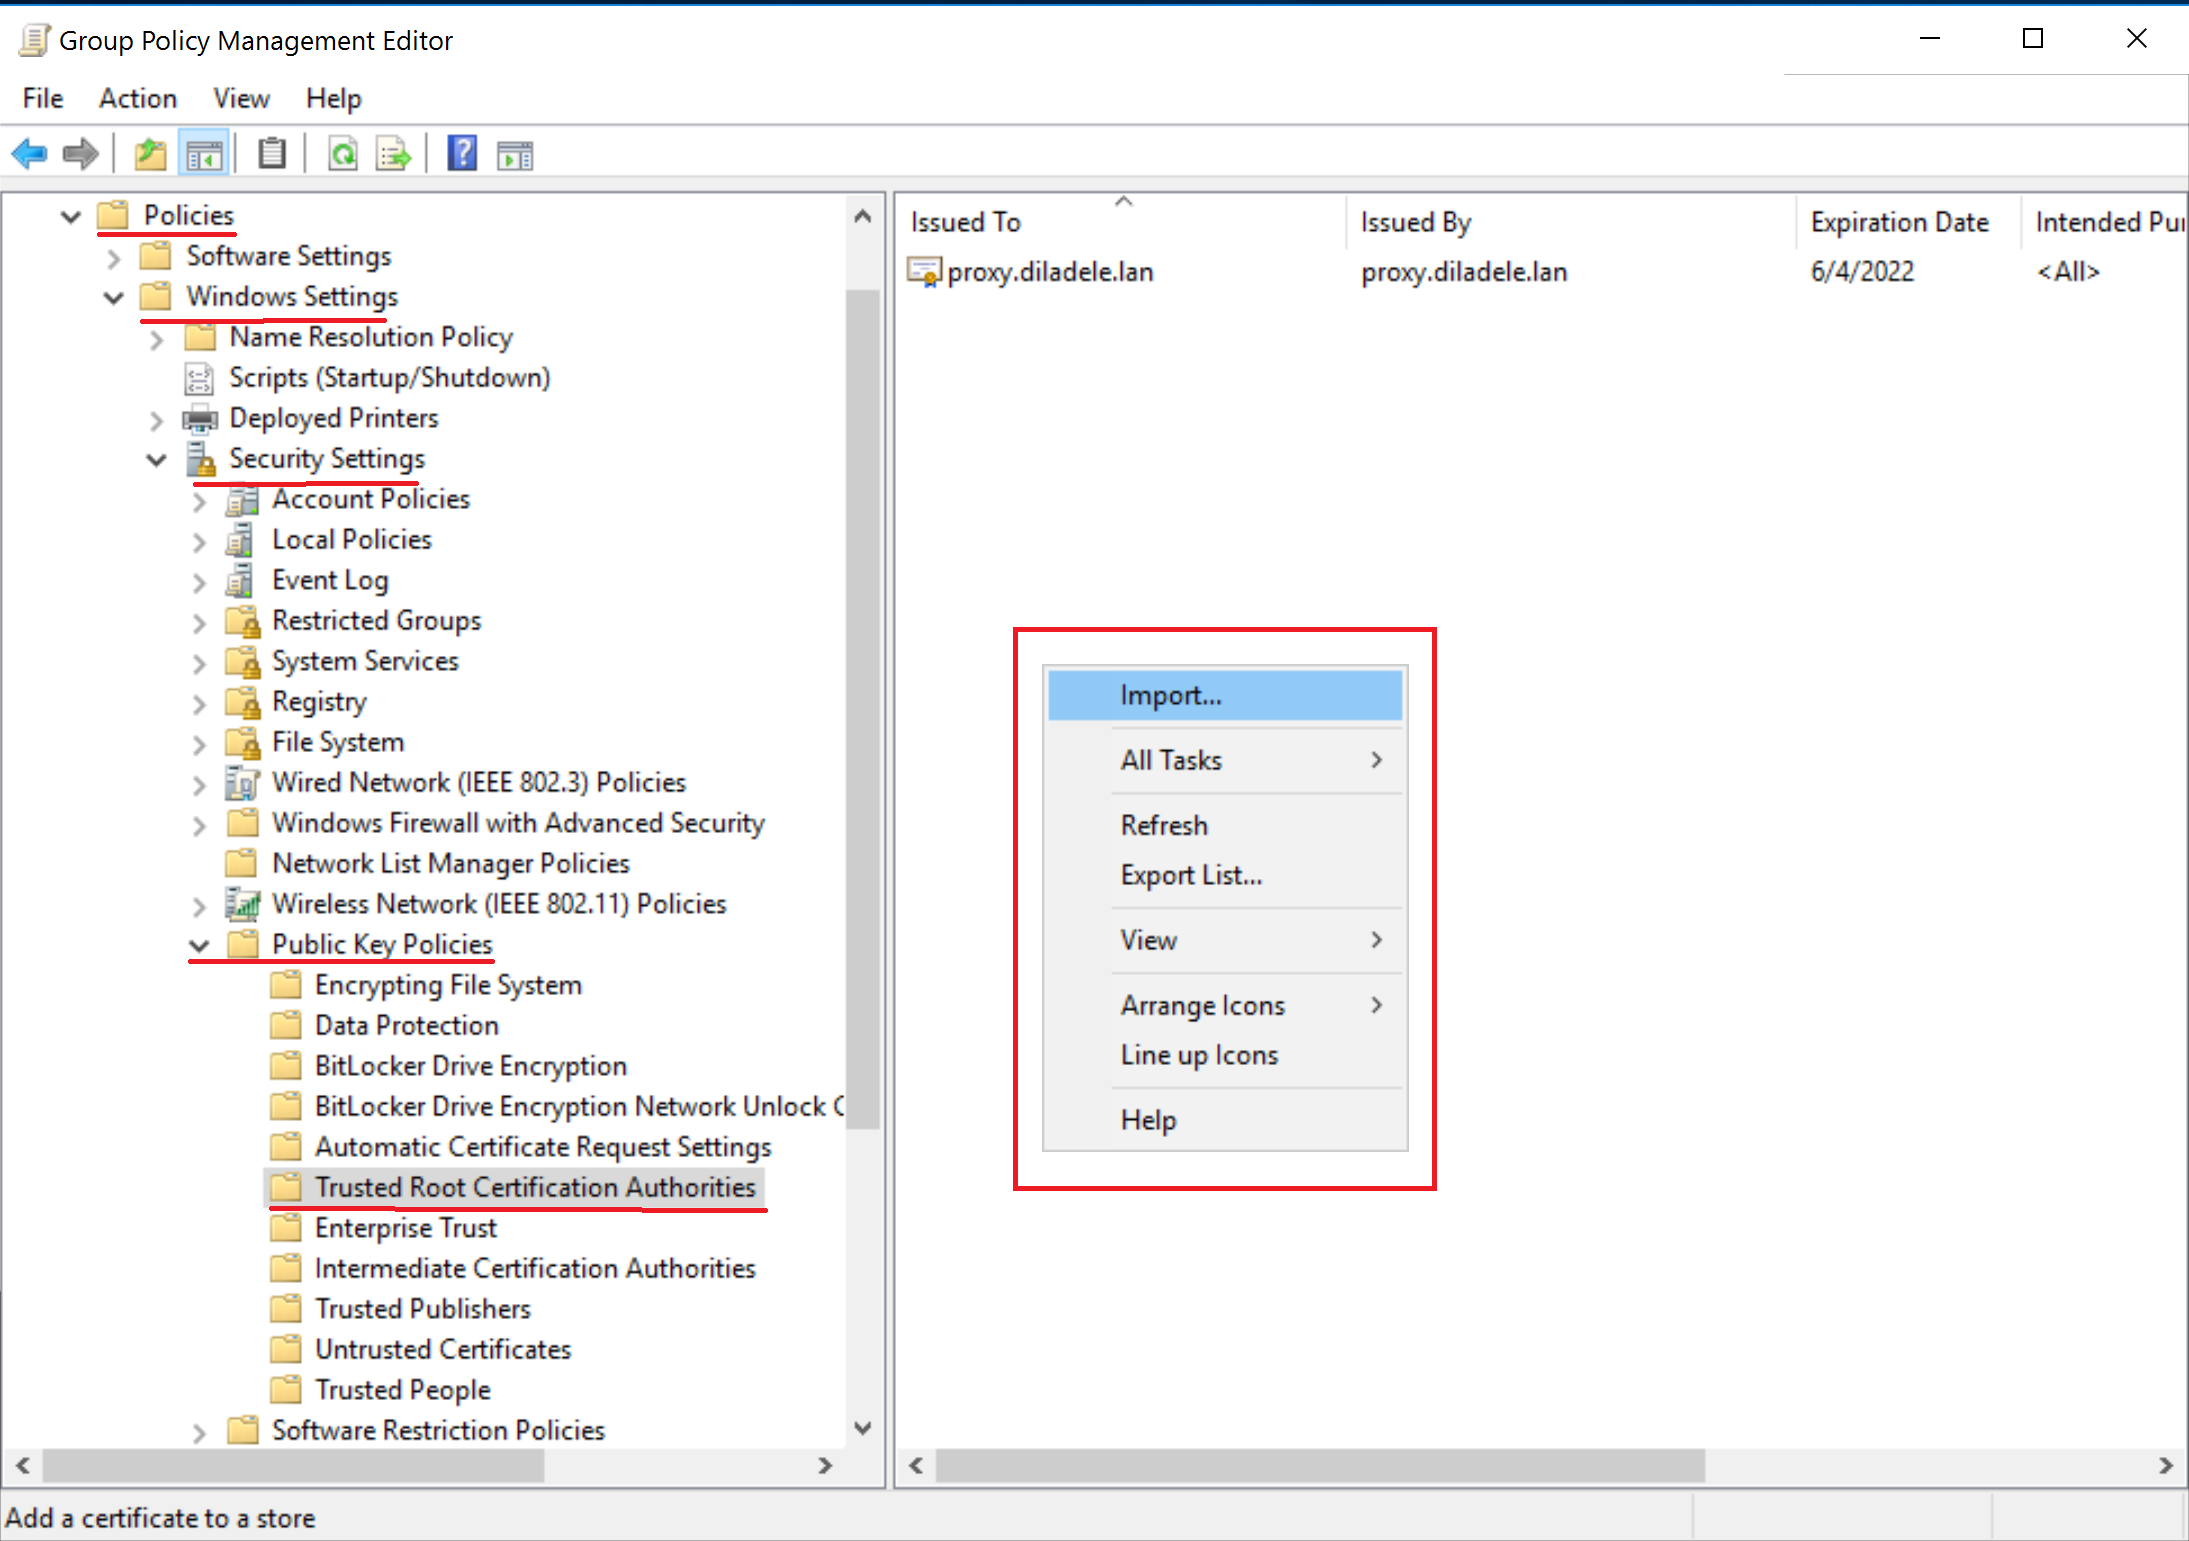
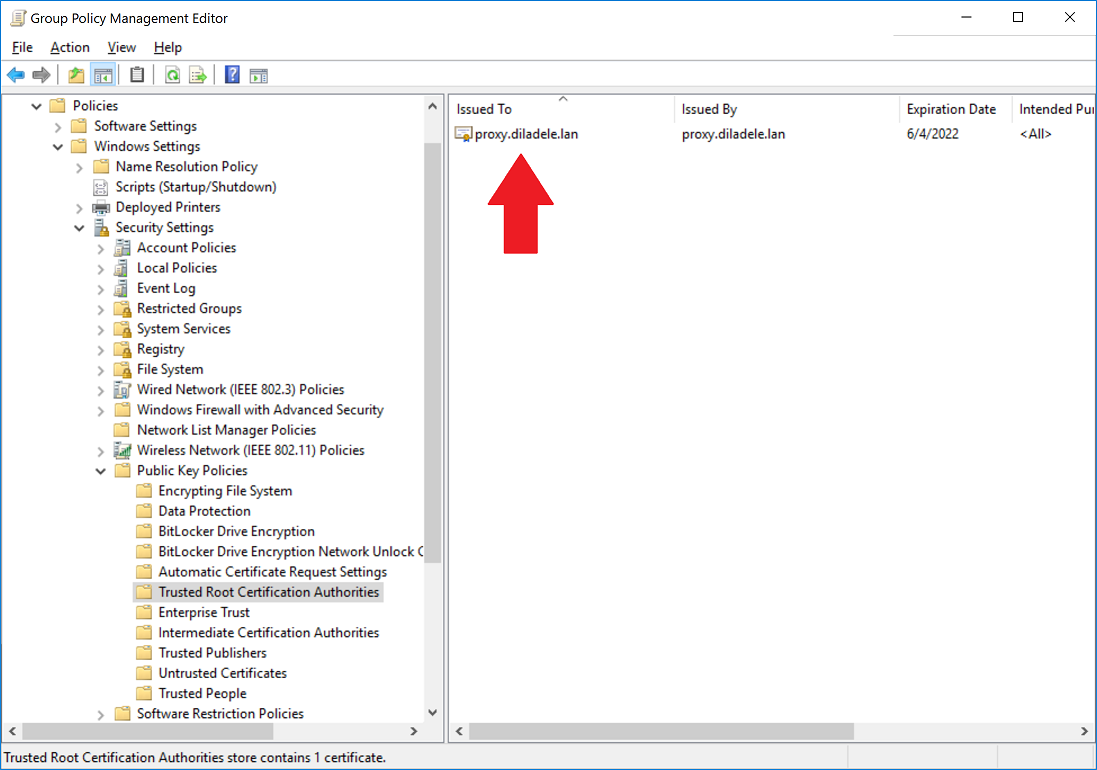
In Group Policy Management editor addin, select Policies / Window Settings / Security Settings / Public Key Policies / Trusted Root Certification Authorities, right click on the right pane and select Import as shown on the following screenshot.
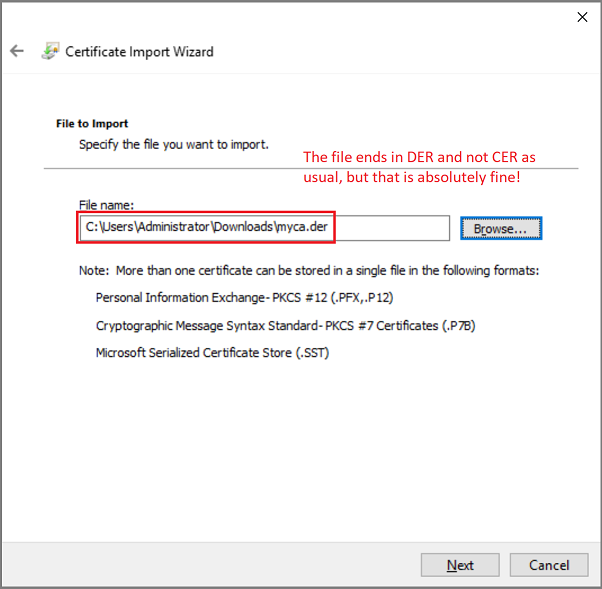
A certificate import wizard appears. Click it through, selecting the certificate you downloaded previously and ensuring the certificate goes to Trusted Root Certification Authorities store.
Note: the myca.der certificate has a DER file extension and not CER as usual, but that is absolutely fine and does not matter for the system, just do not forget to select Show All Files in file browsing dialog when uploading.
The certificate will be added to Trusted Root Certification Authorities store automatically.
After certificate import wizard finishes you will see your certificate in the list.
The domain policy shall be applied to your domain-joined computers after reboot (logoff/logon). To ensure it is indeed applied you might need to run gpupdate /force command on every desktop.
No Installation Required in Active Directory
If you have generated Trusted Root CA as intermediate authority and signed it using Microsoft Active Directory Certification services, no installation at all is needed on the client computers. The client computers already trust the Root CA of your Active Directory, so they will automatically trust the certificates signed by your Intermediate CA imported into Web Filtering Proxy. This is the most convenient method for large network deployments.
This article at Web Safety admin guide describes the intermediate certificate generation in this case.